
Presentation of PowerApps
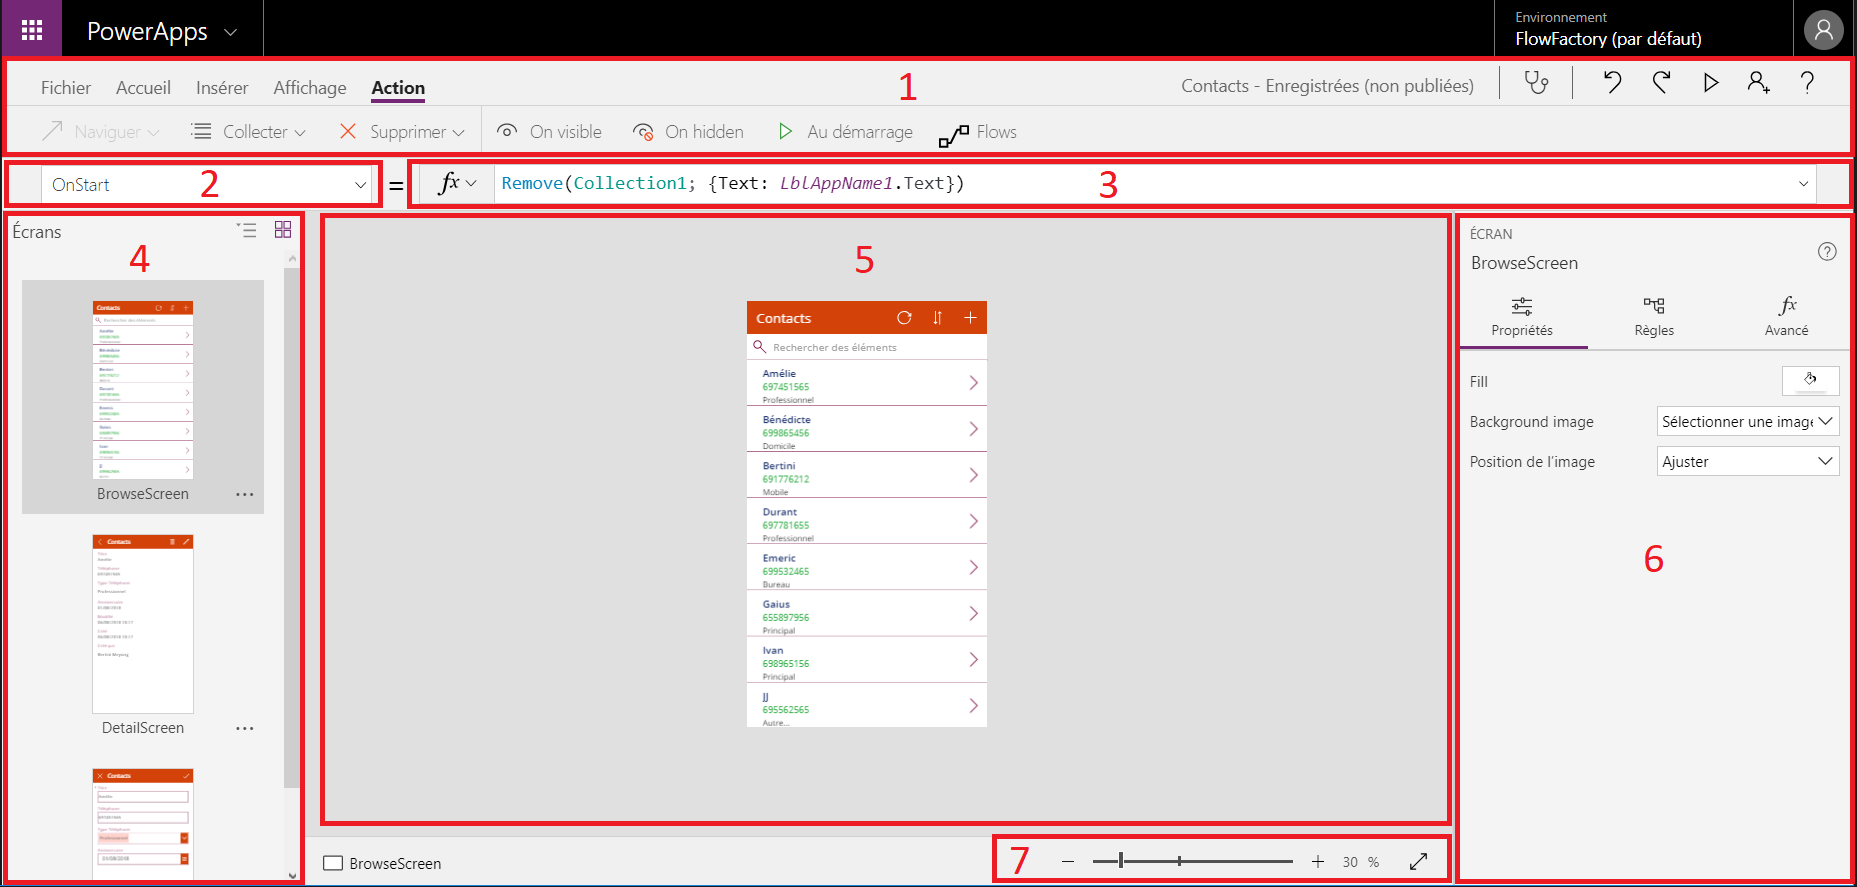
We can subdivide A window of work PowerApps in seven blocks:
- Block 1 is the ribbon, it brings together the tool menus and standard menus. Thanks to this block, one can, among other things, create variables, format our display texts, align our controls, look at the preview of the application and even share it.
- Block 2 is a list of the advanced properties of the selected item.
- This value is a bit of the form of an Excel formula.
- Block 4 presents all the screens of the application (as a PowerPoint presentation would do).
- Block 5 is the work area. It displays the screen in edit mode.
- The properties of the selected item (screen, form, control) are displayed in the “Properties” tab. In the “Rules” tab, you can add rules and in the “Advanced” tab, you access the properties and advanced options.
- The last block allows it to adjust the display (zoom in, zoom out) of Block 5.
The purpose of the article is not an in-depth presentation of PowerApps.
Managing user rights in a PowerApps application
Description of the process
Our application will have two screens (Welcome and Home):
- Welcome : This page will allow us to retrieve the information about the logged-on user and then make a request to our data source to send us a result. Next, this result will be stored in a global variable “Result”.
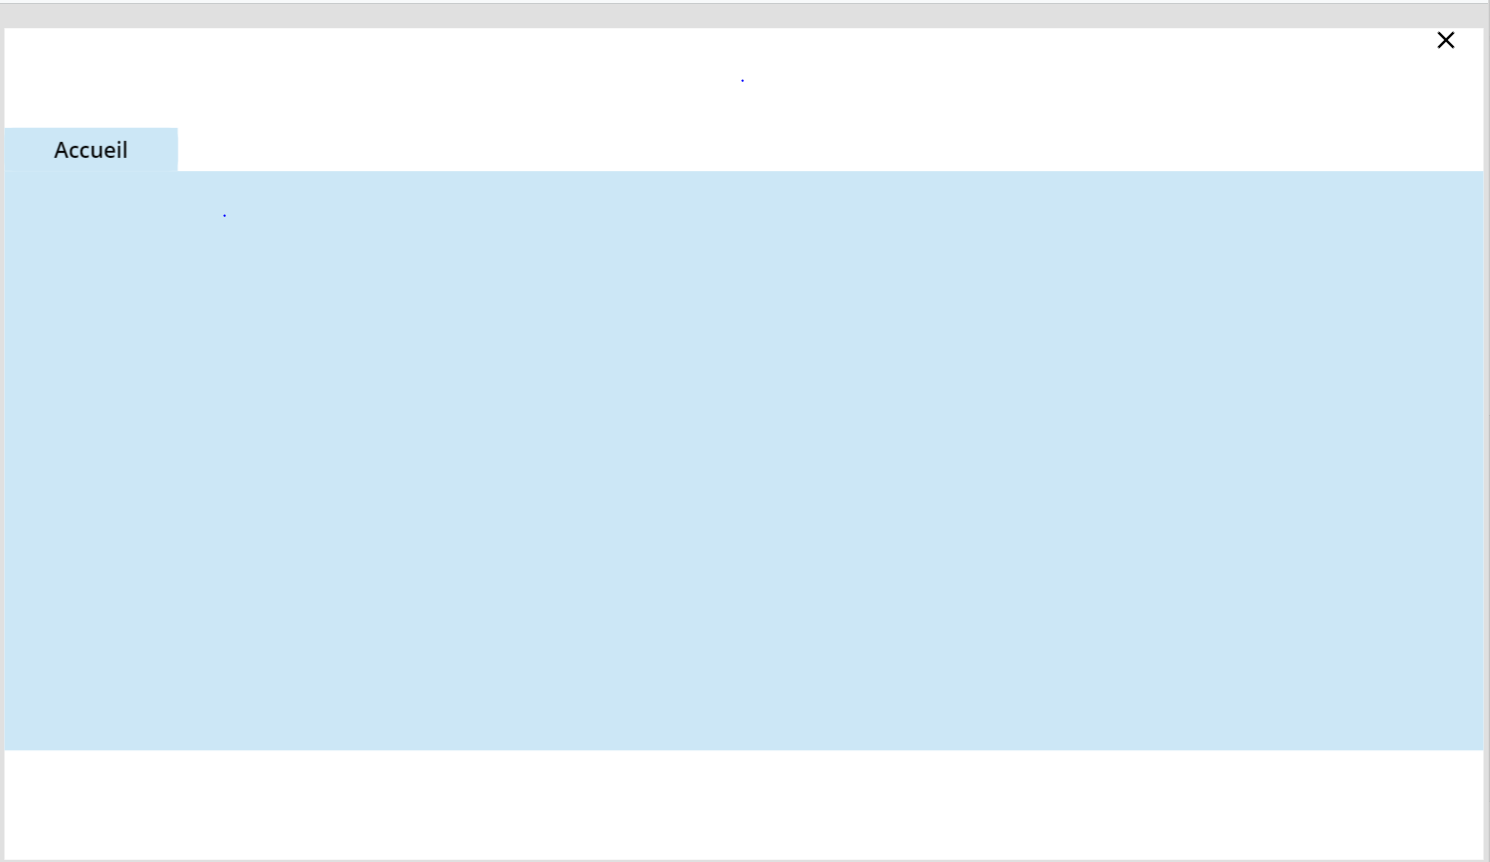
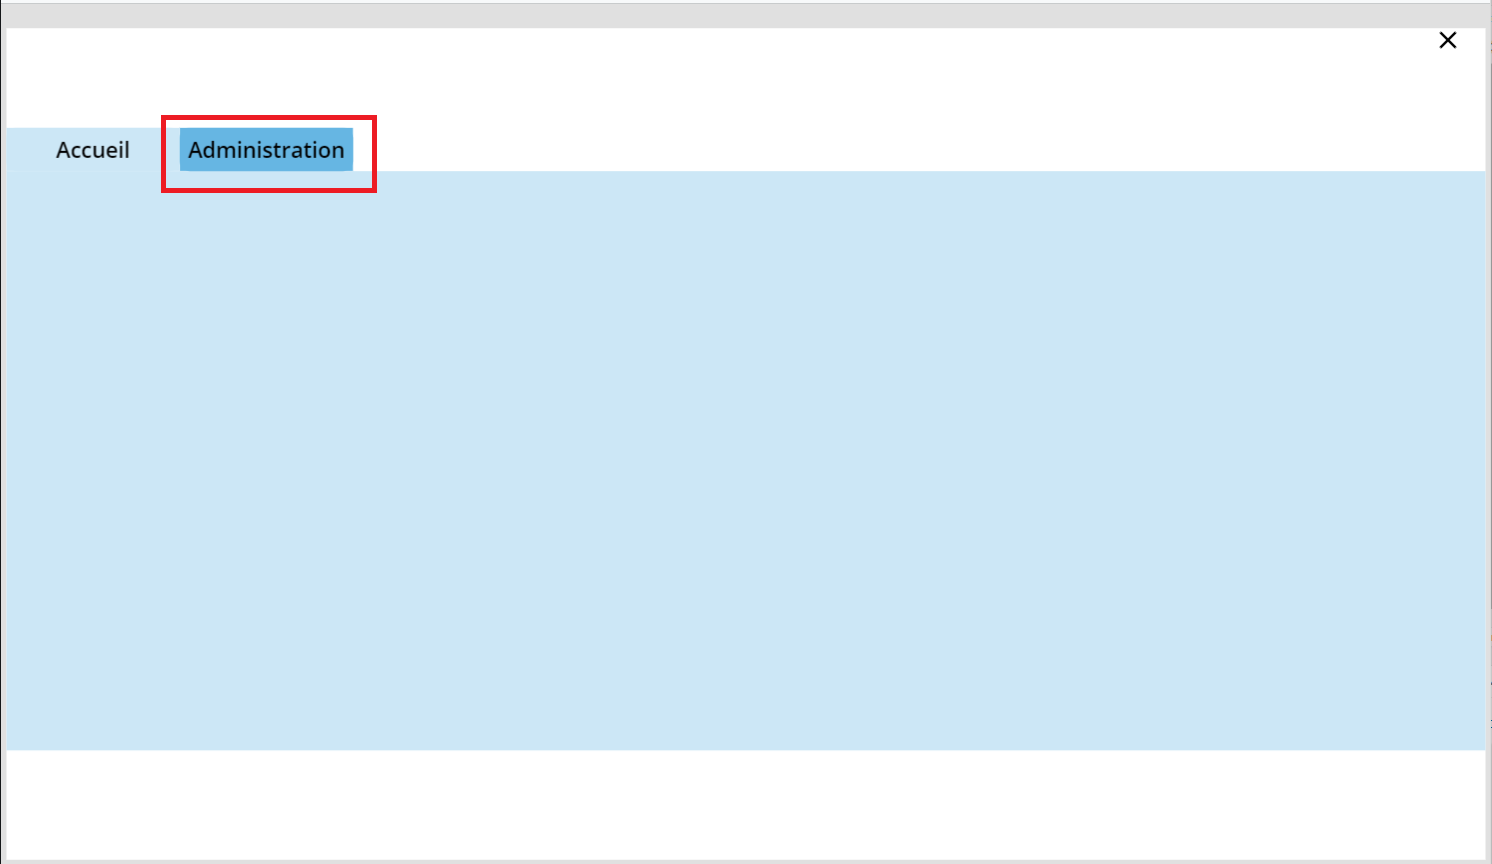
- Home: This screen will check the contents of the global variable “result”. If it has a value (it will mean that the user has the necessary rights) then we will display the “Administration” tab of the Home screen.
The data source
Once in the application, on the tab « View », click on “Data Source”. Then click on “New Connection”.
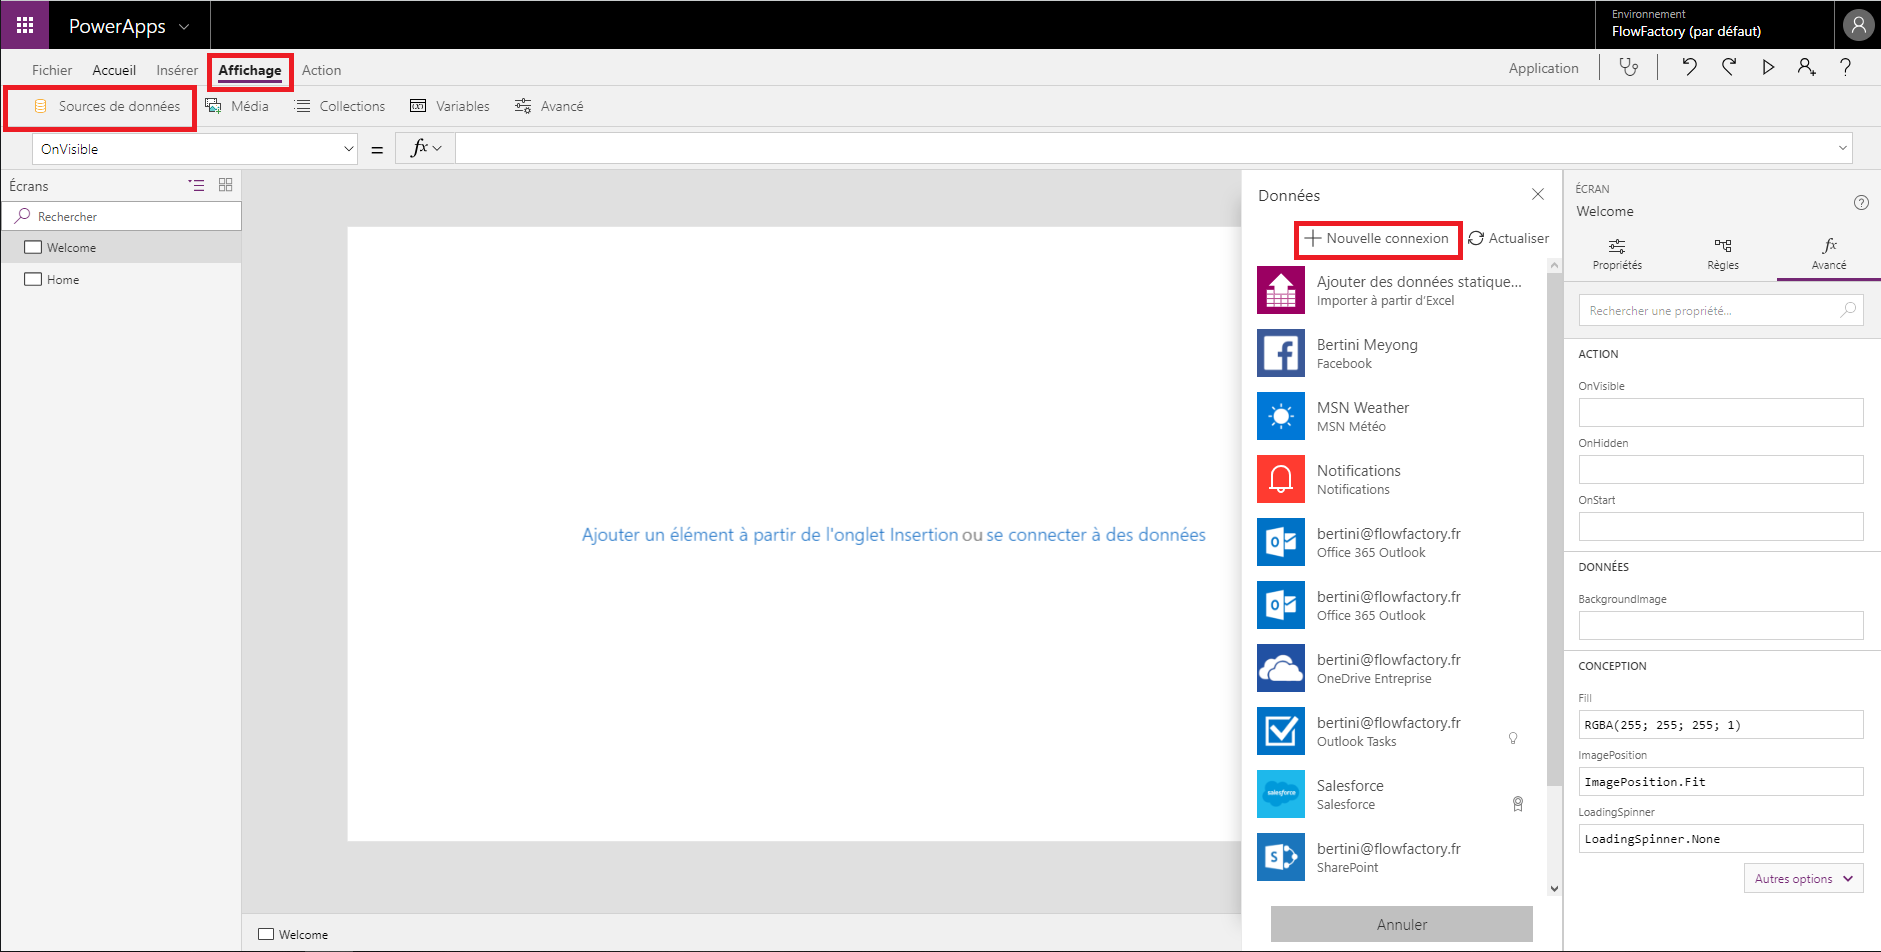
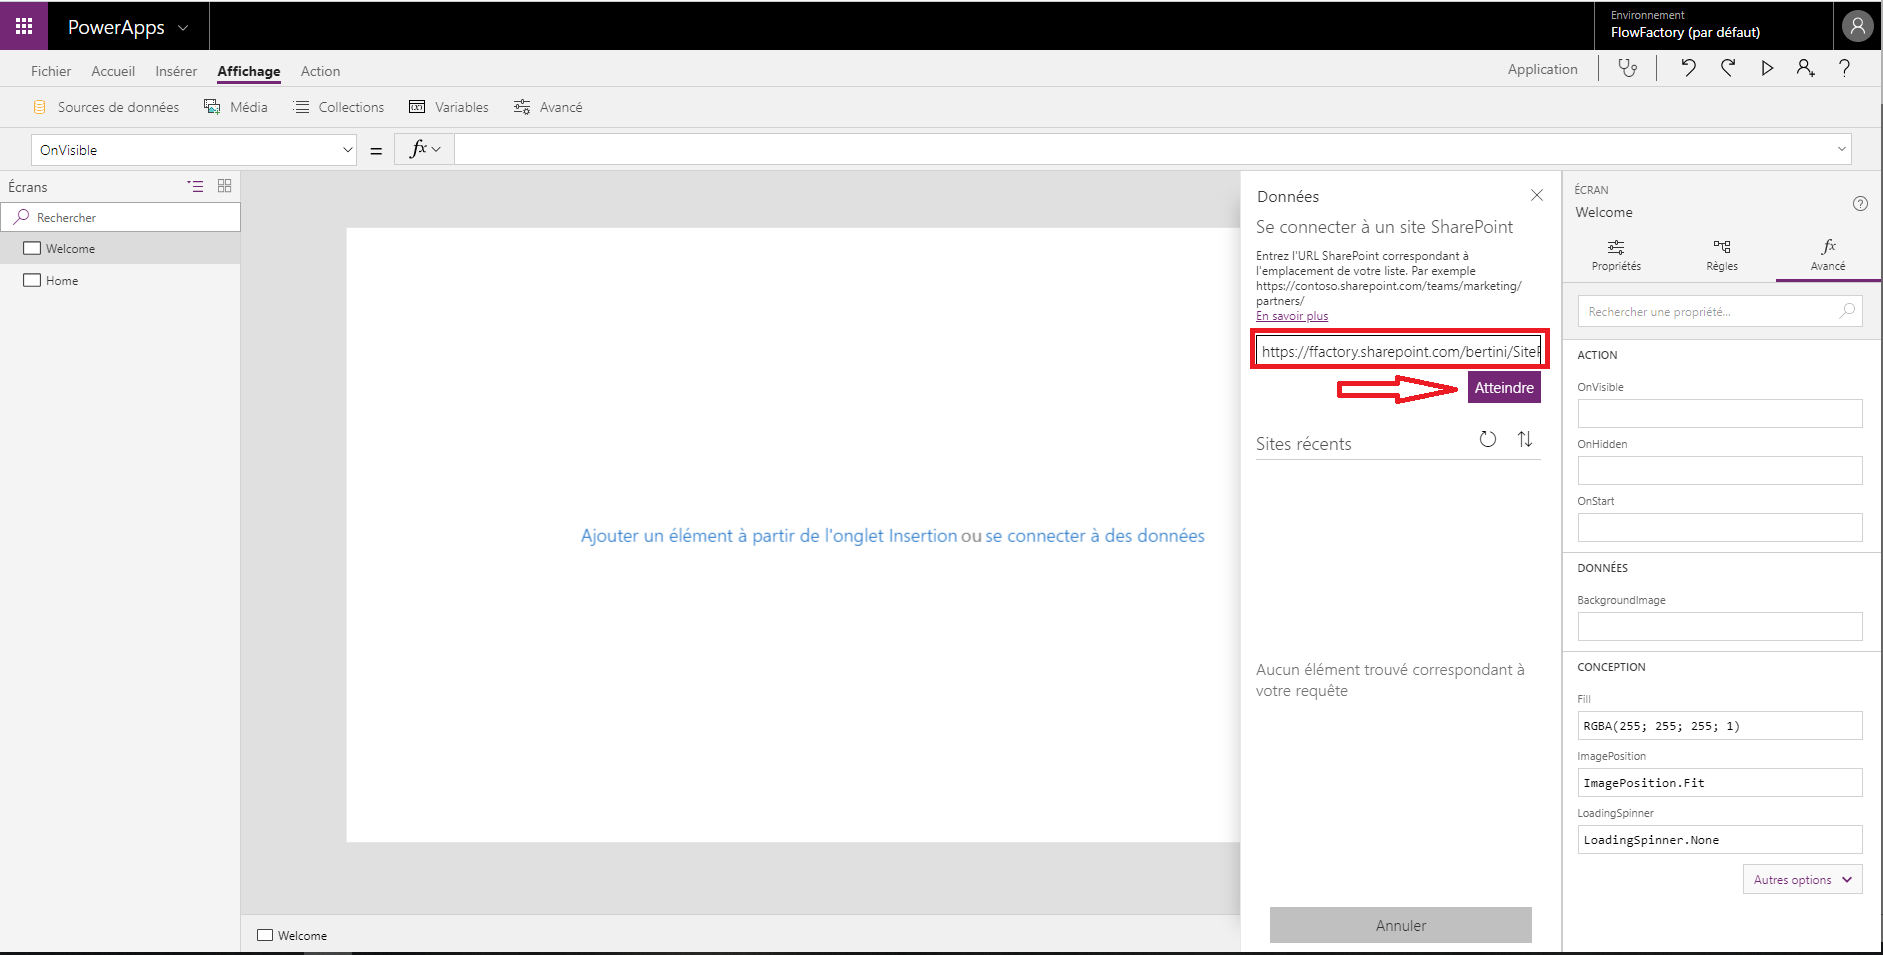
In the list of data sources, choose “SharePoint”. Enter the link to your SharePoint site and then click “Reach”.
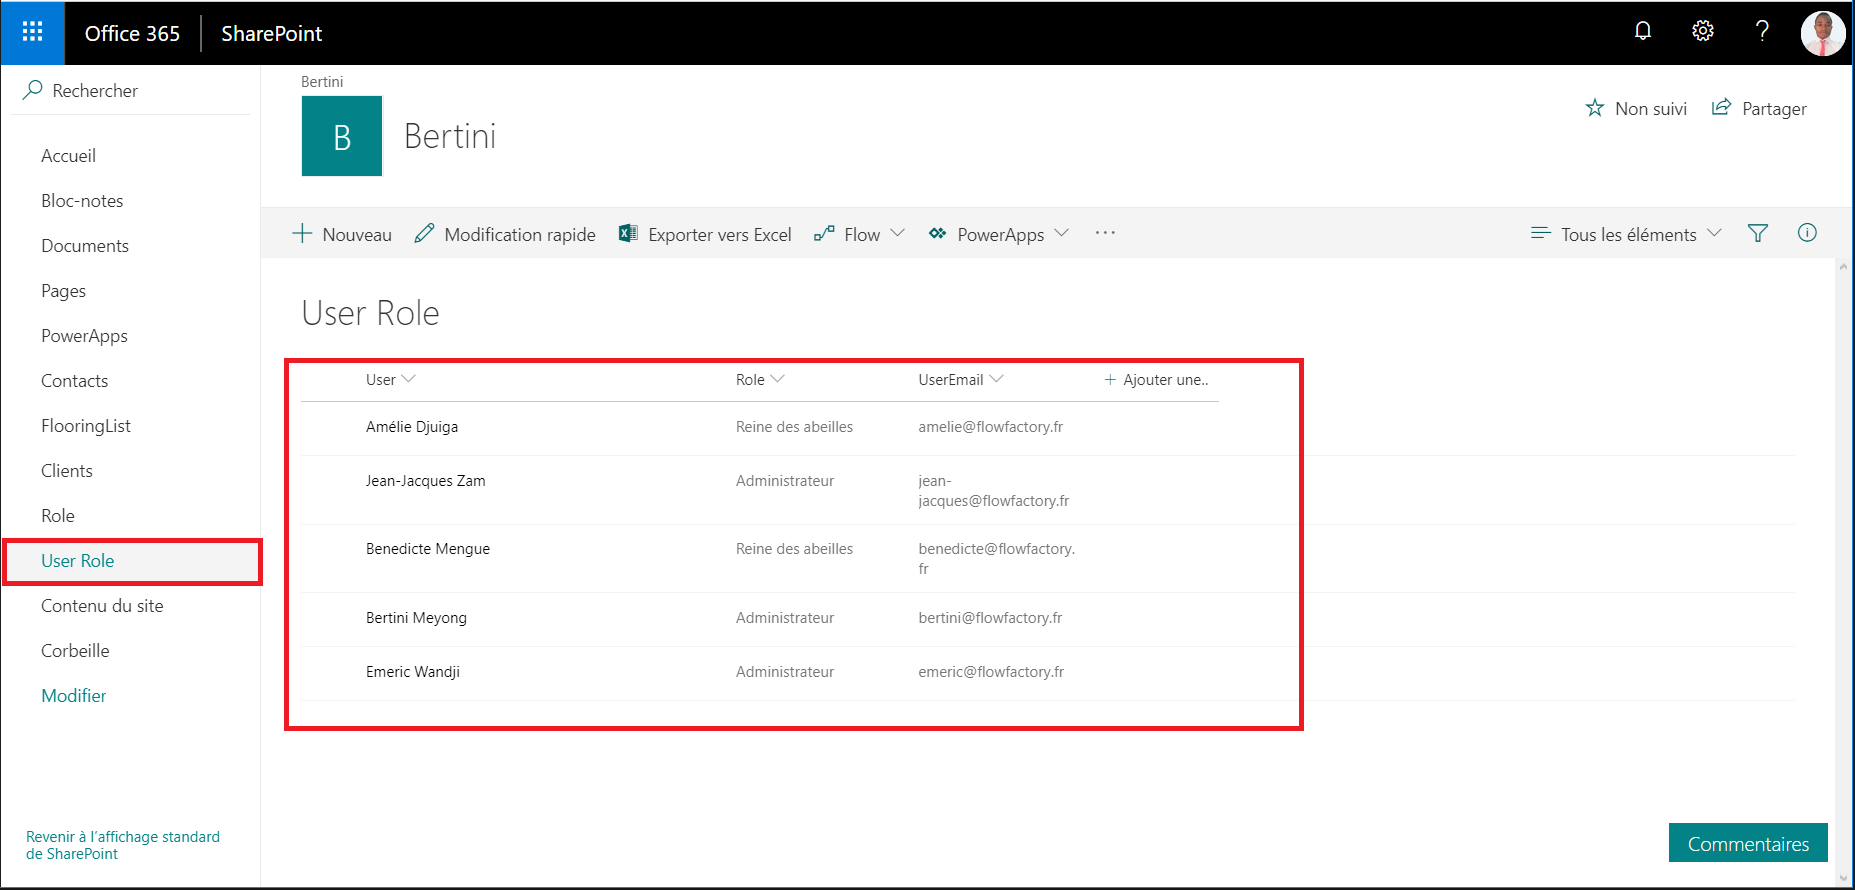
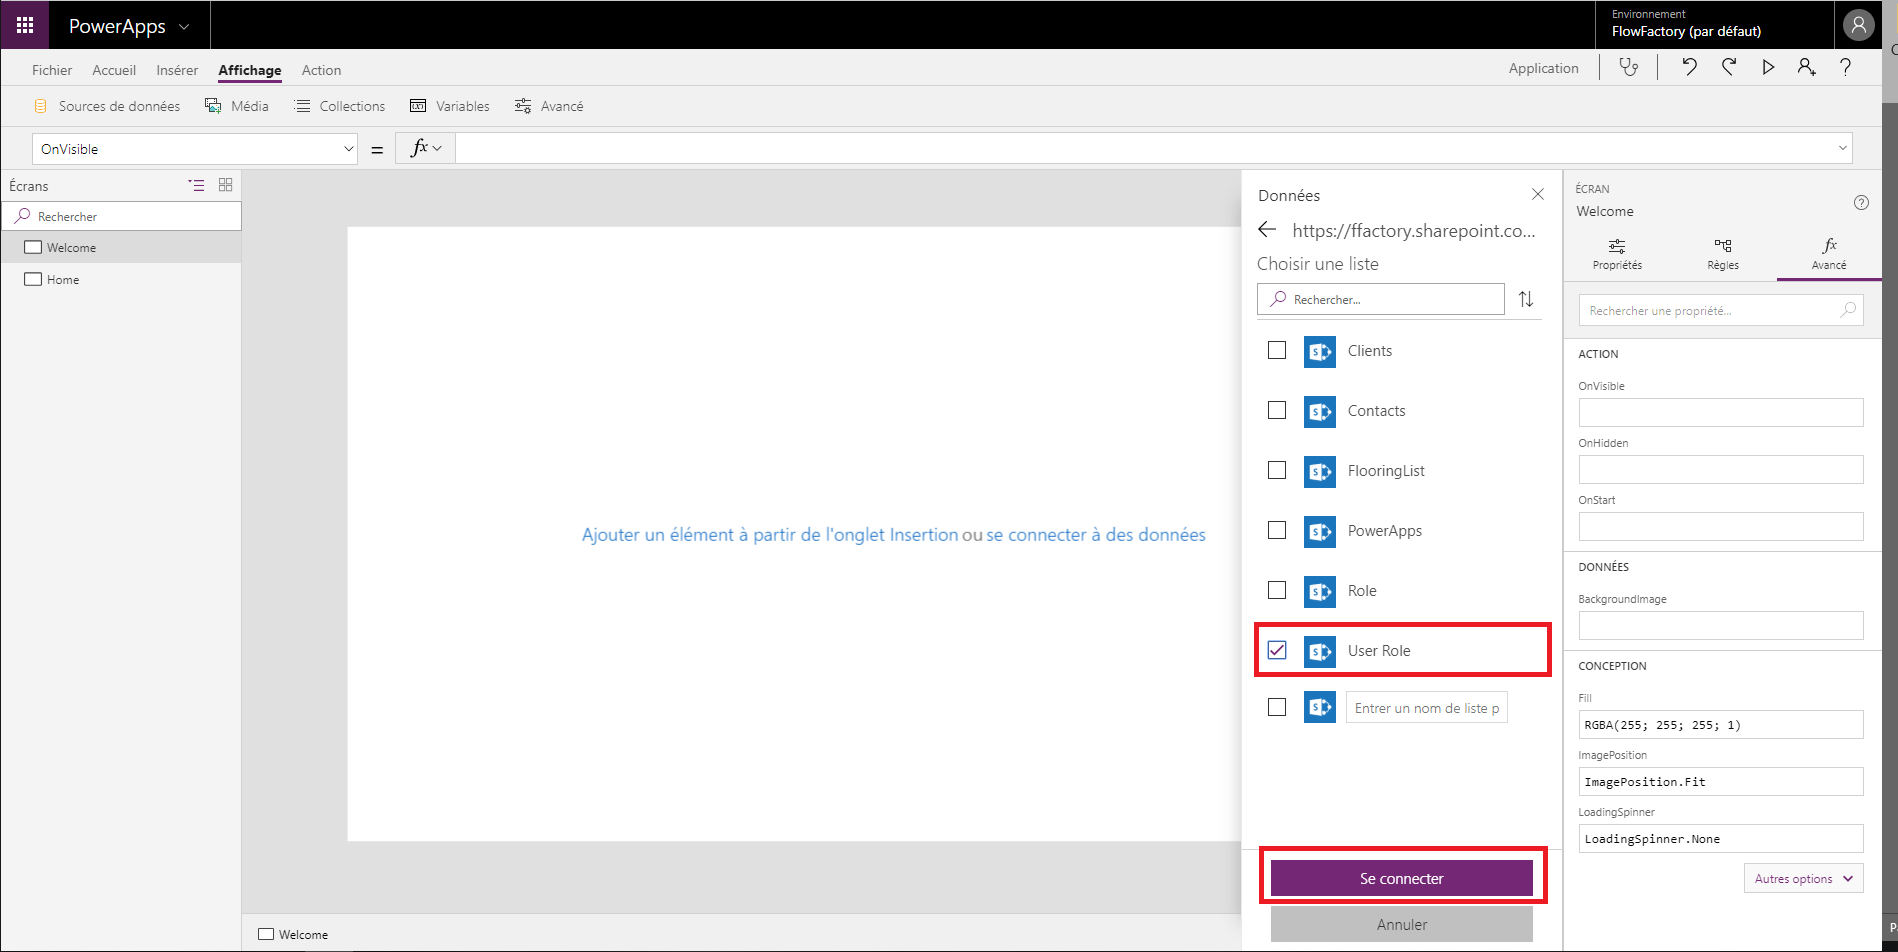
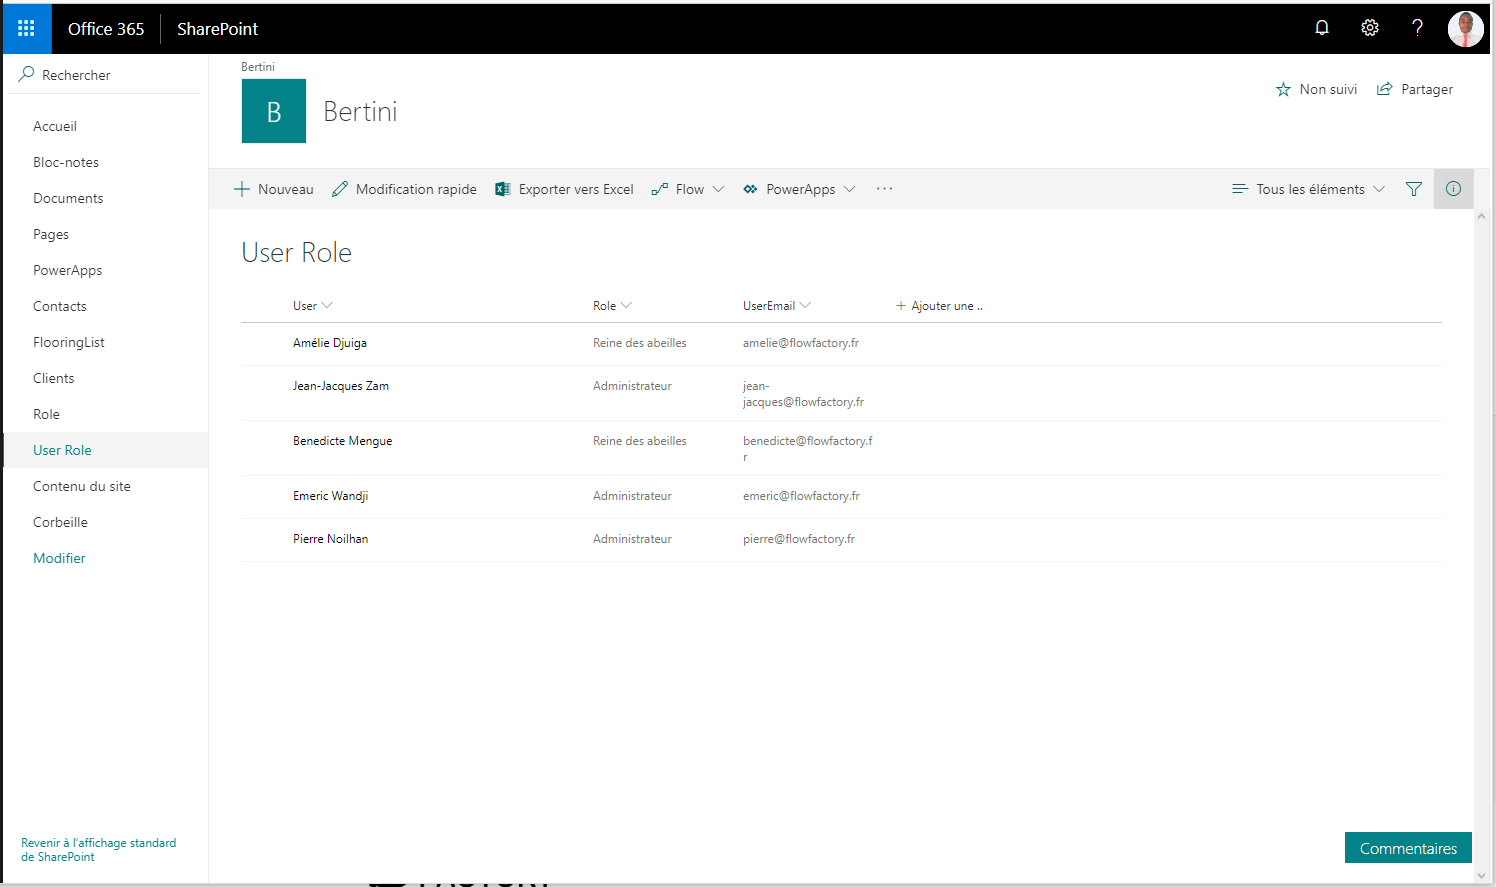
PowerApps displays all of the SharePoint lists in our Site. We choose the list to which we want to connect (User Role in our case) then click on “Connect”.
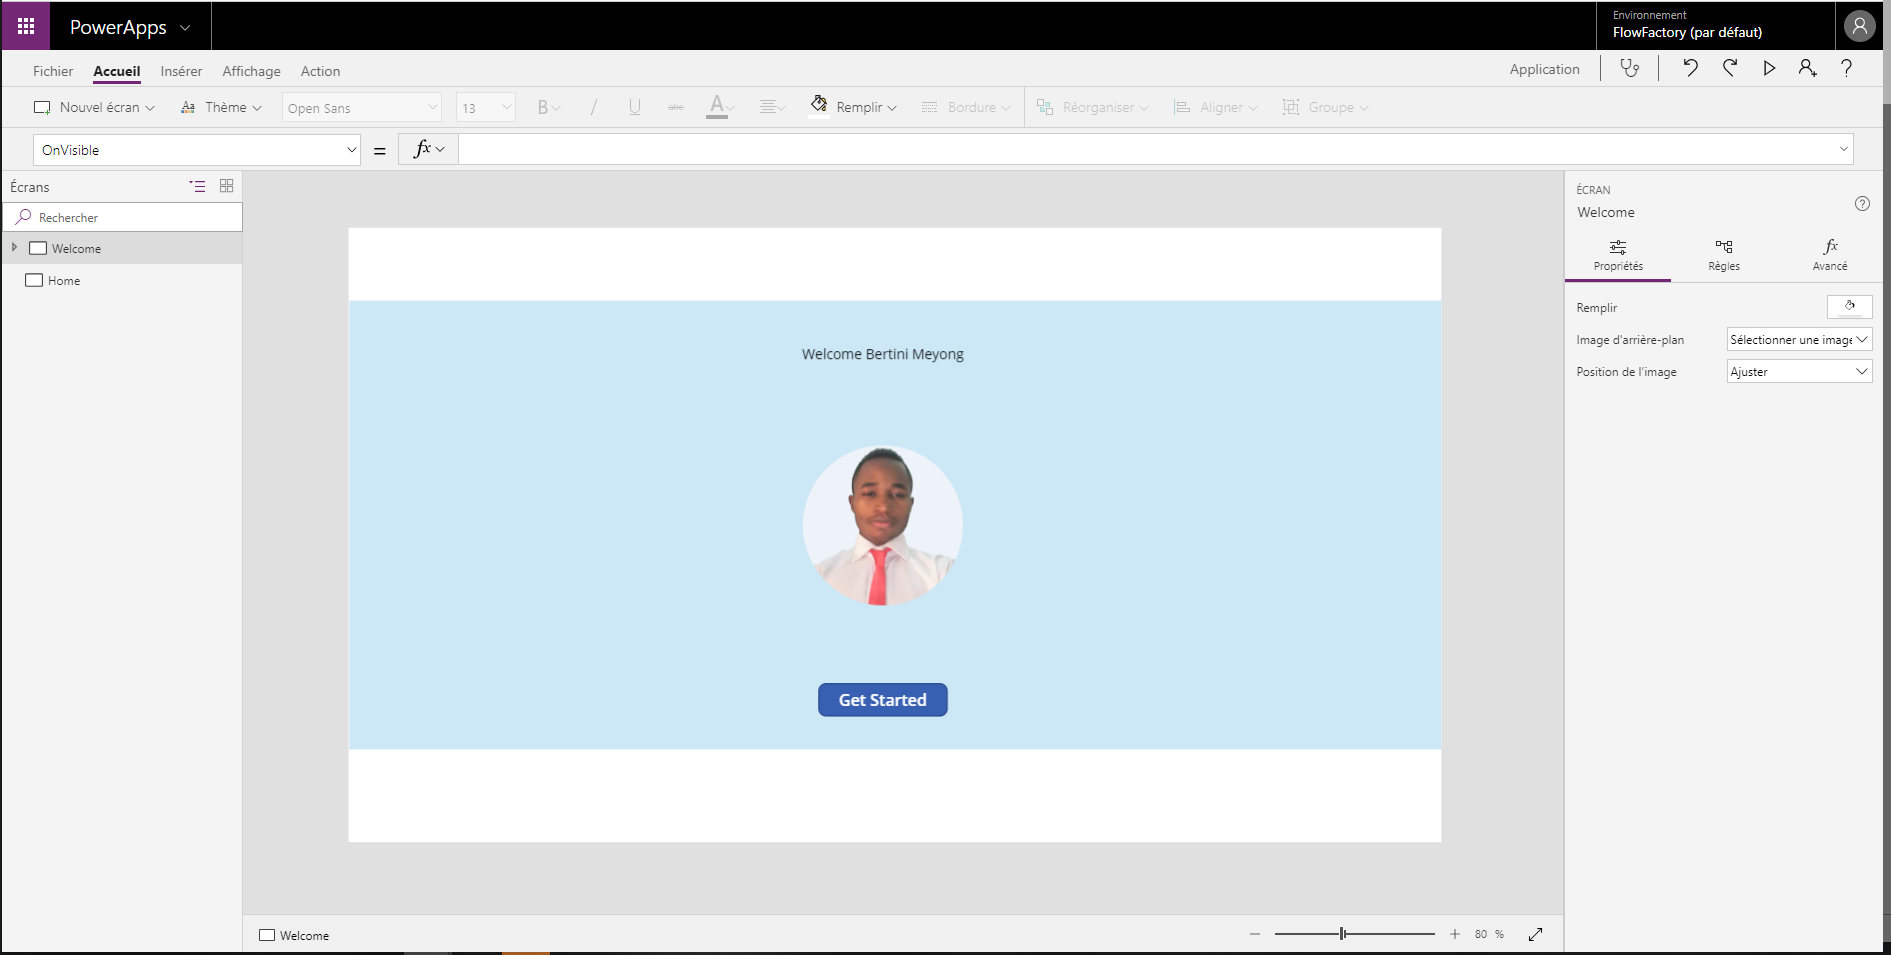
This is done, the same process is used to add the connection to the Office365 Users data source that will allow us to have access to the information of the logged-on user. You can use the data source of the Office365 Users to display the name and photo of the logged on user to say welcome (this is not the purpose of the article). Then you add a button that will allow access to the Home screen. Currently, our app looks like this (but the button alone is enough for the rest).
Setting up formulas
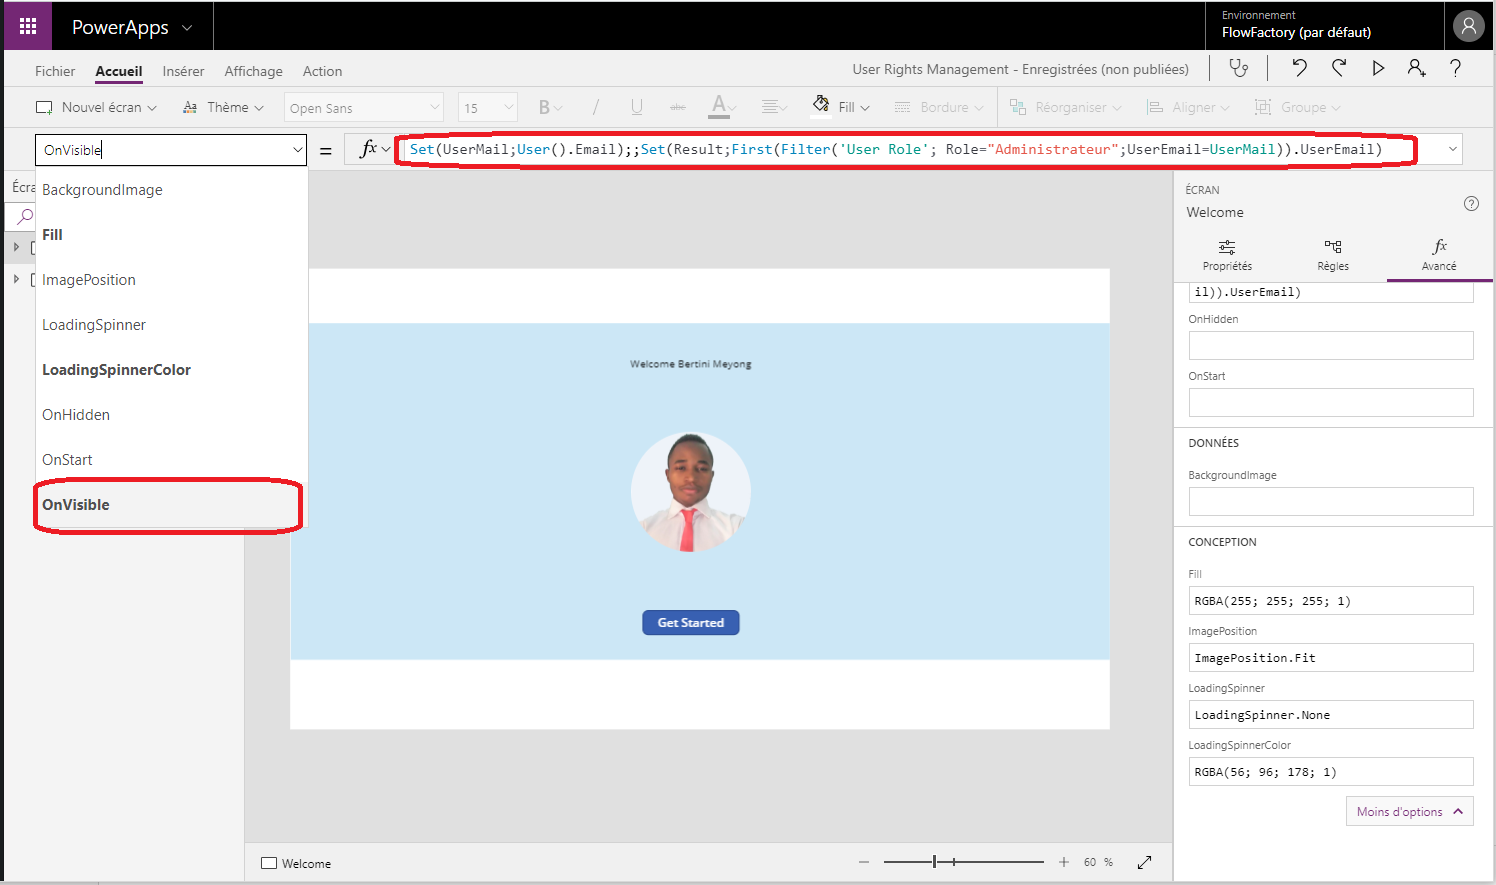
Well, now let’s go to the serious things (no panic, nothing complicated 😊). In the advanced property “OnVisible” (or “OnStart” on the first screen, the Email of the connected person is stored in a global variable.
: The
function creates the global variable UserMail if it does not already exist and updates it if it exists by setting it to User().Email (the email of the connected person).
: Like the previous statement, this one gets in the list ‘User Role’, the connected person email associated with the “Administrator” role, and then stores this email in the global variable “Result”.
The rest of the work will be done in the Home screen. In its advanced property “OnVisible” (here there is no more “OnStart”). You start by changing the “OnVisible” property of all the items you want to hide/display according to the rights. In our case it is the tab “Administration” whose property “OnVisible” is “AdminVisible”, a local variable.
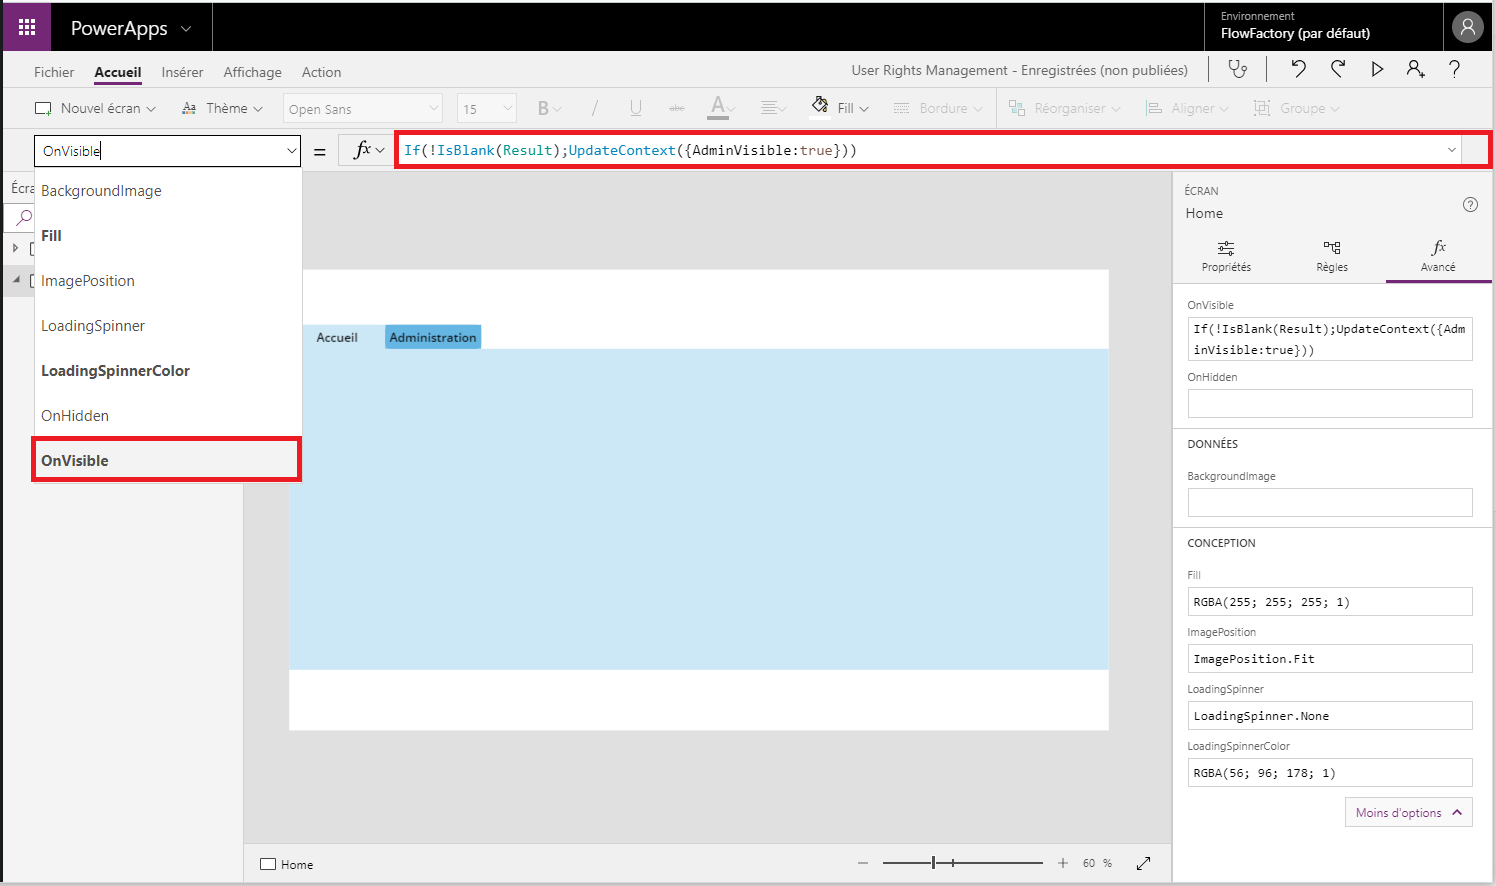
: If the variable Result is empty then the logged-on user is not administrator otherwise it is, logical.
If it is administrator then the local variable AdminVisible goes to “true” so the tab “Administration” will be visible. It is now necessary to initialize AdminVisible to “False” when you click on the button “Get Started” so that this tab is hidden by default.
The logged-on user is not in the list.
Result:
This time it is:
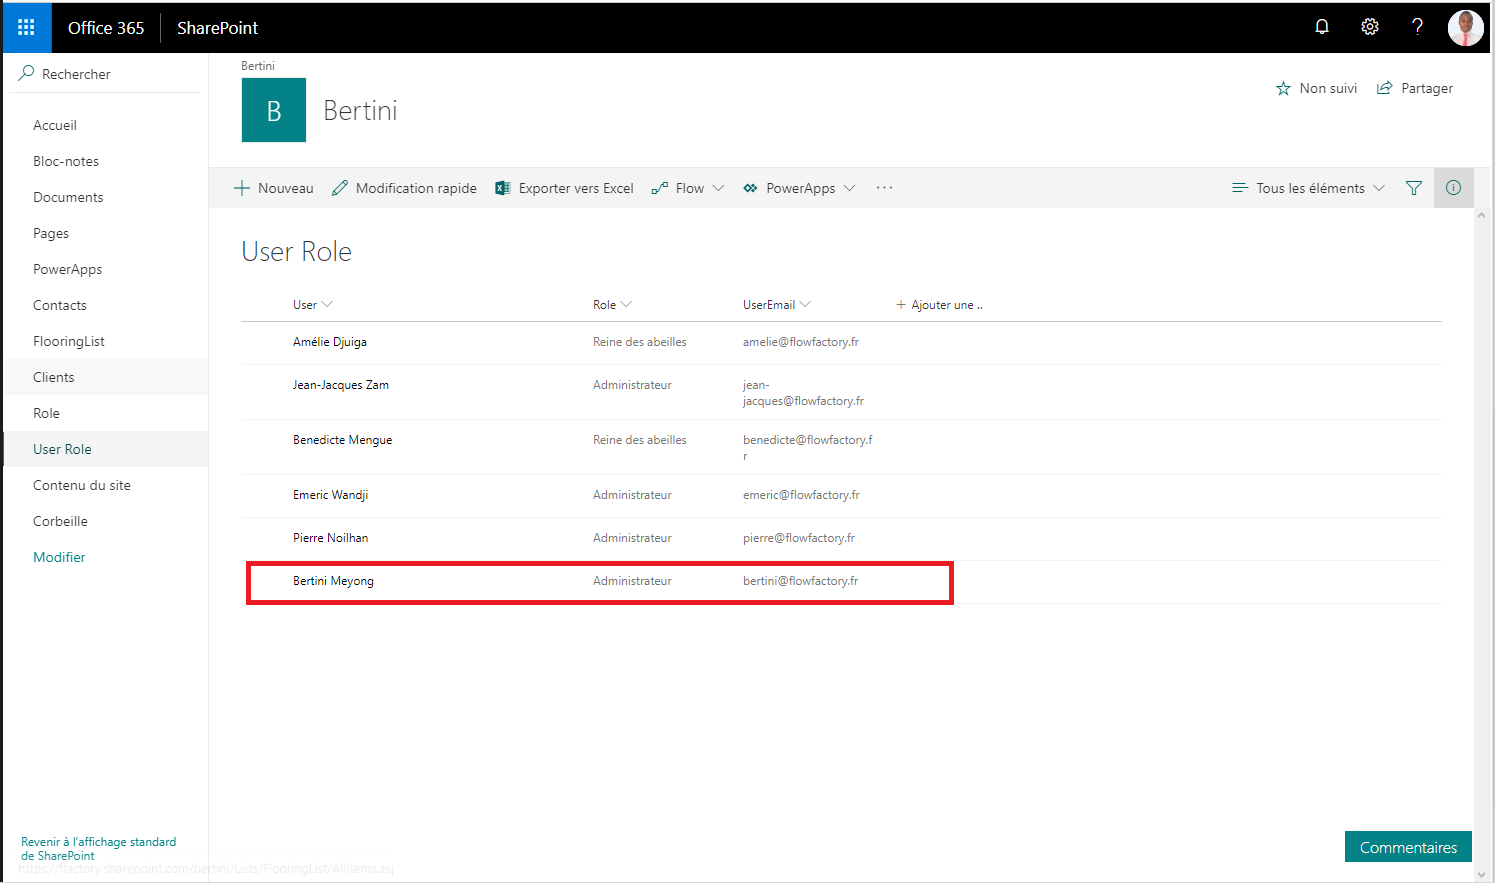
Result:
Here we are at the end of this article, I hope it will have pleased you and made you want to work or to continue with PowerApps. See you soon for a new article.