
We often realize that the worklist control used on our Smartforms does not always provide us the features that we need 😡 .For example, we would like to have additional columns on our WorkList showing us in detail the information related to the task or request. As a result, the concept of Custom Worklist is emerging: we are sometimes used to implementing it using custom broker Workflow Management but, in this article, you will find how to do it without using a custom broker 😎
Preparation of the SMO of the table of columns to be displayed
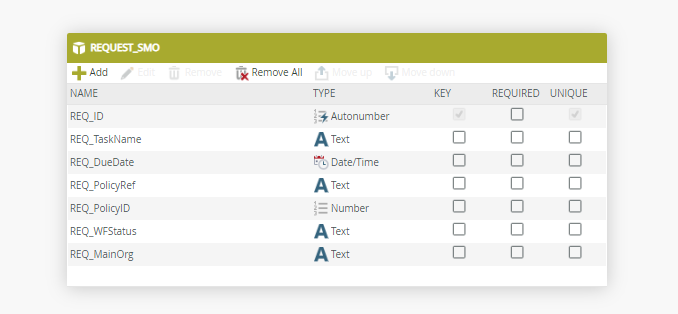
Here, we will make sure that the SmartObject of the table containing the columns to be displayed on the Worklist contains a unique INT type key of preference. In our case, it is the Request table. Indeed, when a request is created, the worklfow is launched and its information is recorded in this table. Its unique property is REQ_ID of type Integer and Autonumber.
Creating the Custom WorkList
K2 Workspace offers us the SMO GetClientWorkListItems() we will use its List method to get the list of tasks, we will then add the GetList method from our SMO Request, and finally, the linked ones to form a kind of composite method.
1- Creation of a new SMO
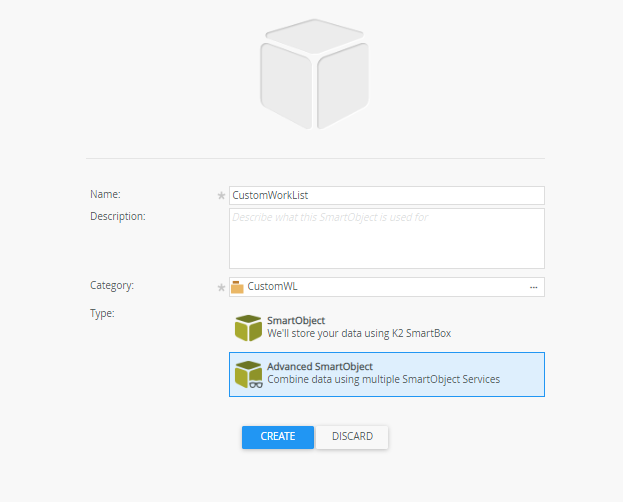
Go to the designer and create a new SmartObject called it CustomWorkList. Choose advanced SmartObject and click on Create
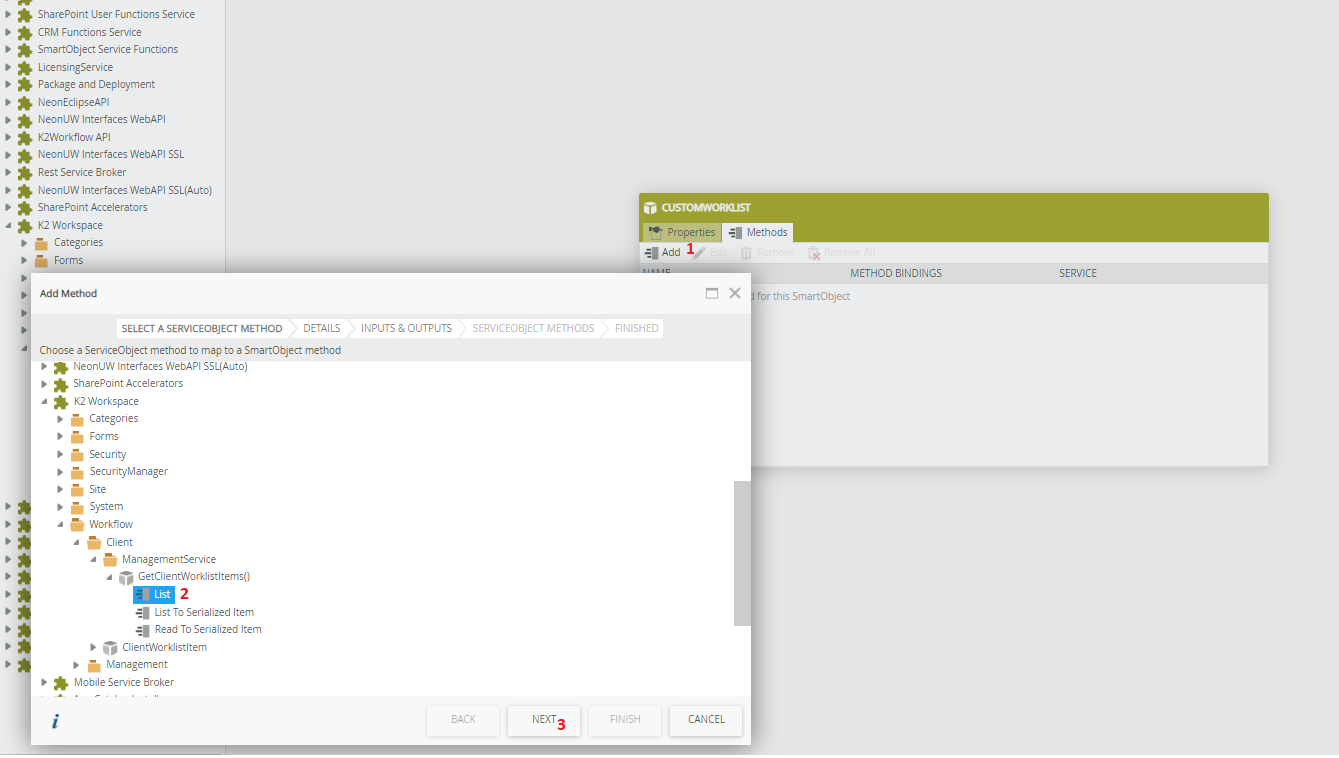
Go to Methods and choose the List method of the SMO GetClientWorkListItems then, Next
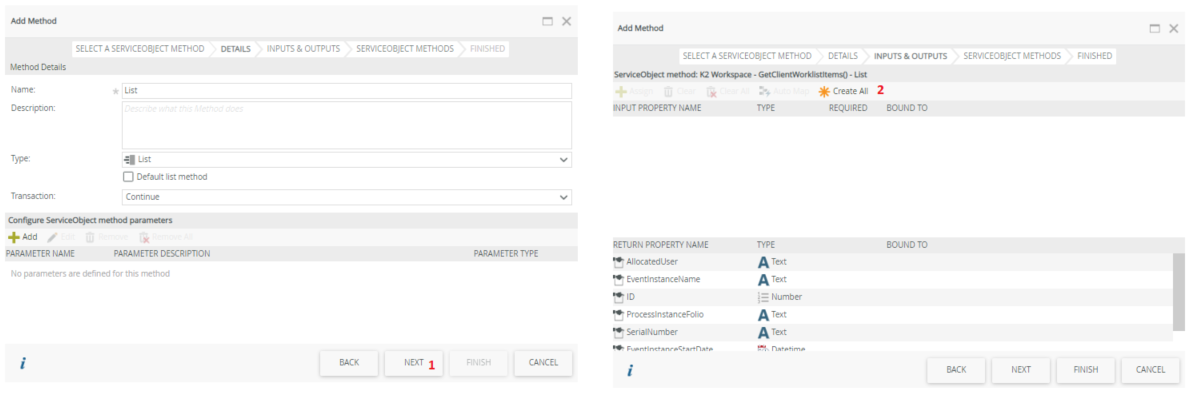
Then click on Next then on Create All
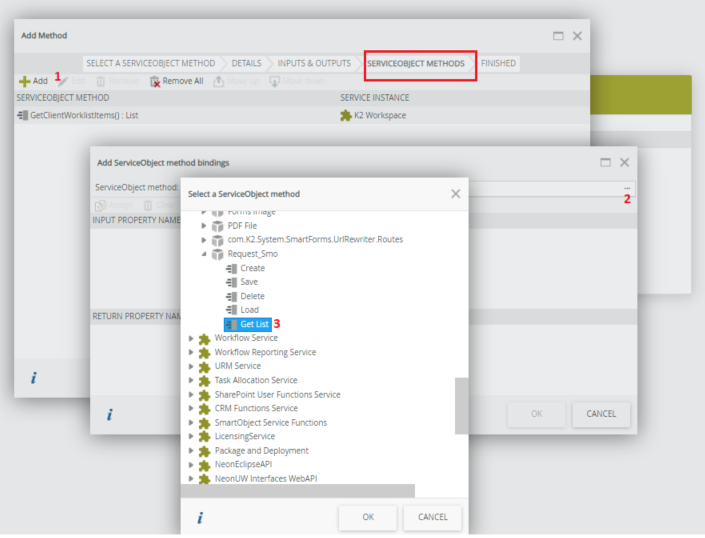
In the ServiceObject Methods tab that appears, it is time to add the GetList method from our SMO Request:
Make an Add and navigate to the three points to search for the method in question and click on OK
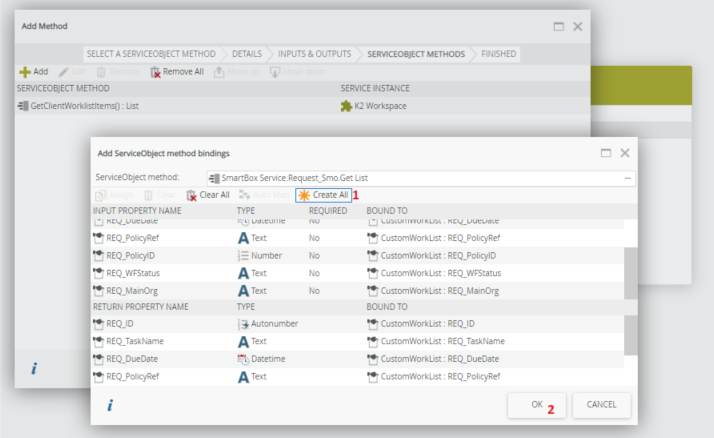
Click on Create All then OK
The time has come to configure the link between the two methods for this, continue by clicking on Next
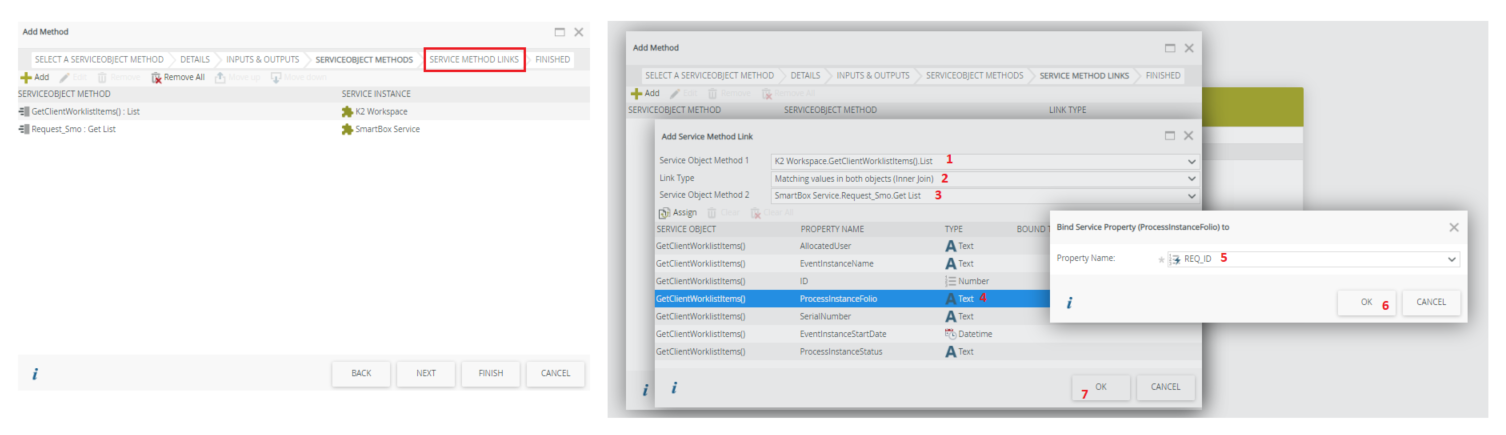
- Choose in 1 the GetClientWorklistItems method
- Step 2 choose the type of join: it’s like in SQL to learn more about joins clic here . In our case take the Inner Join
- Step 3 choose the GetList method from our SMO Request
- In 4 it is a question of mapping the ProcessInstanceFolio property of the GetClientWorklistItems method with the REQ_ID property of our SMO Request: Click on it and choose Assign then, select REQ_ID. Then Okay, Finish
- Finally Finish to complete the creation of the SMO
Note: To make this mapping it is necessary to choose on both sides of the methods, the property which is unique and which will have the same value that is why we took the property Folio that we will then adapt it so that each time it contains the REQ_ID (See next part)
2- Workflow modification
Here we will just modify the value of the folio so that it contains the RED_ID. For this purpose:
- Open your Workflow (the one where the tasks will be displayed on the Custom Worklist)
- Add at the very beginning an activity called Set Folio. If it already exists no problem we’ll just modify it
- Open this activity and at the folio value level, put the REQ_ID
Note: We took DF_ReqID directly because at the start of the workflow the REQ_ID is sent in this variable

Note: If you have several Set Folio activities in your workflow, you must do the same for all these activities
3- Design of the Custom WorkList view
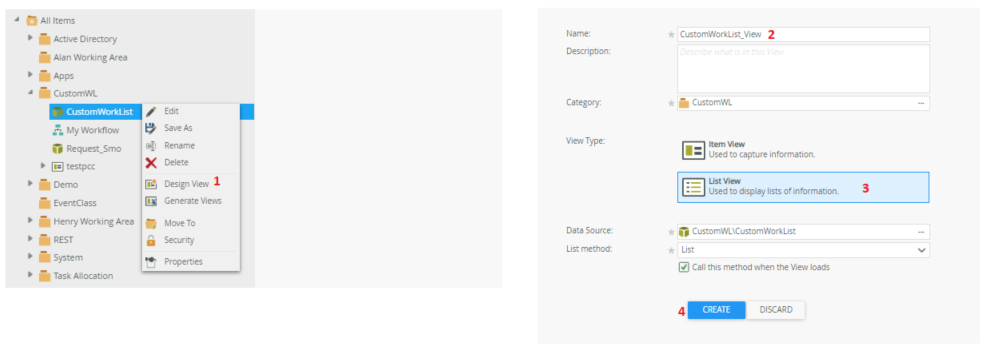
- Right-click on the CustomWorkList SMO and choose Design View
- Enter the name, choose List View
- Check the option “Call this method When the View loads” (by default it is checked)
- Click on Create
- Click on Create Labels and Controls
- Check all the columns you want to display on your WorkList and then, OK
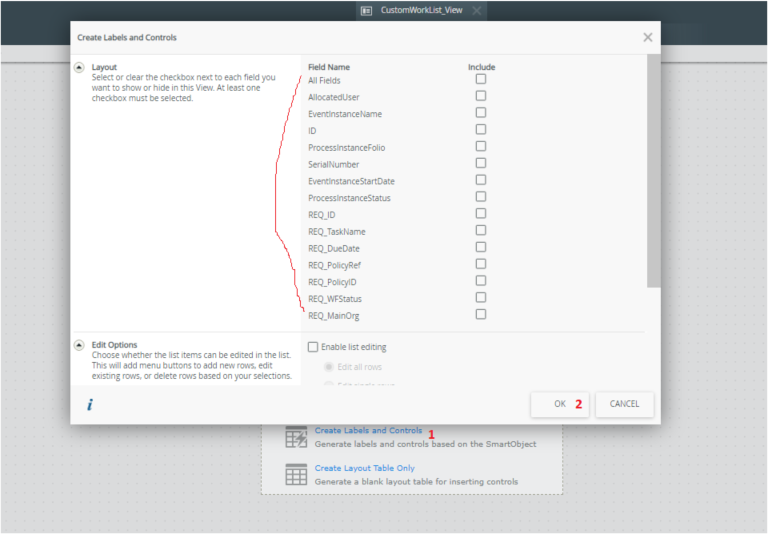
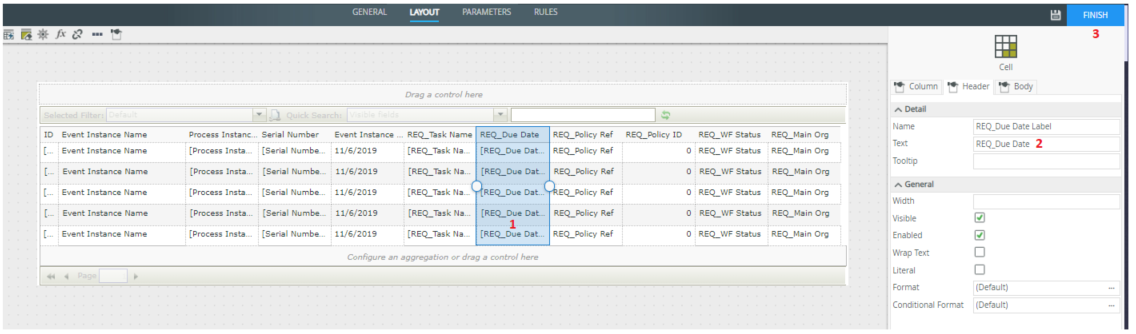
- Rename the columns and click on Finish
Custom Worklist Test
To test, we have in our case created a small view to launch our Workflow (the one at the bottom). We then integrated this view and the Custom WorkList into a test form
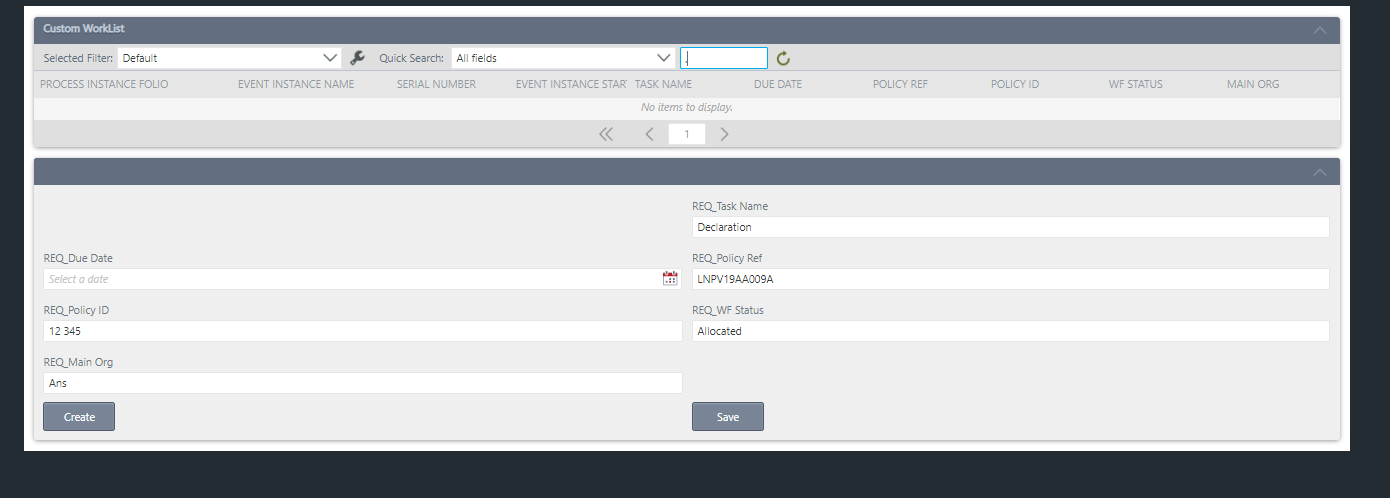
Note: When you click on the Create button, it starts the Workflow. In terms of rules, do not forget to send the REQ_ID as in this image

You can now create your tasks and see how they are displayed in the Custom WorkList

See you later 😉
How to get the worklist url here?
In our case, we construct the Task URL using the SN and the Form URL.