
The ‘Out of Office’ functionality in Nintex K2 allows users to specify their unavailability to process tasks assigned in workflows, while ensuring that these tasks are reassigned to designated delegates so that business processes continue to run smoothly.
It is possible to do this yourself, at any time, easily and without going through management, using a form.
The form takes the following form:

I’ll tell you how it works.
This form consists of 02 views:
- A header with a logo and a title and the logged-in user-
- The main view in which the user logs in or out ‘Out of office’.
We’re going to look at the configuration of the main view. In editing mode, it looks like this:
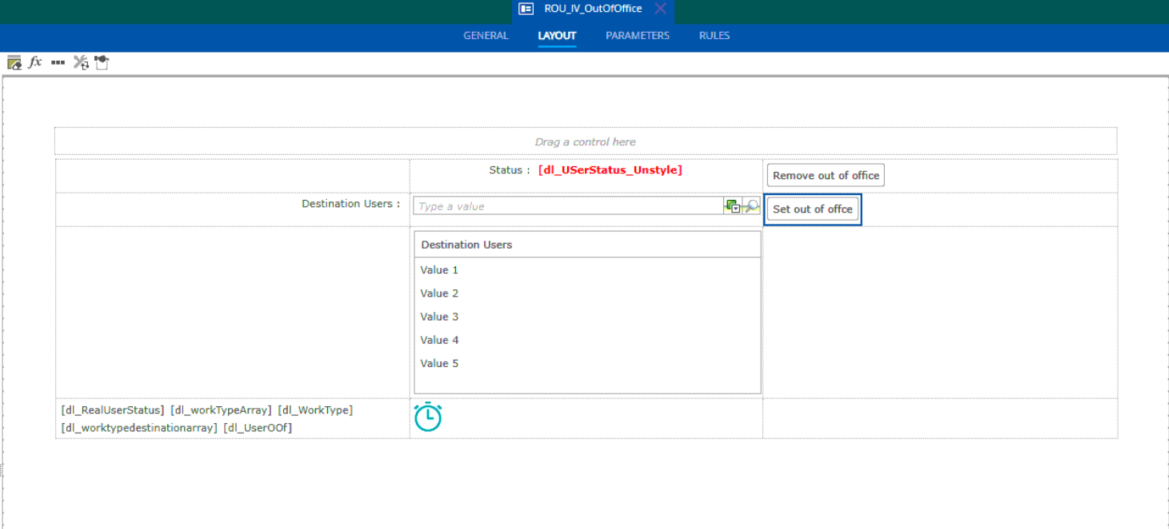
It consists of 02 ‘Set out of office’ and ‘Remove out of office’ buttons and a set of other controls (picker, labels and data label, timer, etc).
- Initialising the view
When initialising the view, we have the following configurations:
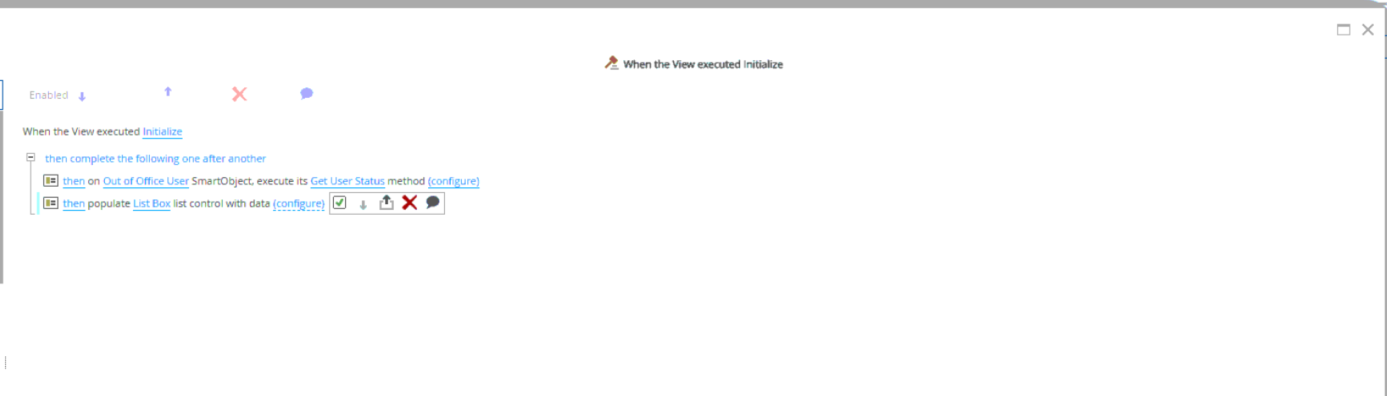
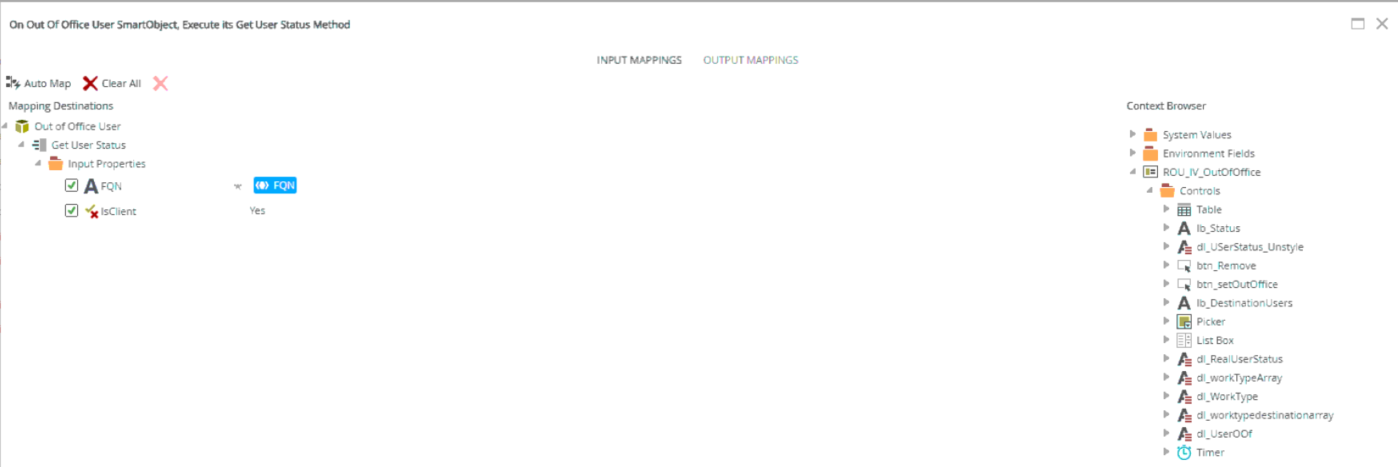
– The user’s status is retrieved and displayed (available or out of office) using the ‘Get User status’ method, which has as input the FQN of the connected user and the value ‘Yes’, and as output the user’s status in the data label dl_RealUserStatus:
2. The dl_USerStatus_Unstyle data label
This data label contains the status of the connected user: Out Of Office or Available. A conditional style is applied to manage the status colours (green for Available and red for Out of office). Here are the configurations made when this control changes:
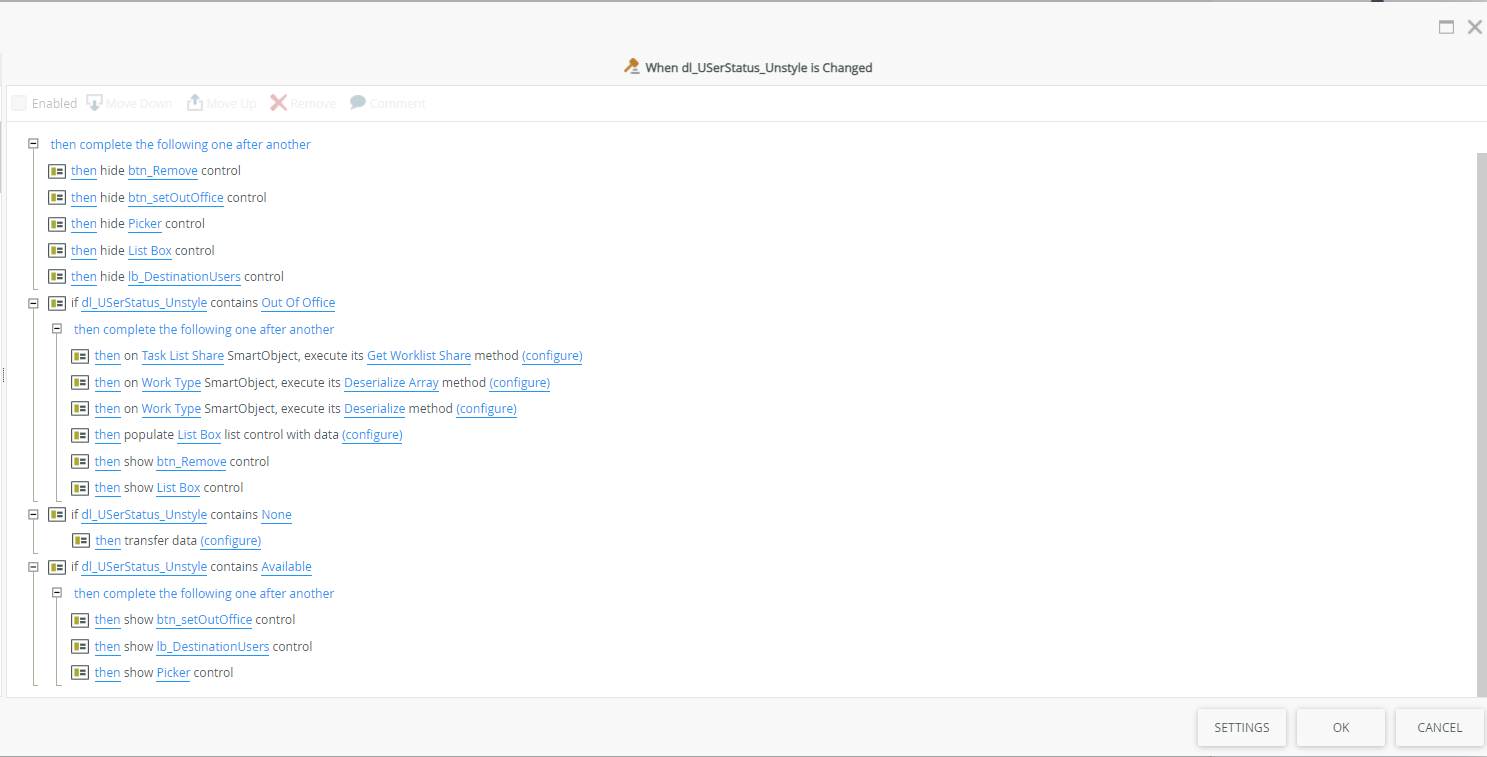
a) All other labels are hidden
b) If dl_USerStatus_Unstyle contains the value ‘Out of office’, all the following instructions are executed.
The ‘Get Worklist Share’ method of the ‘Task List Share’ smartObject is called with the following parameters:
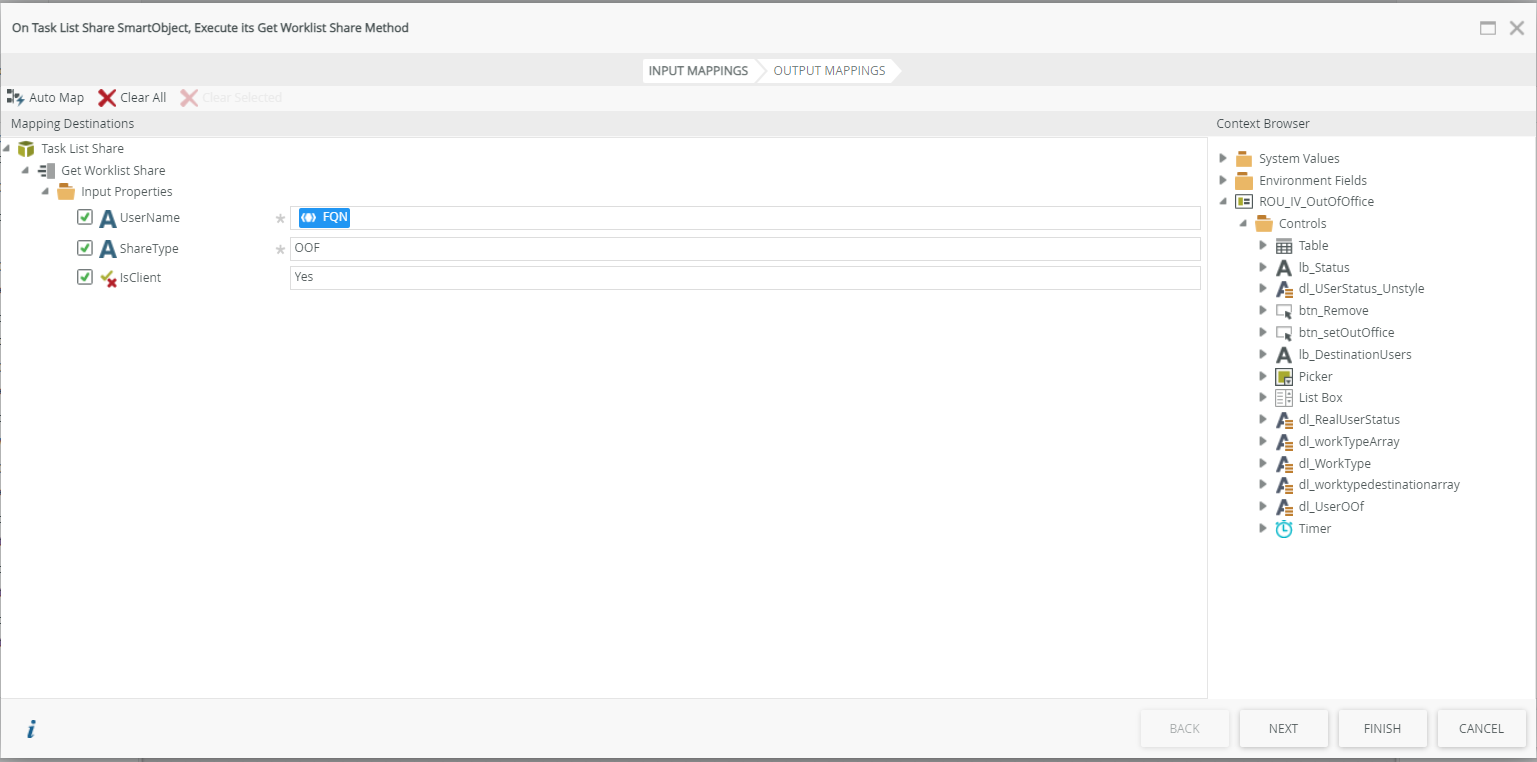
As output, workTypes(workType[]) is retrieved from the data label dl_worktypeArray.
The ‘Deserialize Array’ method of the ‘Work Type’ smartObject is called with the dl_workTypeArray data label as input. The output Worktype(worktype) is returned in the data label dl_Worktype .
Then the ‘Deserialize’ method of the ‘Work Type’ smartObject is called with the dl_Worktype data label as input. The output workTypeExceptions(workTypeException[]) is returned in the data label dl_worktypedestinationarray.
Then the list of recipients (this is the spiller control whose data source is the Work Type Array Destination smartobject) is fed with the dl_worktypedestinationarray data label as input
the ‘Remove out of office (btn_Remove)’ buttons and the control containing the list of recipients are displayed (List Box).
c) If dl_USerStatus_Unstyle contains the value ‘None’, we replace it with the value ‘Available’.
d) If dl_USerStatus_Unstyle contains the value ‘Available’:
the ‘Set out of Office’ button and the list of recipients are displayed
The Control Picker is displayed
3. The main button is ‘Set out of office’.
This button is displayed when a user is available (status available) and is clicked to set a user out of Office. The settings on this button are made in the following order:
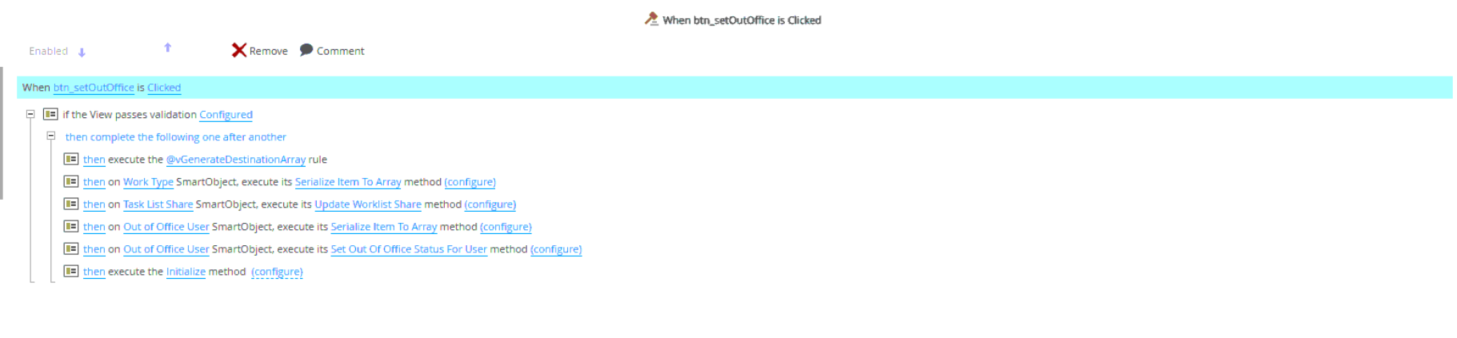
a. After checking the mandatory fields (the contents of the picker), we first call the @vGenerateDestinationarray rule.
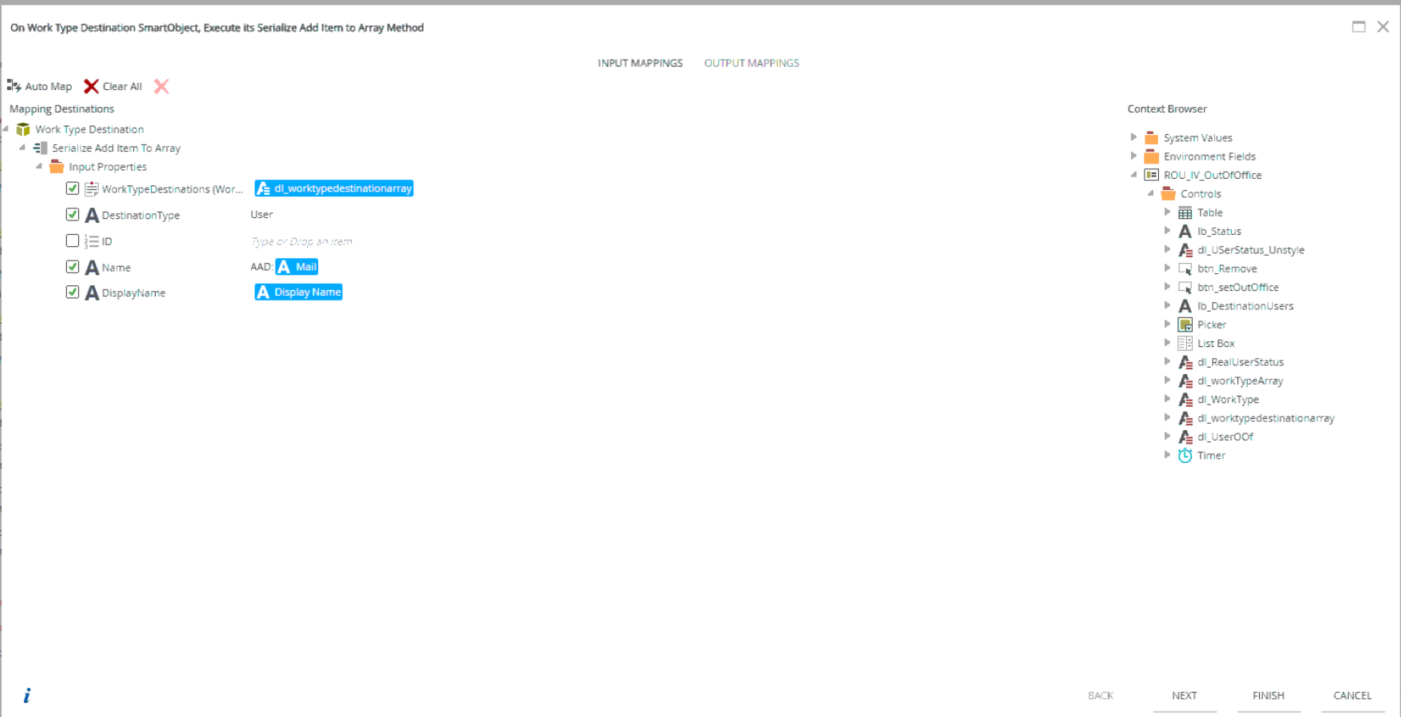
This rule provides the set of users to whom the delegated tasks will go. It has the following configurations:

- We empty the data label dl_worktypedestinationarray using a ‘data transfer’.
- Then we call the ‘Serialize Add Item To Array’ method of the ‘Work type Destination’ smartObject, as shown in the image, and the result is saved in the dl_worktypedestinationarray data label.
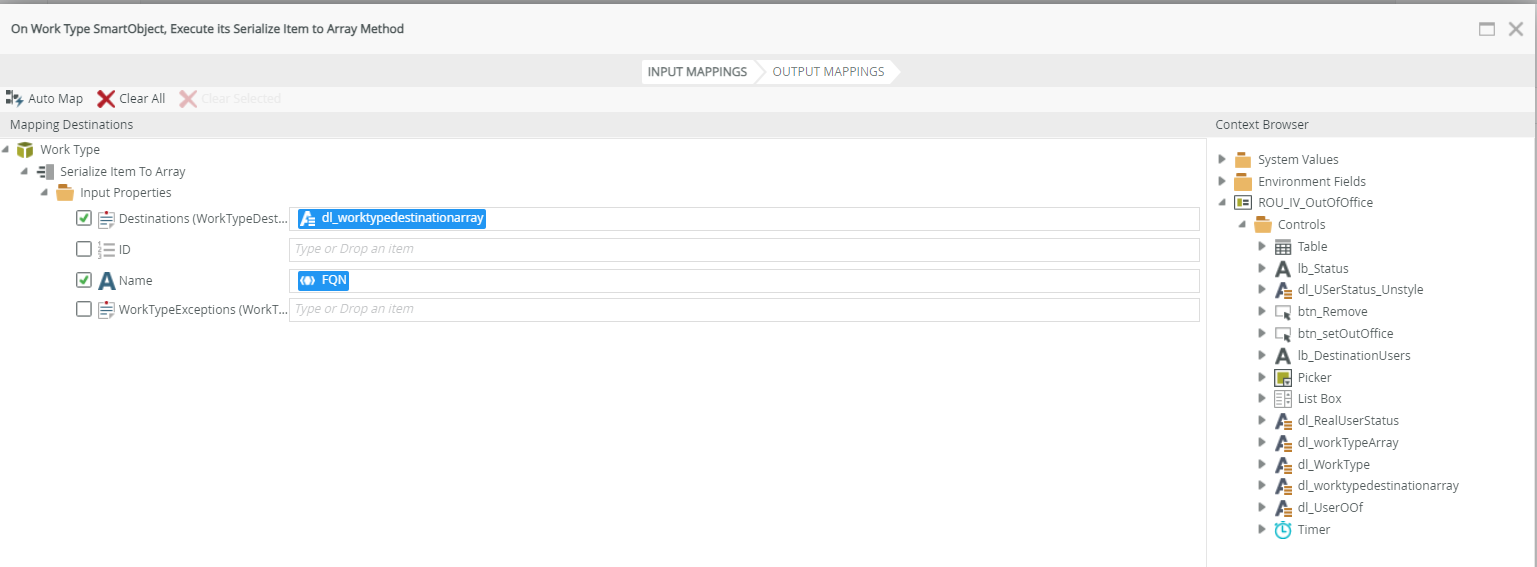
b. Then the ‘Serialise Item To Array’ method of the ‘Work Type’ smartObject is called with the following parameters, as shown in the image. The output is returned in the data label dl_dworkTypeArray.
c. The ‘Update Worklist Share’ method of the ‘Task List Share’ smartObject is called with the following parameters: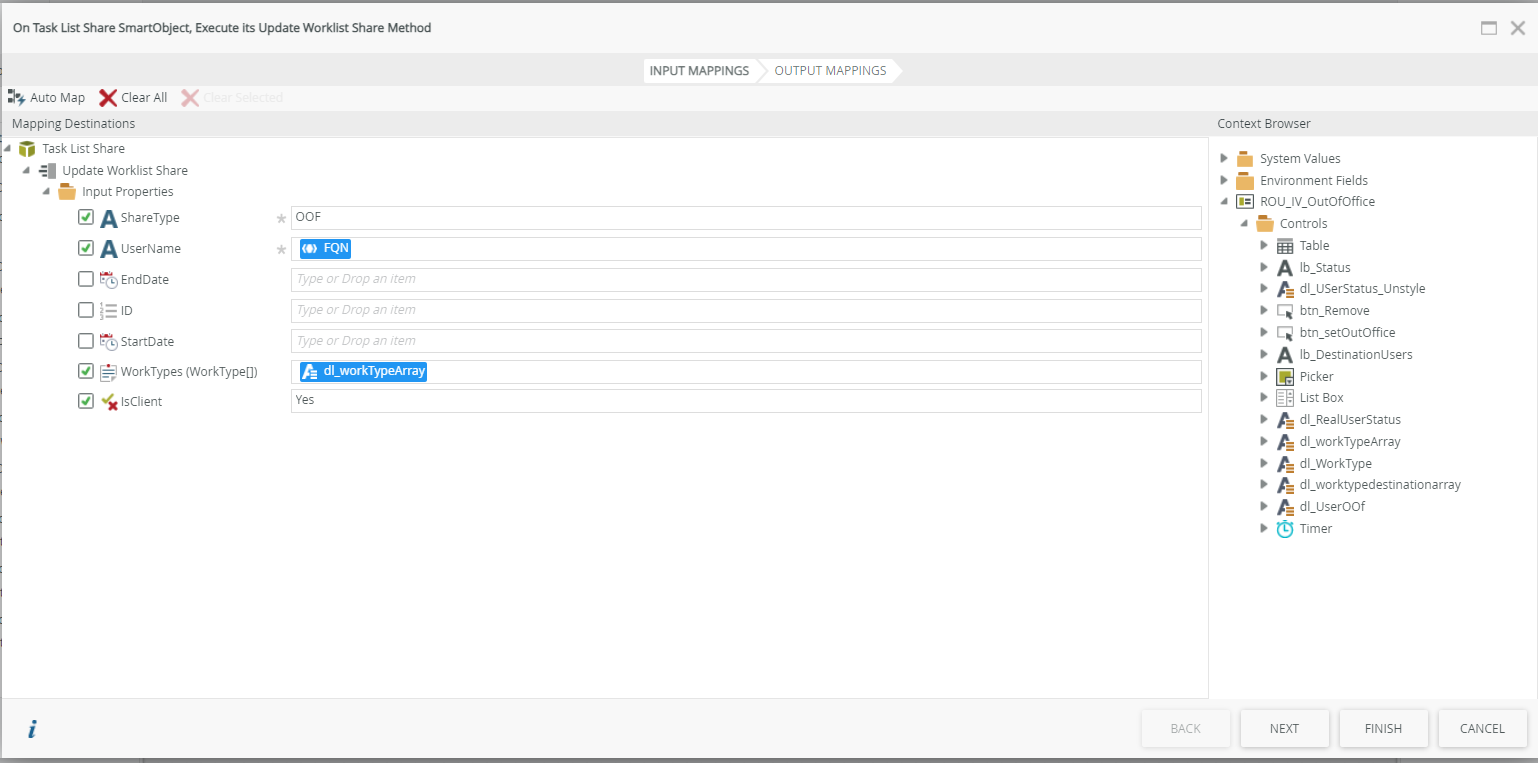
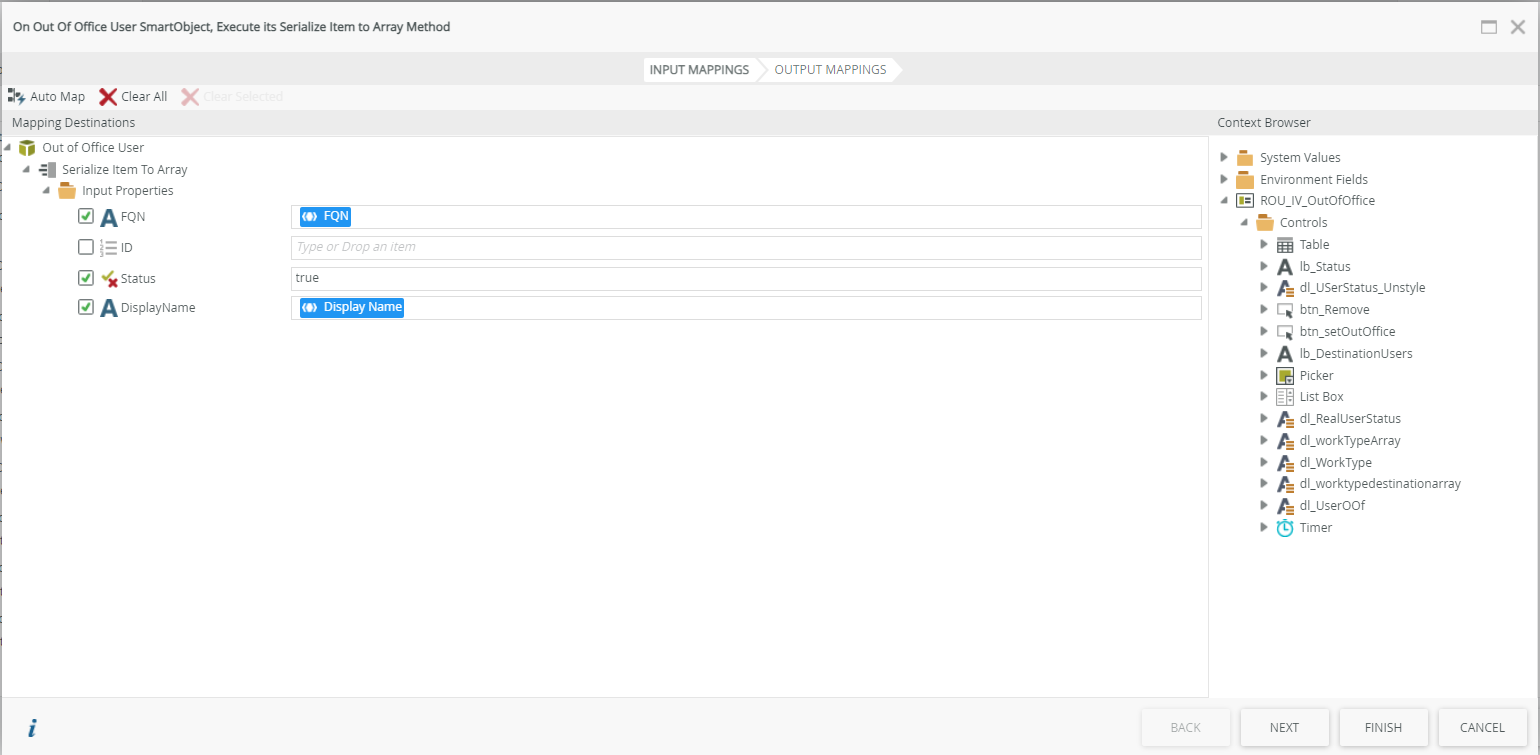
d. The ‘Serialise Item to array’ method of the ‘Out of office User’ smartObject is called with the following parameters, as shown in the image. The output data is stored in the data label dl_UserOOf :
e. The ‘Set out of Office Status for User’ method of the ‘Out of office User’ smartObject is called with the following parameters:

f: The view is then reset.
4. The Remove out of office button (btn_Remove)
Clicking on this button makes a user who was ‘ouf of Office’ available again. The settings for this button show the following steps:
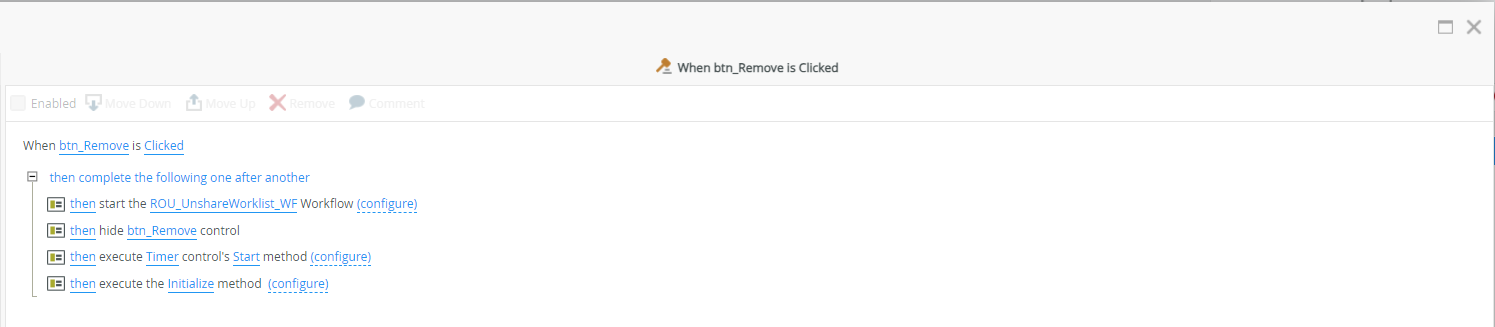
– The Rou_UnshareWorkList_WF workflow is configured by calling the ‘Unshare Worklist’ method of the Task list Share smartObject. It is used to cancel the sharing of the task list.
