
Download Broker
Click on this link to download the broker.
Broker Installation
1. Copy the DLL
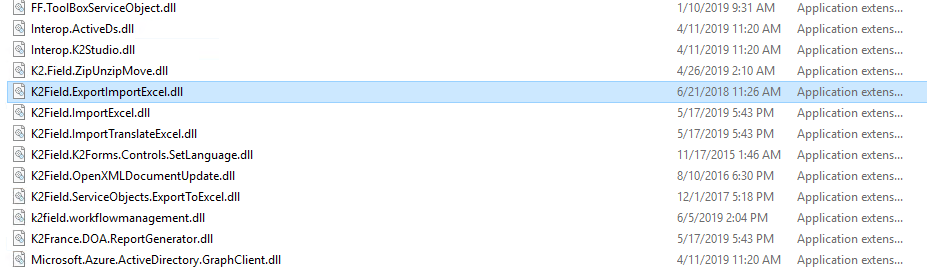
After downloading the Service broker, open the folder and copy it to the ServiceBroker folder in your K2 installation directory (exemple:C:\K2 Projects\Broker\ProjectName\).
2. Creation of the Service type
Once the DLL is copied in your K2 installation directory, open the SmartObject Service Tester Utility , then click on the “Register ServiceType” button.
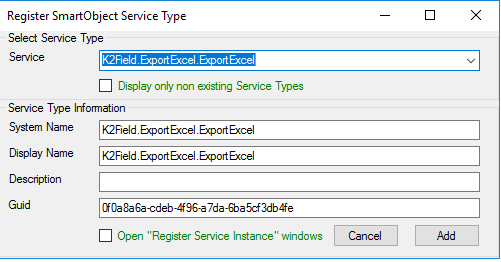
- Service : Locate the deployed service.
- System Name: You can edit it or leave the default name.
- Display Name: this is the display name of your service, the one that will be visible.
- Description: Description of your service, it’s optional.
- Guid : Don’t edit it.
- Click on “Add”.
3. Creation of the Service Instance
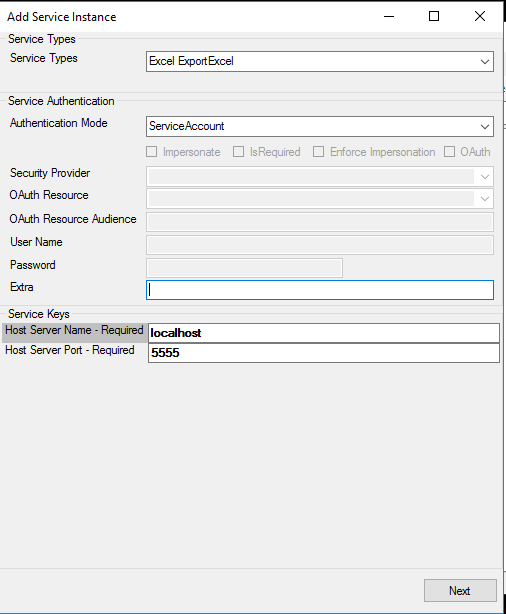
Once the button “Add” is clicked, a new service type appears, it’s necessary to create an instance of this service (right click on the service type, then click Register Service Instance ).
- Authentication Mode: The authentication mode is requested, choose Service Account.
- Host Server Name : Fill with your server name.
- Host Server Port : Fill with your server port.
- Click on Next to continue.
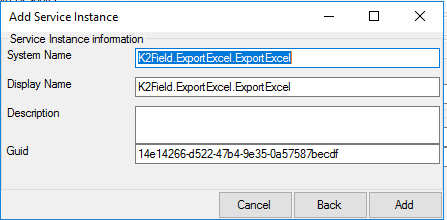
- Enter the Sytem Name and Display Name of your Service Instance , then click “Add”.
4. Creation of the SmartObject
-
- Generate a SmartObject by right-clicking on the new service and then click on “Create SmartObject”.
- In the “Name” field, enter a name or leave the default name.
- In the “Category” field choose the category where your SmartObject will be placed (By default, the SmartObject folder of your K2 Application).
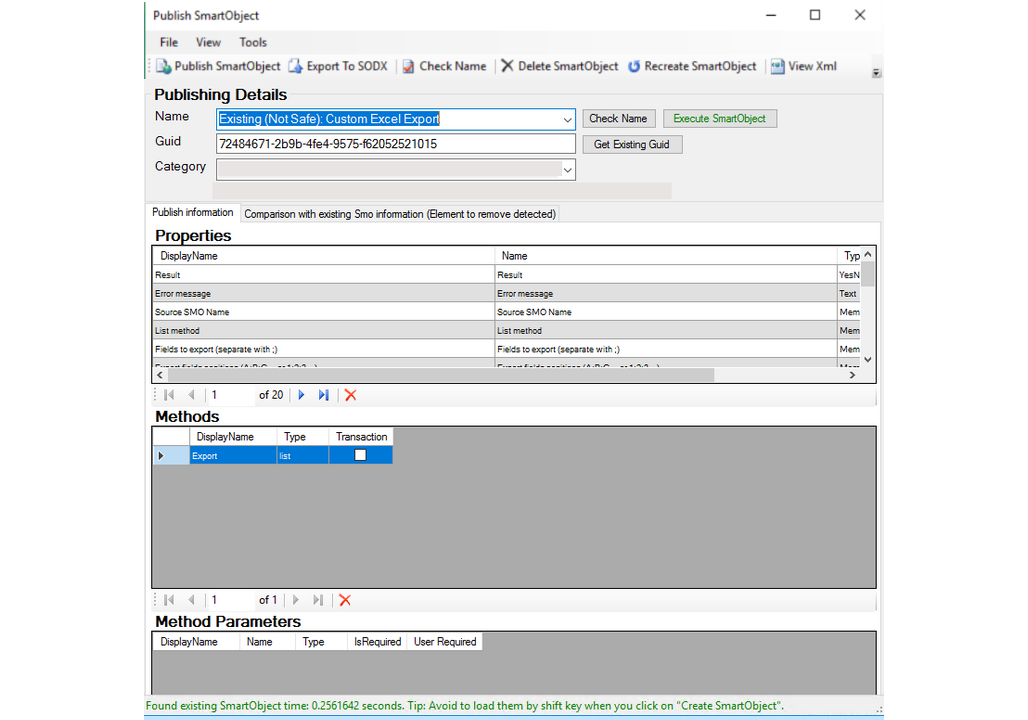
Then click on “Publish SmartObject”.
Execute the SmartObject.
We will now test our method to export our data. Go to the “SmartObject Explorer” section , then go to the category where you published your SmartObject , right click on the SmartObject and choose “Execute SmartObject”.
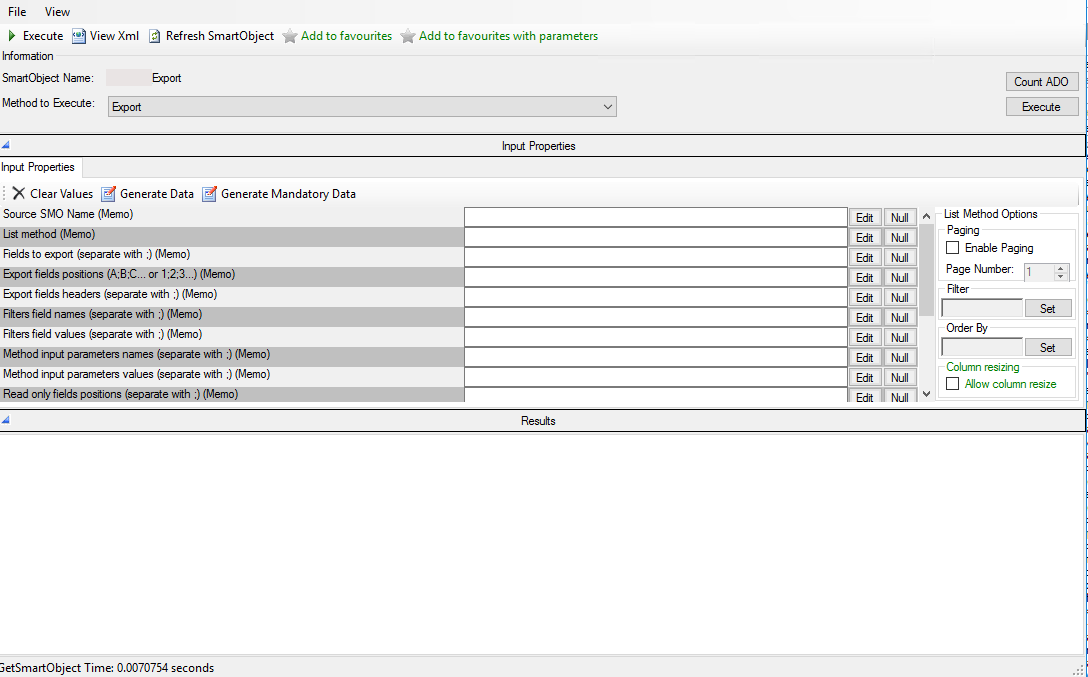
Filling in the following fields:
- Source SMO: Fill with the name of the SmartObject that will generate your data to export. In other words, it is the data returned by this SmartObject that we want to put in Excel format.
- List method: Fill with the name of the method of your SmartObject which will generate your data. (exemple: List)
- Fields to export: Fill with the different fields you want to export and don’t forget to sperate each field with “;”.(Name of SmartObject properties entered in Source SMO.)
- Export fields headers: Fill with the different headers you want for yout export and don’t forget to sperate each header with “;”.(In the same order as the previous property.)
- Method input parameters names: Fill with the input parameter names for the method you have selected and don’t forget to separate each name with “;”.(Name of SmartObject parameters entered in Source SMO.)
- Method input parameters values: fill with the input parameter values for the method you have selected and don’t forget to separate each value with “;”.(In the same order as the previous property.)
Advanced properties are available:
- Filter field names: To filter on properties instead of parameters.
- Filter field values: Properties values.
- Read only fields position: To set columns to read only mode.
- Password protection: To protect the export with password.
- Export file name: Exported file name.
- Positions of drop down list: To add drop down lists.
- Values of drop down lists: Drop down list values.
- Template file: Template file to export.
- Data sheet name: Name of the sheet where data will be added.
And press Execute and Taaadada !
Thanks for stopping by here.
I will be back 😎
Thank you for providing us the information about broker excel export,
I have a doubt regarding changing of template in which the smo is already generated using the service broker and data is also generated. Can you help me or suggest me a solution for changing the template. Highly appreciated for your replay.