
Backup a SQL database in a single click is now possible throught your K2 forms. You just have to install the appropriate broker service. For more information read the article until the end 🙂.
Deployment of the broker service
1. Download the DLL.
Click Here to download your DLL and unzip the zip file you would get.
2. Place the DLL file in the ServiceBroker folder of the K2 installation directory (default C: \ Program Files (x86) \ K2 blackpearl \ ServiceBroker)
NB: When updating a broker service, the DLL file to replace will be blocked by the operating system (and therefore not replaceable). It is then necessary to restart the service K2 blackpearl to do the manipulation.
3. Use the SmartObject Service Tester tool, available in the K2 bin directory (default: C: \ Program Files (x86) \ blackpearl \ Bin \ SmartObject Service Tester.exe) to install the Broker
4. Select Register ServiceType in order to choose the broker to install. For this case: BackUp.Service
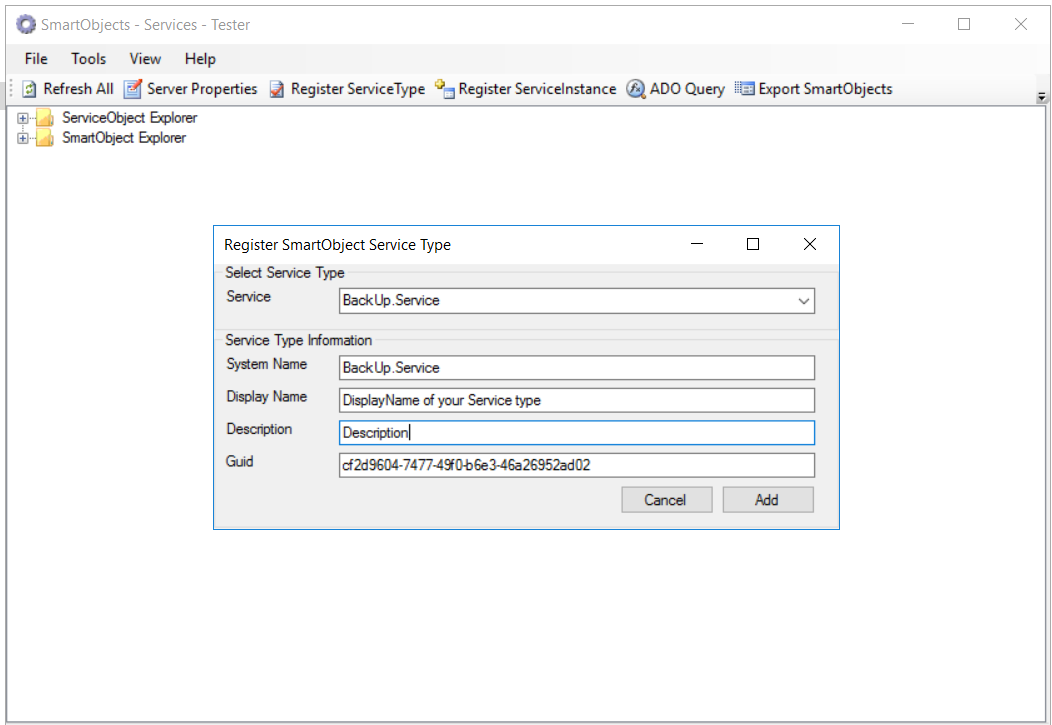
- Service: Locate the deployed service
- System Name: You can leave the default name or edit it
- Display Name: this is the display name of your service, ie the one that will be visible
- Description : optional, gives an overview of the role of the service
- Guid : leave the default
Instantiation of the broker
After clicking Add a new line appears in the ServiceObject Explorer. The Type Service has been created (referenced at the K2 server level) so the “connector” becomes usable.
1. Now create an instance of this service: Right-click> Register ServiceInstance
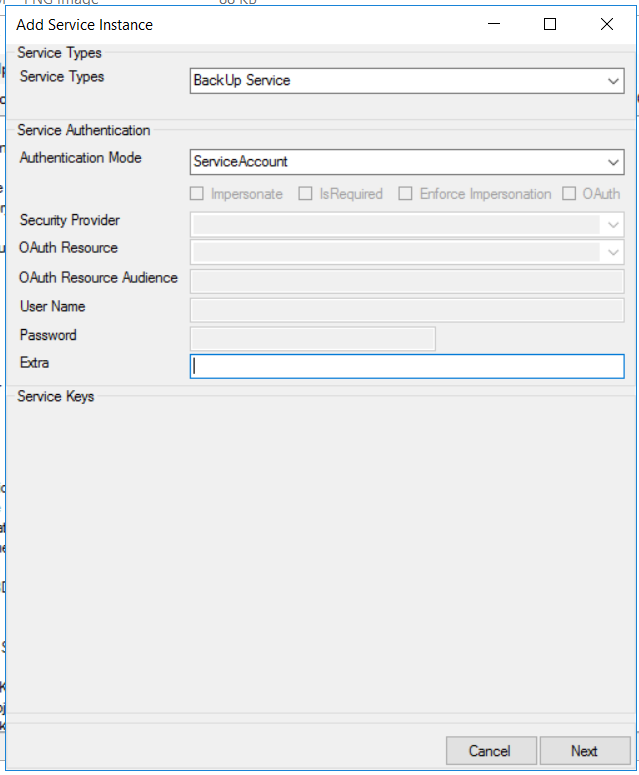
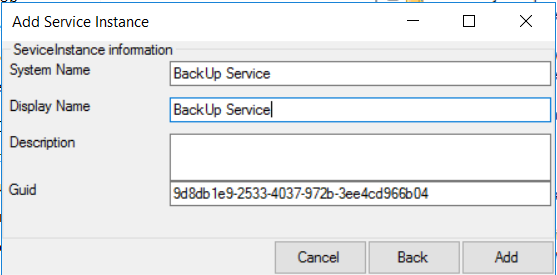
2. Click on Next (the configuration can be modified without problems later if necessary) then fill in the System Name and Display Name in the pop-up that appears (this is the name of the broker instance).
3. Click on Add
Creation of the SmartObject
- Generate a SmartObject by right-clicking on the SmoFile service then Create SmartObject
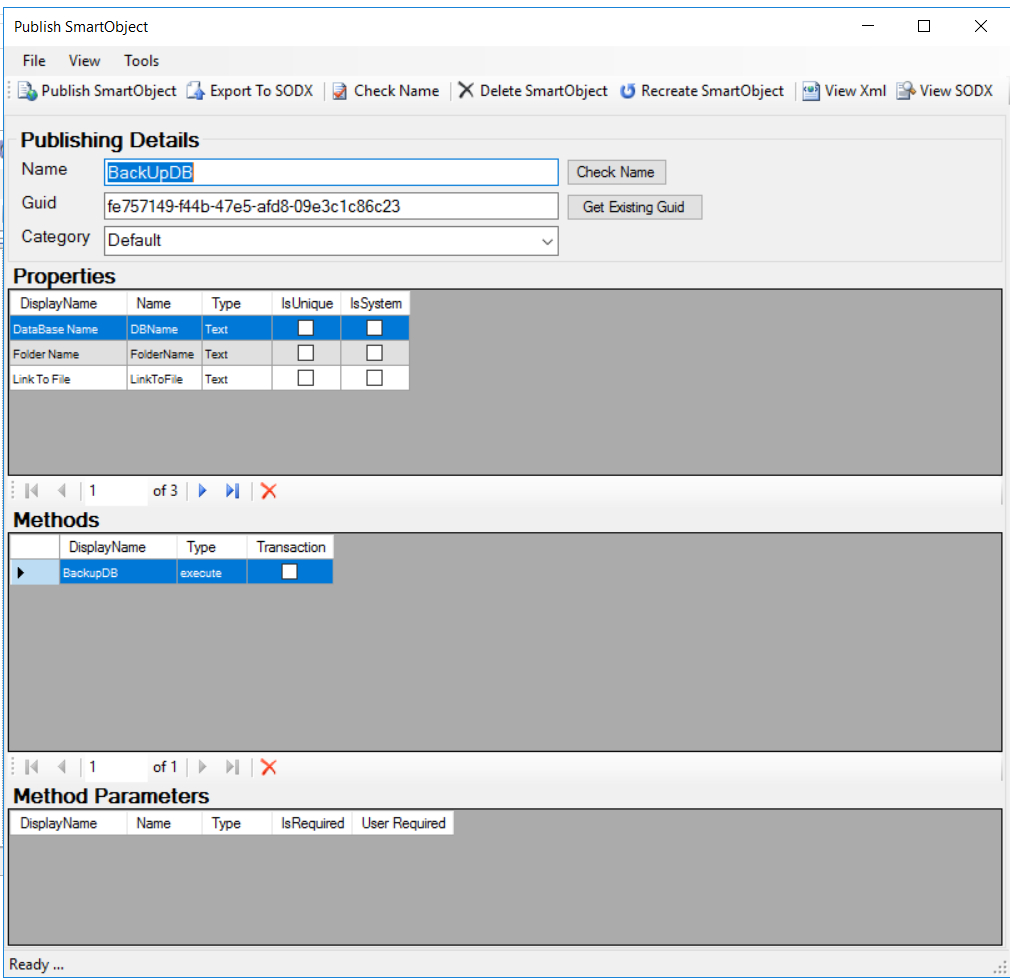
- On the Name field, enter a Name or leave the default name
- On the Category field, choose the category where your SmartObject will be placed
- Click on Publish SmartObject
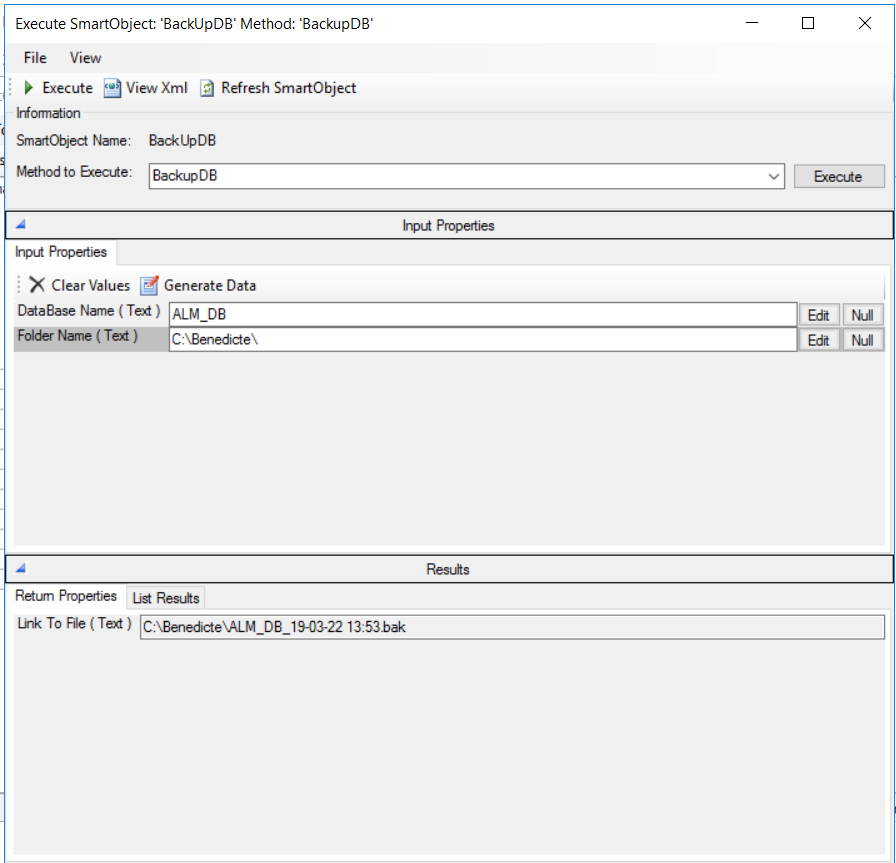
Execution the SmartObject
1. In the SmartObject Explorer folder, navigate to the folder where you published your SmartObject (For this case: Default)
2. Right-click on SmartObject> Execute SmartObject
3. On the DataBase Name field, enter the name of the database you want to back up
4. On the Folder Name field, enter the path where the BackUp file will be saved (on the K2 server)
5. Click on Execute: The link to your BackUp file will appear in the Result box
We arrive at the end of this article. I hope he helped you.
If you have any questions, leave a comment.
See you soon 🙂 !!!