
If you read this article, it would mean that it seemed necessary to you to deploy and use the Control « Digital Signature ». « DigitalSignature » is a community control that can be integrated into our SmartForms and allows to make drawings (digital signatures, or other drawings).
I hope with all my heart that this article will make you want to use it 😉
To deploy it you must:
- Download it
- The install
- Add it to the form
- Save Signature
- And finally display the saved signature
Downloading
The latest version (v3) of the control is downloaded from http://community.k2.com/t5/K2-blackpearl/Digital-Signature-v3/ba-p/93216
Installation
After unzipping the downloaded file, the following tree is accessed.

The Source Directory contains the solution for those who want to help improve control. And the “Deploy” directory that contains the files needed to install the control is the one we are interested in
Deploying SmartObject “DigitalSignature-SmartObject-SmartBox_Service”
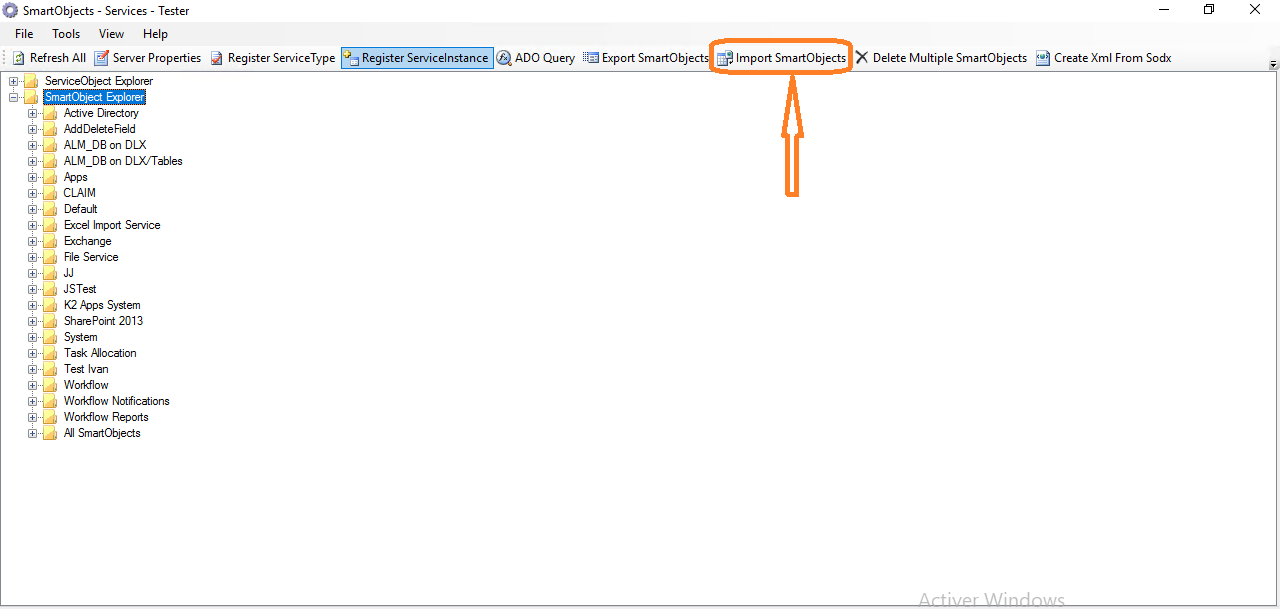
To deploy this SmartObject which is in the directory “Deploy”, You have to open “SmartObjects Services Tester” Then click on Import SmartObjects
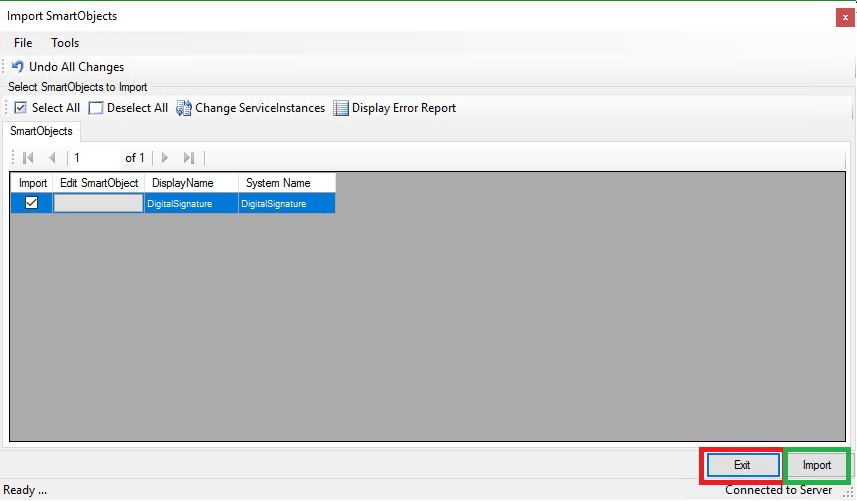
We choose the SmartObject to deploy then we click on “OK”

Click on Import to Deploy
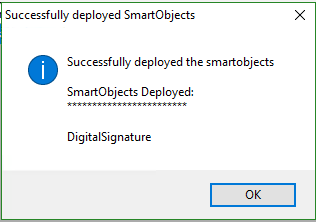
The SmartObject is deployed
 Control installation
In the “Release” directory, there is a .bat file named RegisterCustomControl. To install the control it is necessary to modify this file. The file contains 2 lines that copy the file In the Runtime and in the Design of K2. So the first modification is to specify the absolute path of the control DLL
“C:\Bertini\digital signature v3_1.3\k2-sf-digital-signature-control-v3\Deploy\Release\DigitalSignature.dll” in my case

And the second change is to specify the path the installation path of K2 if it is not the default one. Then we save and execute the file as administrator, which marks the end of the installation of the control.
Add to the form
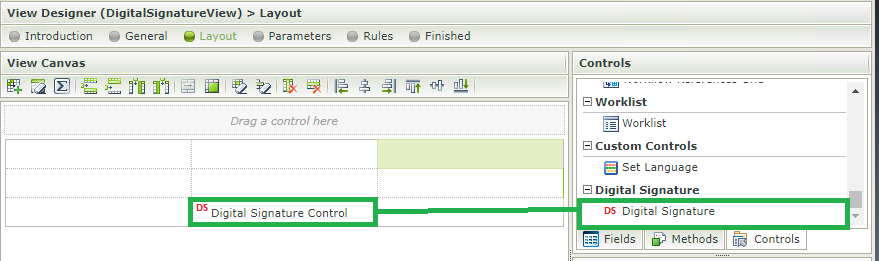
Add control
To use the control we just create a Form or a View and we just drag it
Once it’s done we can modify the properties of the control:
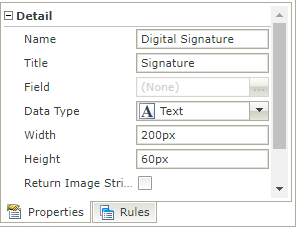
When we try to execute. 
Nothing at all. Just the Title of the signature that appears. In this case it is the “Signature” label
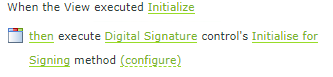
For us to have what we want we need to execute a control method called “Initialize For Signing” when the view is initialized

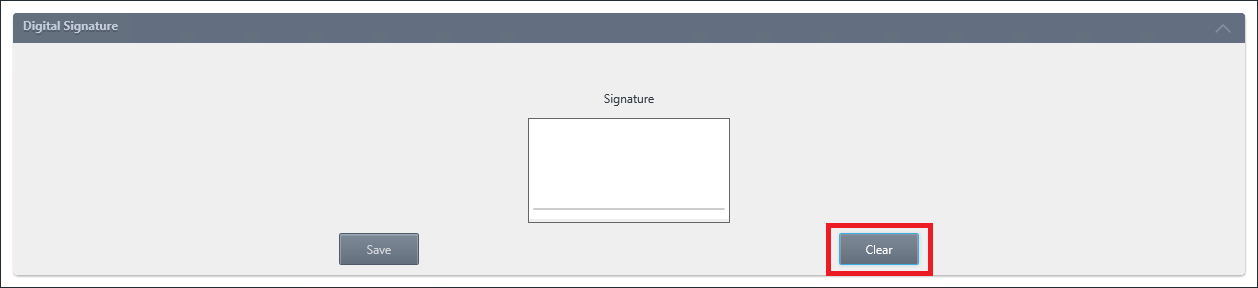
So far we can draw a signature. Great not? 😎 😎 😎
Configure the Clear button which allows you to delete all the contents of the control
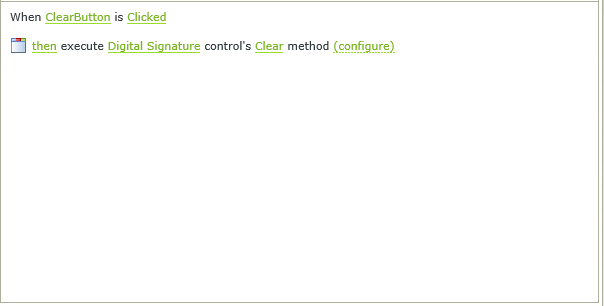
After adding the Button that will erase the contents of the control, we execute the Clear method of the control when we click on the button as shown in this image
Saving the signature in a business object (Save button configuration)
What would we use to draw a signature if we can not store it for later use? Registration of the signature can be done in three ways. If the goal is to store the signature in our business object then we need to create one in advance that will have the fields we are interested in.
For this article, our business object will have all possible fields for any record mode.

Each field of this business object, with the exception of its identifier, represents each of the following three recording methods:
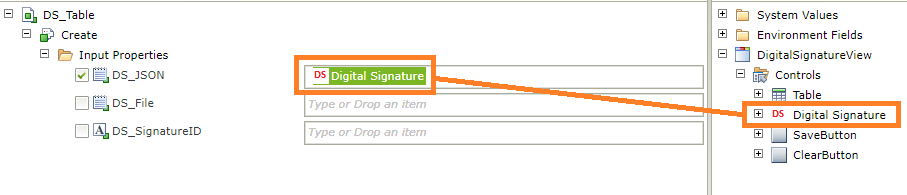
- Generate JSON code from the control and store it in a Business Object.
- Save the signature as a file in a business object.
- Save the Base64 signature in the SmartObject we deployed earlier and store its ID in our business object
JSON
The method of storing the JSON is relatively simple. Just execute the Create method of our business object and store the control in the appropriate field.

Advantages :
- The image is stored directly in the business Smartobject.
- The JSON code is significantly lighter than the Base64.
Disadvantage :
- obligation to use the signature control to redisplay the signature, even read-only.
File
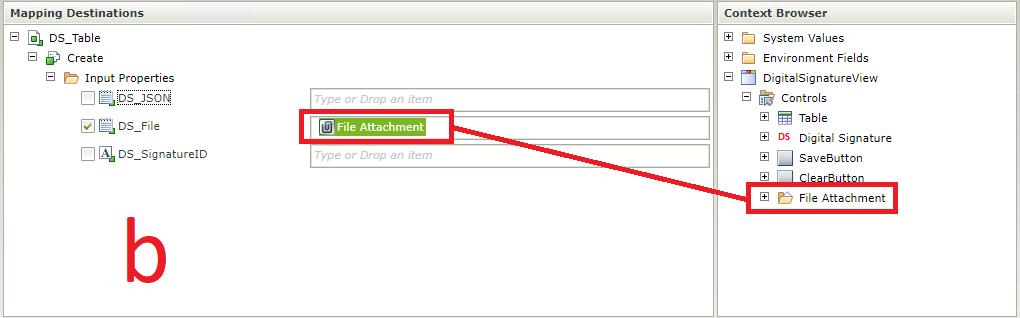
Save the signature as a file in a business object: This method is done in 2 steps.
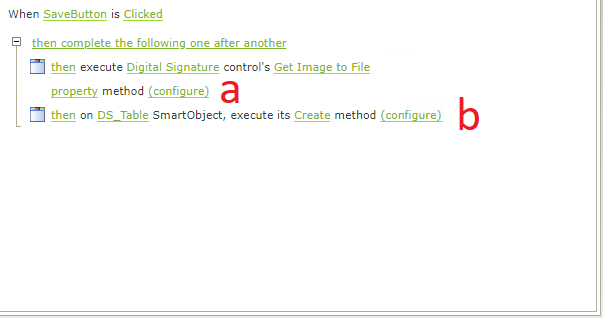
- Execute the control method named ‘Get Image to File Property’ which takes no parameters but returns a file (the signature) that is mapped into a File Attachement hidden control
- Then, store this File Attachment in our business object

Finally we have this as a rule on the Save Button
Advantages :
- Like the JSON code, the image is stored directly in the business SmartObject.
- The image is stored as a file, which makes it easy to download to your own computer.
Disadvantage:
- The image is stored as a file, which does not allow to display it directly on the form. The user is obliged to download the file for later to open it in his computer
Base64
Save the signature in Base64 in the SmartObject we have deployed: like the previous one, this method is done in 2 steps:
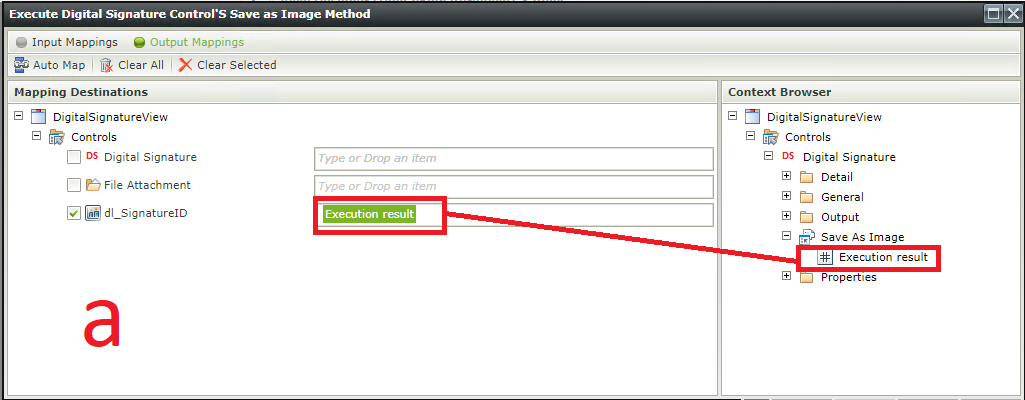
- Run the control method named ‘Save As Image’ which takes two optional parameters. The FQN (Fully Qualified Name) which is a string representing the full name of the user and the Form URL which designates the form that has been signed.
- Then, store this File Attachment in our business object

Advantages :
- A Smartobject SmartBox with all the fields needed for storing signatures
- The image is saved as Base64 code, which allows to display it like any other image by using a concatenation with the tag <img src=”” /> du HTML
disadvantages :
- The signatures are stored in a Smartobject Smartbox.
- The image is saved as Base64 code, more disk space intensive than JSON.
View a signature stored in a business object
Each recording method corresponds more or less to a display method
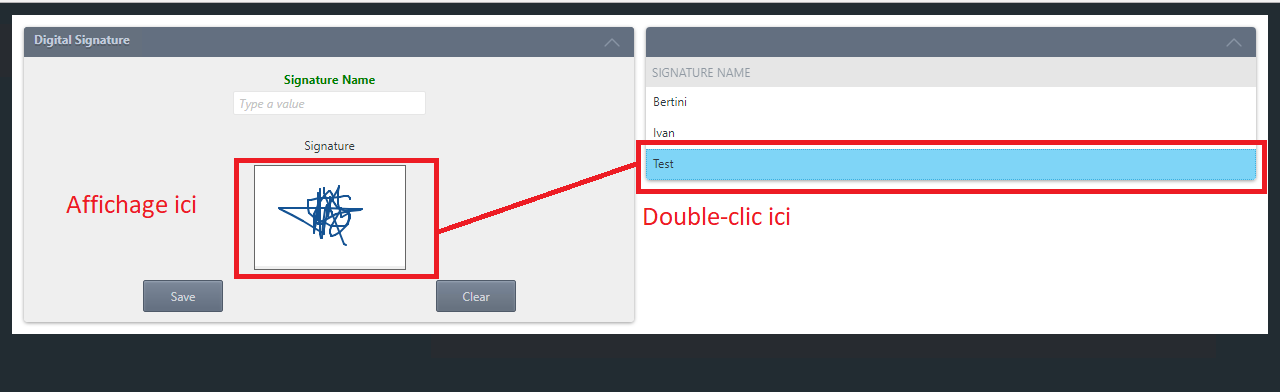
NB: In this case we have created a list of signatures. To display a signature, double-click on the name of the signature to display
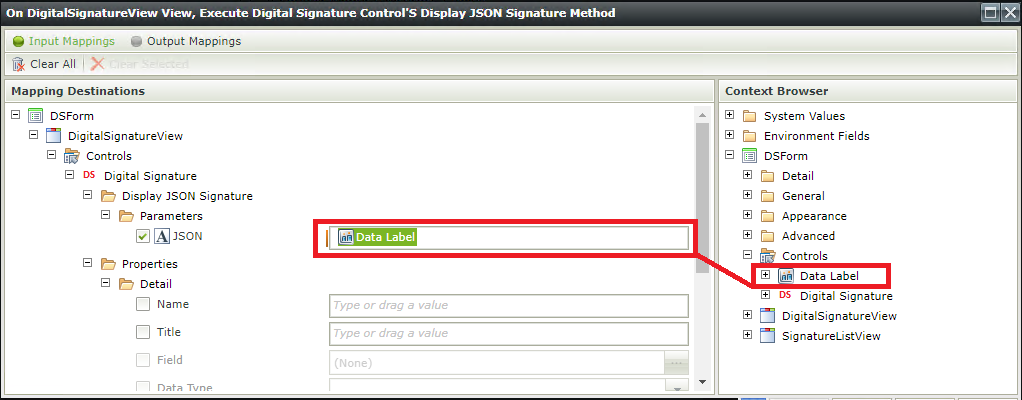
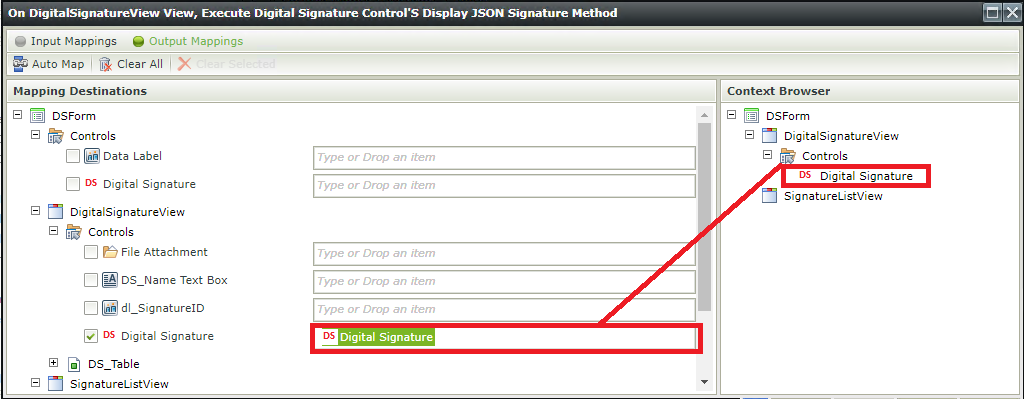
If the signature is stored in JSON
The display is done in two steps:
- A Transfer Data that loads the JSON code of the chosen signature into a hidden control (a Data Label in our case)

- And we execute a control method named ‘Display JSON Signature’ which takes as parameter the JSON code previously stored in a hidden control. Then return a control called Digital Signature that maps to the control of the same name in our view
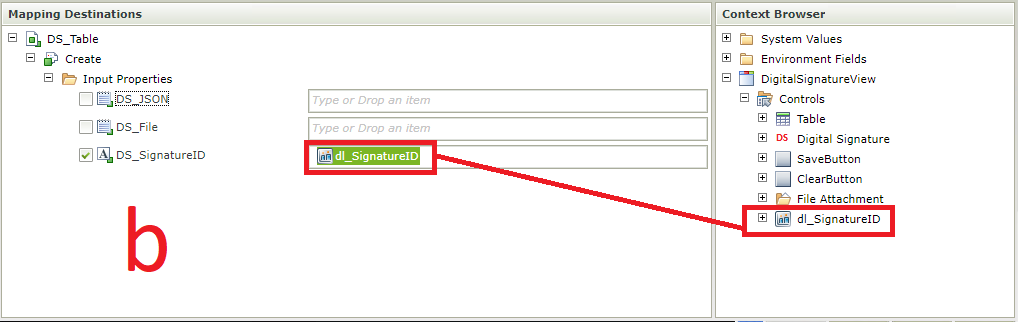
If the signature is stored in SignatureID in our business object (Base 64 in the SmartObject DigitalSignature)
In this case, there are 2 display methods:
- The first looks exactly like the previous one (JSON)
- A Transfer Data that loads the ID of the chosen signature into a hidden control
- And we execute a control method named ‘Display Signature Image’ which takes as parameter the ID stored previously in a hidden control. Then return a control called Digital Signature that maps to the control of the same name in our view
- The second method in our case, will be the most complicated. It is done in 3 steps
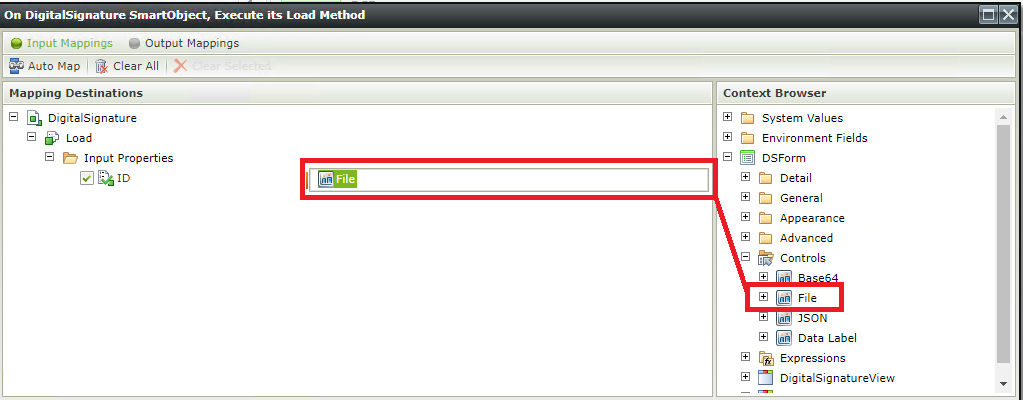
- A Transfer Data that loads the ID of the chosen signature into a hidden control (File)
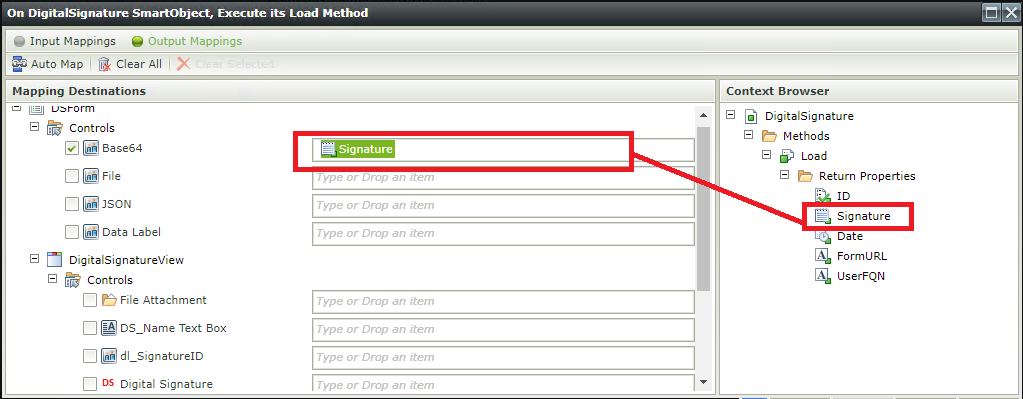
- We execute the ‘Load’ method of the SmartObject DigitalSignature which will take the ID stored previously in the hidden control (File) and return the Base64 code which is stored in another hidden control (Base64)
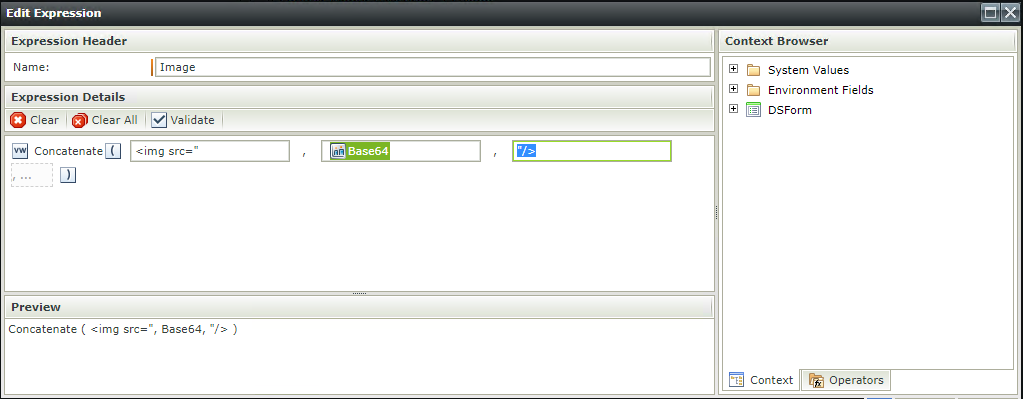
- To display the image whose Code Base64 is already in the Data Label ‘Base64’ we create a Hidden Data Label (Encore Encore) whose expression will be the concatenation of <img src=” + Base64 + “/>
If the signature is stored as a file
Execute the Read, Load, List, or Get List method of our business object and map the returned file to a “File Attachment” control
Here we are at the end of this article I hope you liked it and that it was useful to you. See you soon for more adventures K2 🏃🏃🏃🏃🏃
Hi,
cool article. After 5 Year there is further no official solution from Nintex for a easy “sign/draw” Control.
Where can I download this? Because http://community.k2.com/t5/K2-blackpearl/Digital-Signature-v3/ba-p/93216 it don’t works anymore and I can find nothing in Nintex Comunity.
Many thanks,
Lavinia