
Document signing is a common task in many businesses. However, manually signing each document can be tedious and time-consuming. Fortunately, with the integration of Power Automate and DocuSign, you can automate and streamline this process. In this article, we will guide you through the steps to sign a document using Power Automate and DocuSign, enabling you to save time and effort.
Note:
Before getting started, make sure you have an active account on both Power Automate and DocuSign. If you don’t have one, you will need to sign up and set up these services according to your needs. You can click on the following links to sign up for DocuSign: Inscription à DocuSign
Step 1: Setting up the document template
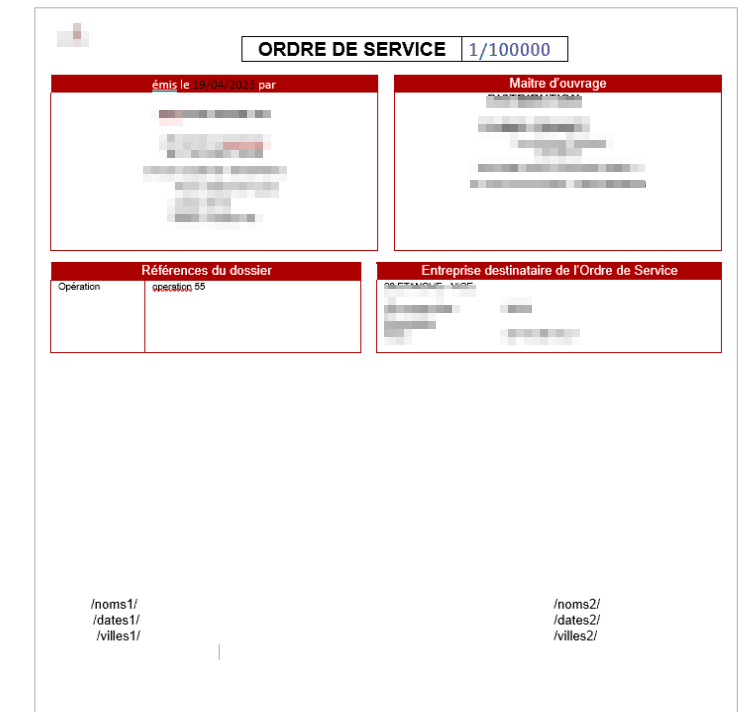
In order to insert the different electronic signatures into our document, we need to configure their placement using markers. For this test, we will insert the following markers: /names1/, /dates1/, /cities1/ and /names2/, /dates2/, /cities2/. These markers will be replaced with the name, date, and city of signer 1, and with the name, date, and city of signer 2.
Here is what our document will look like after inserting the markers:
Note: This document template must be saved in a SharePoint library.
After configuring the document for signing, the next step is to create a SharePoint list that will allow us to track the progress of the electronic signature on our document. In our case, this is the /Document Template Library.
Step 2: Creating the SharePoint list (DocuSignTest)
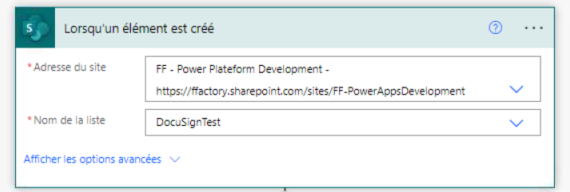
To trigger the process of sending the document for signing in DocuSign, we need a SharePoint list. To accomplish this, we have created a SharePoint list called “DocuSign Test.”
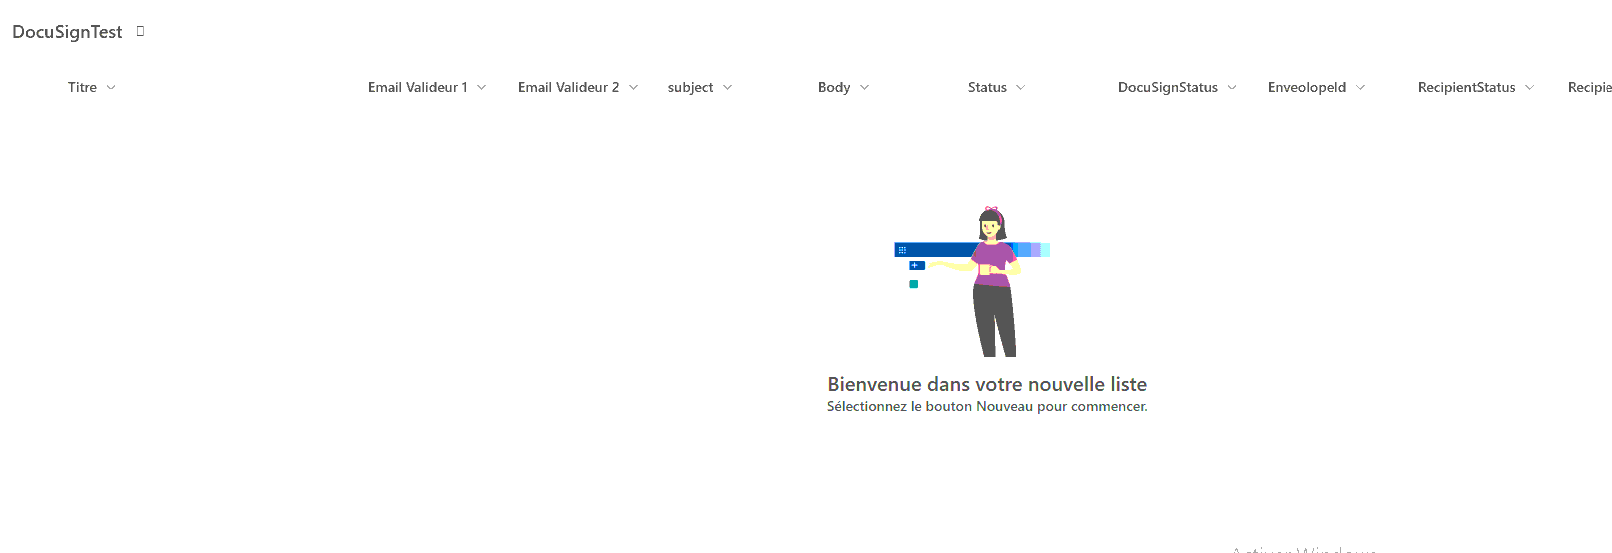
In this list, we will store the signers’ emails, email subject, email body, document status, DocuSign status, envelope ID, recipient status, and signer status.
Step 2: Creating the flow to send the document to recipients via DocuSign
Let’s create a flow and name it “DocuSign_SendDocument.” This flow will be triggered when an item or row is added to the “DocuSign Test” list.
Note: You can add an item manually directly from the SharePoint list or automatically from PowerApps or Power Automate. For our test, we will do it manually. Therefore, let’s add the following details to the “DocuSign Test” SharePoint list:
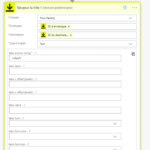
- Email: [email address of the signer]
- Subject: [email subject]
- Body: [email body]
- Document Status: [status of the document]
- DocuSign Status: [status in DocuSign]
- Envelope ID: [envelope ID]
- Recipient Status: [status of the recipient]
- Signer Status: [status of the signer]
These details will serve as the input for sending the document to the recipients using DocuSign.
Step 2: Creating the flow to send the document to recipients via DocuSign
Let’s create a flow and name it “DocuSign_SendDocument.” This flow will be triggered when an item or row is added to the “DocuSign Test” list.
Note: You can add an item manually directly from the SharePoint list or automatically from PowerApps or Power Automate. For our test, we will do it manually. Therefore, let’s add the following details to the “DocuSign Test” SharePoint list:
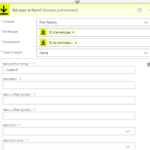
- Title: Test Document
- Validator 1 Email: [email address of validator 1]
- Validator 2 Email: [email address of validator 2]
- Email Subject: Sign this document
- Email Body: Dear validators, please review and sign the attached document.
These details will serve as the input for sending the document to the recipients using DocuSign.

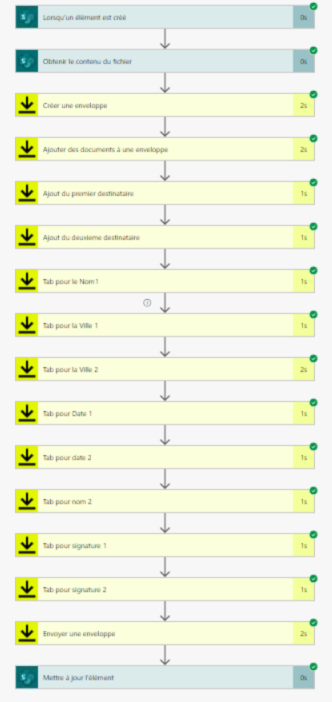
Let’s continue with the creation of the flow for sending the DocuSign document for signature. The flow will be structured as follows:
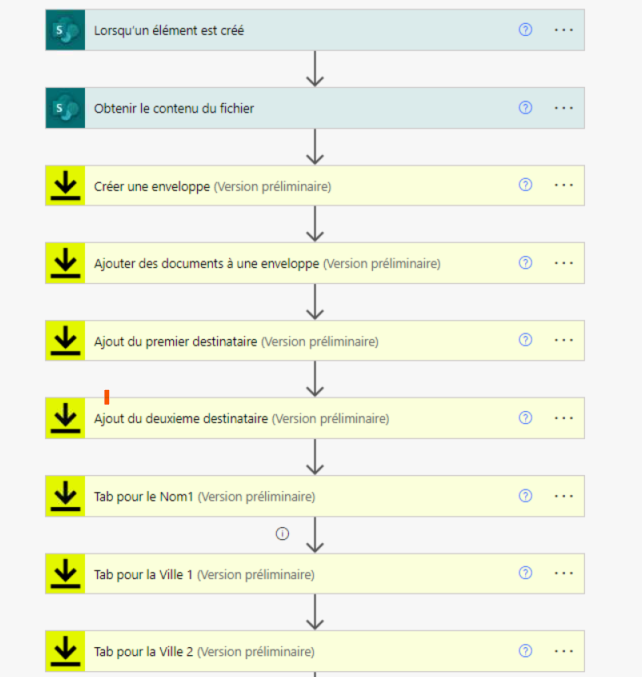
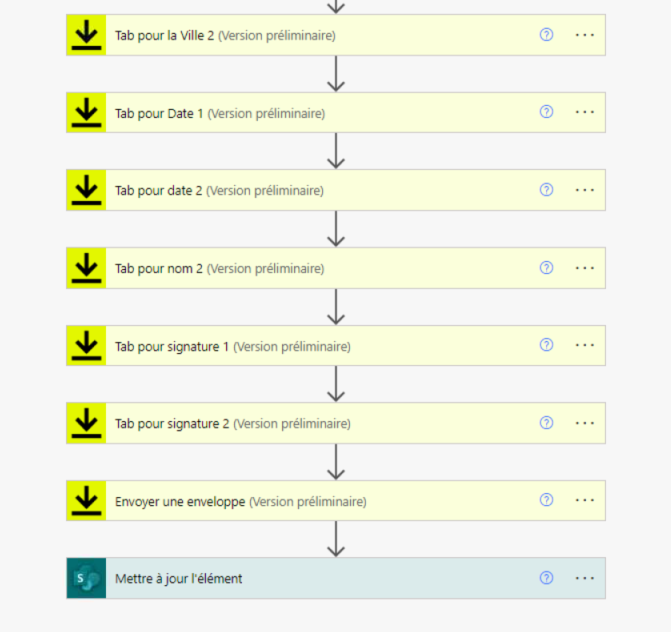
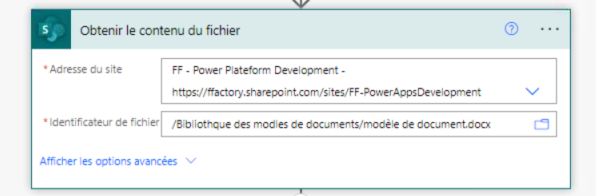
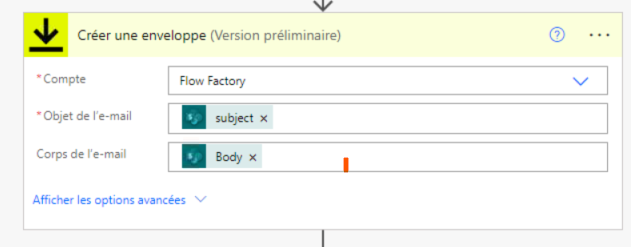


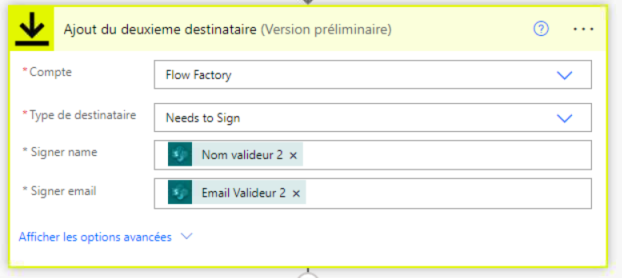
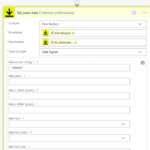


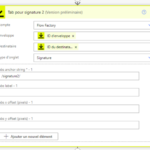
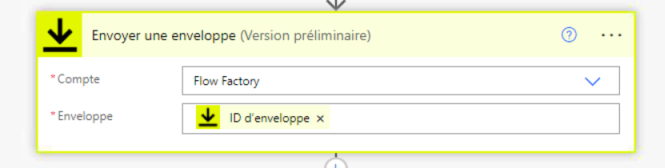
Flow Principle: The flow for sending documents via DocuSign is straightforward to configure. The first step is to trigger the flow when an item in the SharePoint list is created (“When an item is created”). Then, we retrieve the document template from the Document Library (“Get file content”), and create an envelope to store our document (“Create an envelope”). In the envelope, we associate our document (“Add documents to an envelope”). Next, we add the recipients or signers of the document (“Add a recipient to an envelope (V2)”) and add each marker (“Add tabs for a recipient on an envelope”). After performing all these actions, we send the envelope for signature (“Send an envelope”). Finally, we update our SharePoint list to track the progress of the electronic signature (“Update item”).
By following these steps, the flow will automate the process of sending documents for signature through DocuSign and keep track of the electronic signature progress in the SharePoint list.
Step 3: Creating the flow for signed documents
Once the flow for document signing via DocuSign is triggered and the recipients receive the document for signature, the next action is to finalize the signing process with a flow that we will set up. This flow is called “DocuSign_DocumentSigned.” It will be structured as follows:
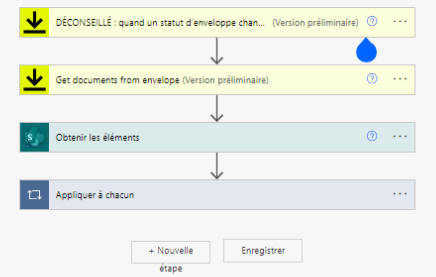


Flow Explanation:
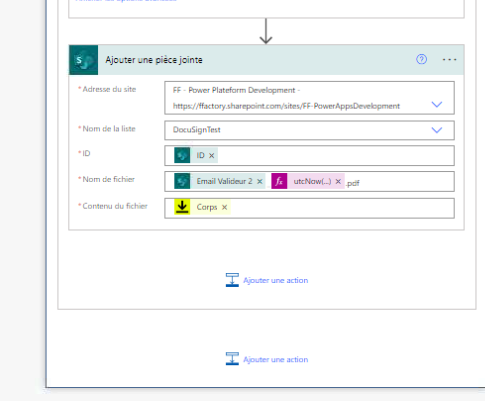
This flow is triggered when the status of the envelope changes. We then retrieve the signed document to update the status of the items in the SharePoint list, and finally, we attach the signed document as an attachment.
In conclusion, to configure the electronic signature of a document via DocuSign and Power Apps using a document template, you need to follow these steps:
- Create your document template and insert markers within it.
- Save your document template in a SharePoint library.
- Create a temporary SharePoint list to track the signature progress of your document.
- Create a flow to send the document to DocuSign.
- Create a flow to finalize the document signature in DocuSign and save the signed document.
By following these steps, you can automate and streamline the document signing process, saving time and effort for your organization.
Test
- Create a record in the DocuSign Test list.

2.Document signing via DocuSign.
The flow is executing successfully. Please refer to the figure below:
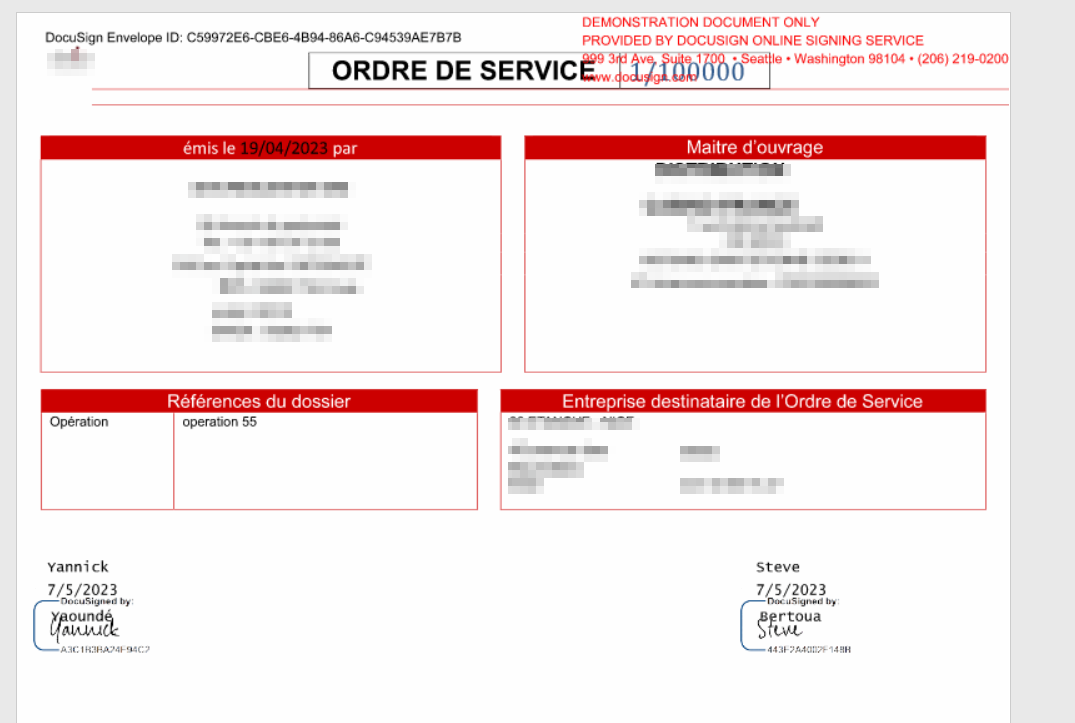
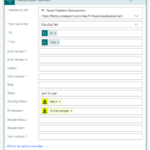
You can now proceed to the respective email addresses to sign the document through DocuSign. Here is the final document after signature:
I hope this article has been helpful to you. Feel free to ask any questions in the comments if you have any areas of uncertainty. 😉