
Any K2 developer has already, at least once in their lifetime, needed to remove the selection on items in a list view. This for a single solution is often offered to us: refresh the view . In this article, we’ll see how to remove this selection without having to refresh the entire view.
“But to refresh the whole view, it works well, right? », Will you say to me 😊. I would answer yes. However, for a view mapped to a (very) large data source, the “Refresh” may cause performance issues on the application. That’s why I’m going to present you a simple and effective way to remove the selection. </ P>
The use case is simple, we have a List view (1), we select an element (2), and we click on a button (3) to remove the selection without refreshing the view. </ p>

Steps
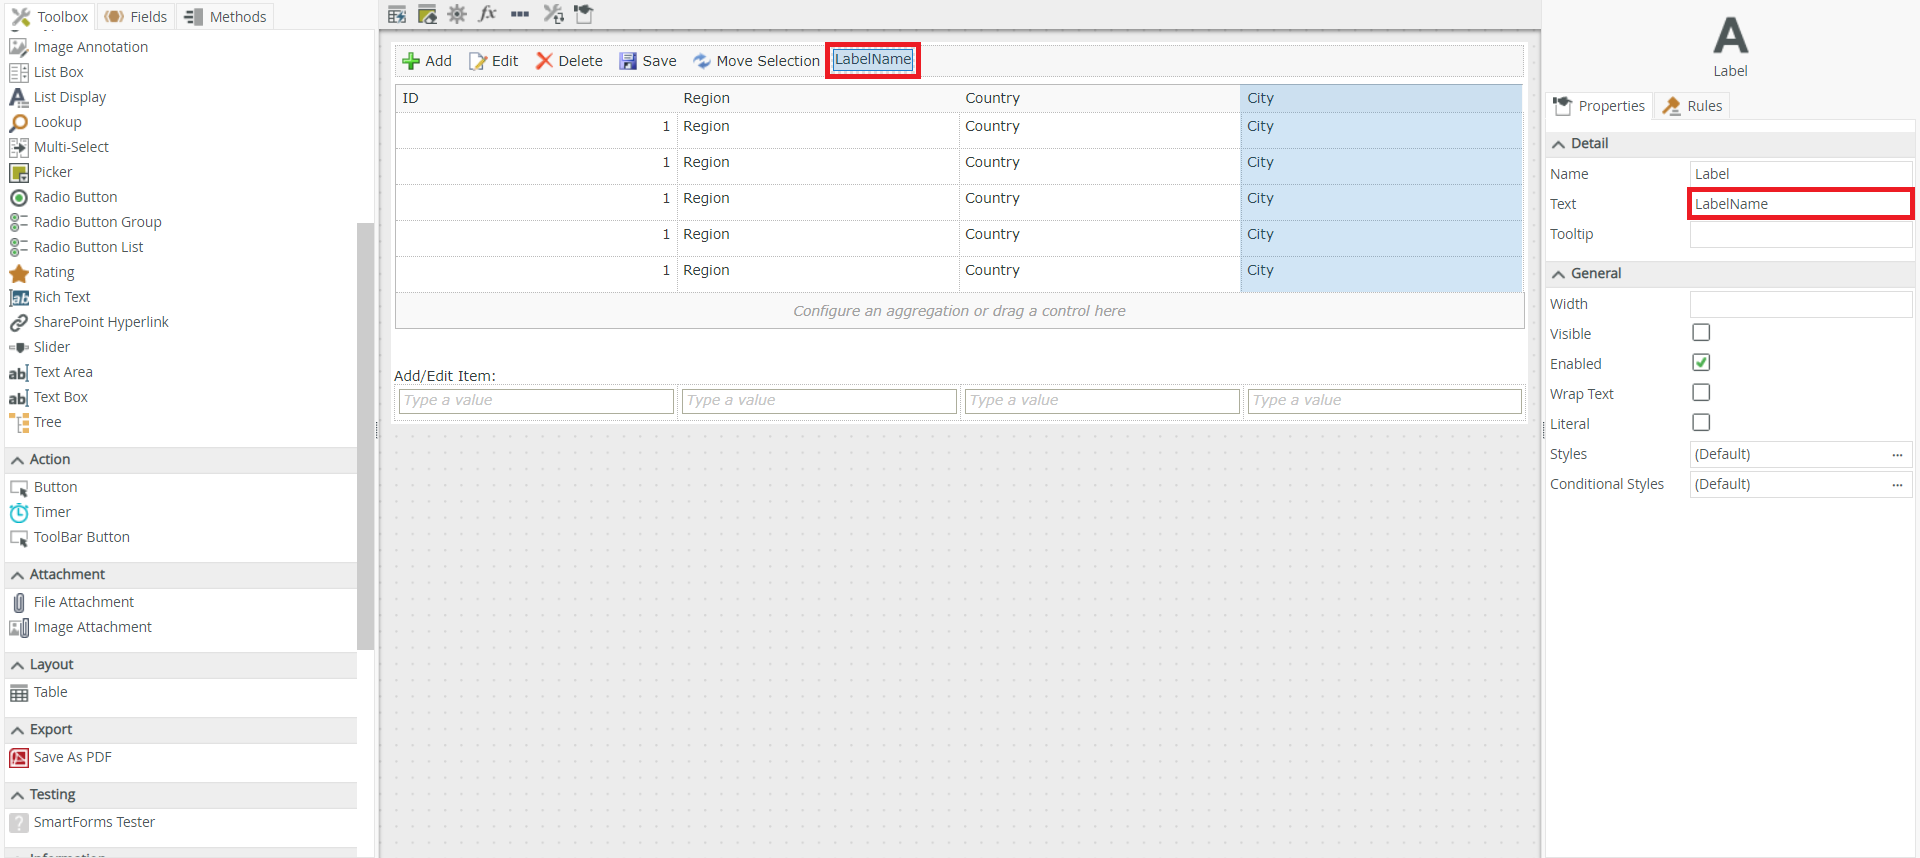
Create a hidden label in the header of the vie
w
The first step is to add a hidden Label to the header of the view (the name of the label must be quite explicit because it is it that will be used in the script
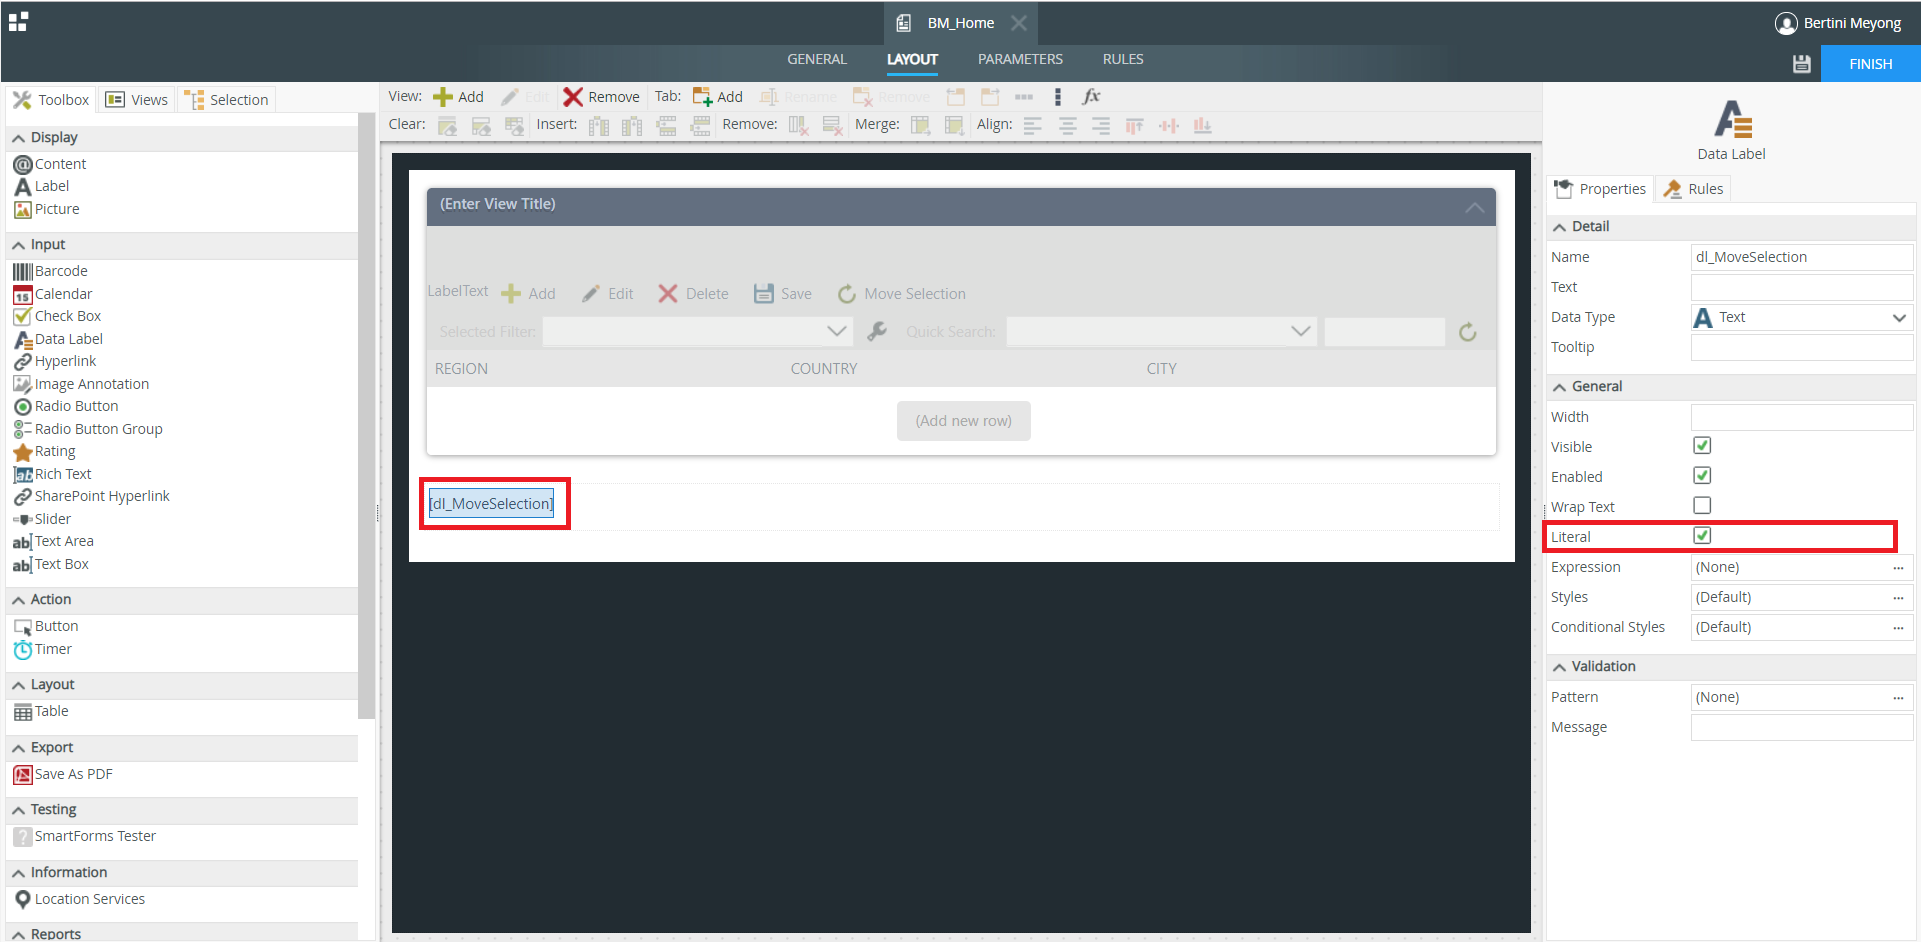
Create a hidden Data Label
Create a hidden Data Label in the Form from which you want to remove the selection. We will call it dl_MoveSelection
.
NB: Something very important to note, the hidden Data Label must be in Literal mode (as in the capture). Otherwise, it will not work.
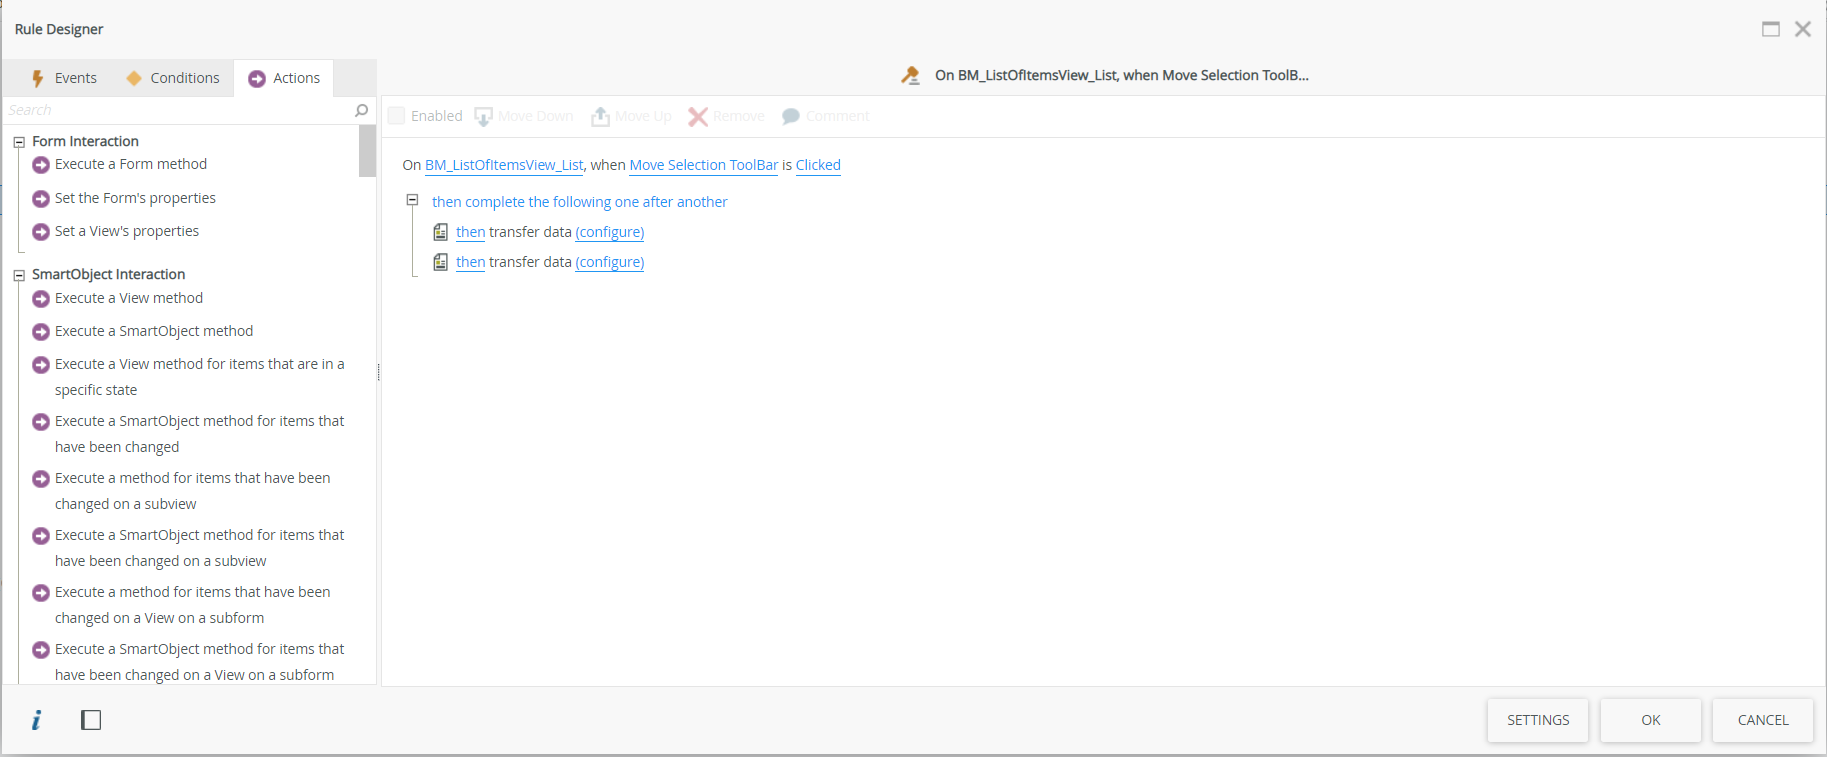
Configure the button
The button configuration is the main part of the entire task. Here you have to do two (02) Transfer Data.
- The first will contain the JavaScript script that removes all selections from the view (while emptying the SmartObject)
- The second to empty the Data Label so that it can be reused.
In our case we used a ToolBar Button named Move Selection
The script to transfer to the hidden Data Label is as follows:
The name attribute of the script takes the value of the hidden label created previously “LabelName” in our case
That is all !