
How to filter Attachments to a SharePoint list on a Canvas PowerApps application?
You are a developer of Low-Code solutions on the Microsoft Power Platform using the Microsoft Power Apps tool to create applications that follow a defined business process, you use Microsoft SharePoint for the permanent backup of your data, it probably happened to you that you wanted for a given step of the process to save files from your application to the corresponding SharePoint list but PROBLEM: you can’t display particular files, all the files are displayed at the same time 😭.
Don’t panic, don’t change your need, change your approach 😉 !
So how to group attachments to a SharePoint list by categories on a Canvas PowerApps application?
Let’s start by talking about uploading files to PowerApps
On PowerApps one of the methods to work with files is to use the Attachments field which doesn’t offer us great possibilities other than uploading files and deleting files. The files contained in this field will be attached to an item in the SharePoint list used for the backup. This is how it works for basic use. If you want to avoid displaying certain files in this field, for example, this is one of the limitations of the Attachment field.
How to filter files in the Attachments field of PowerApps?
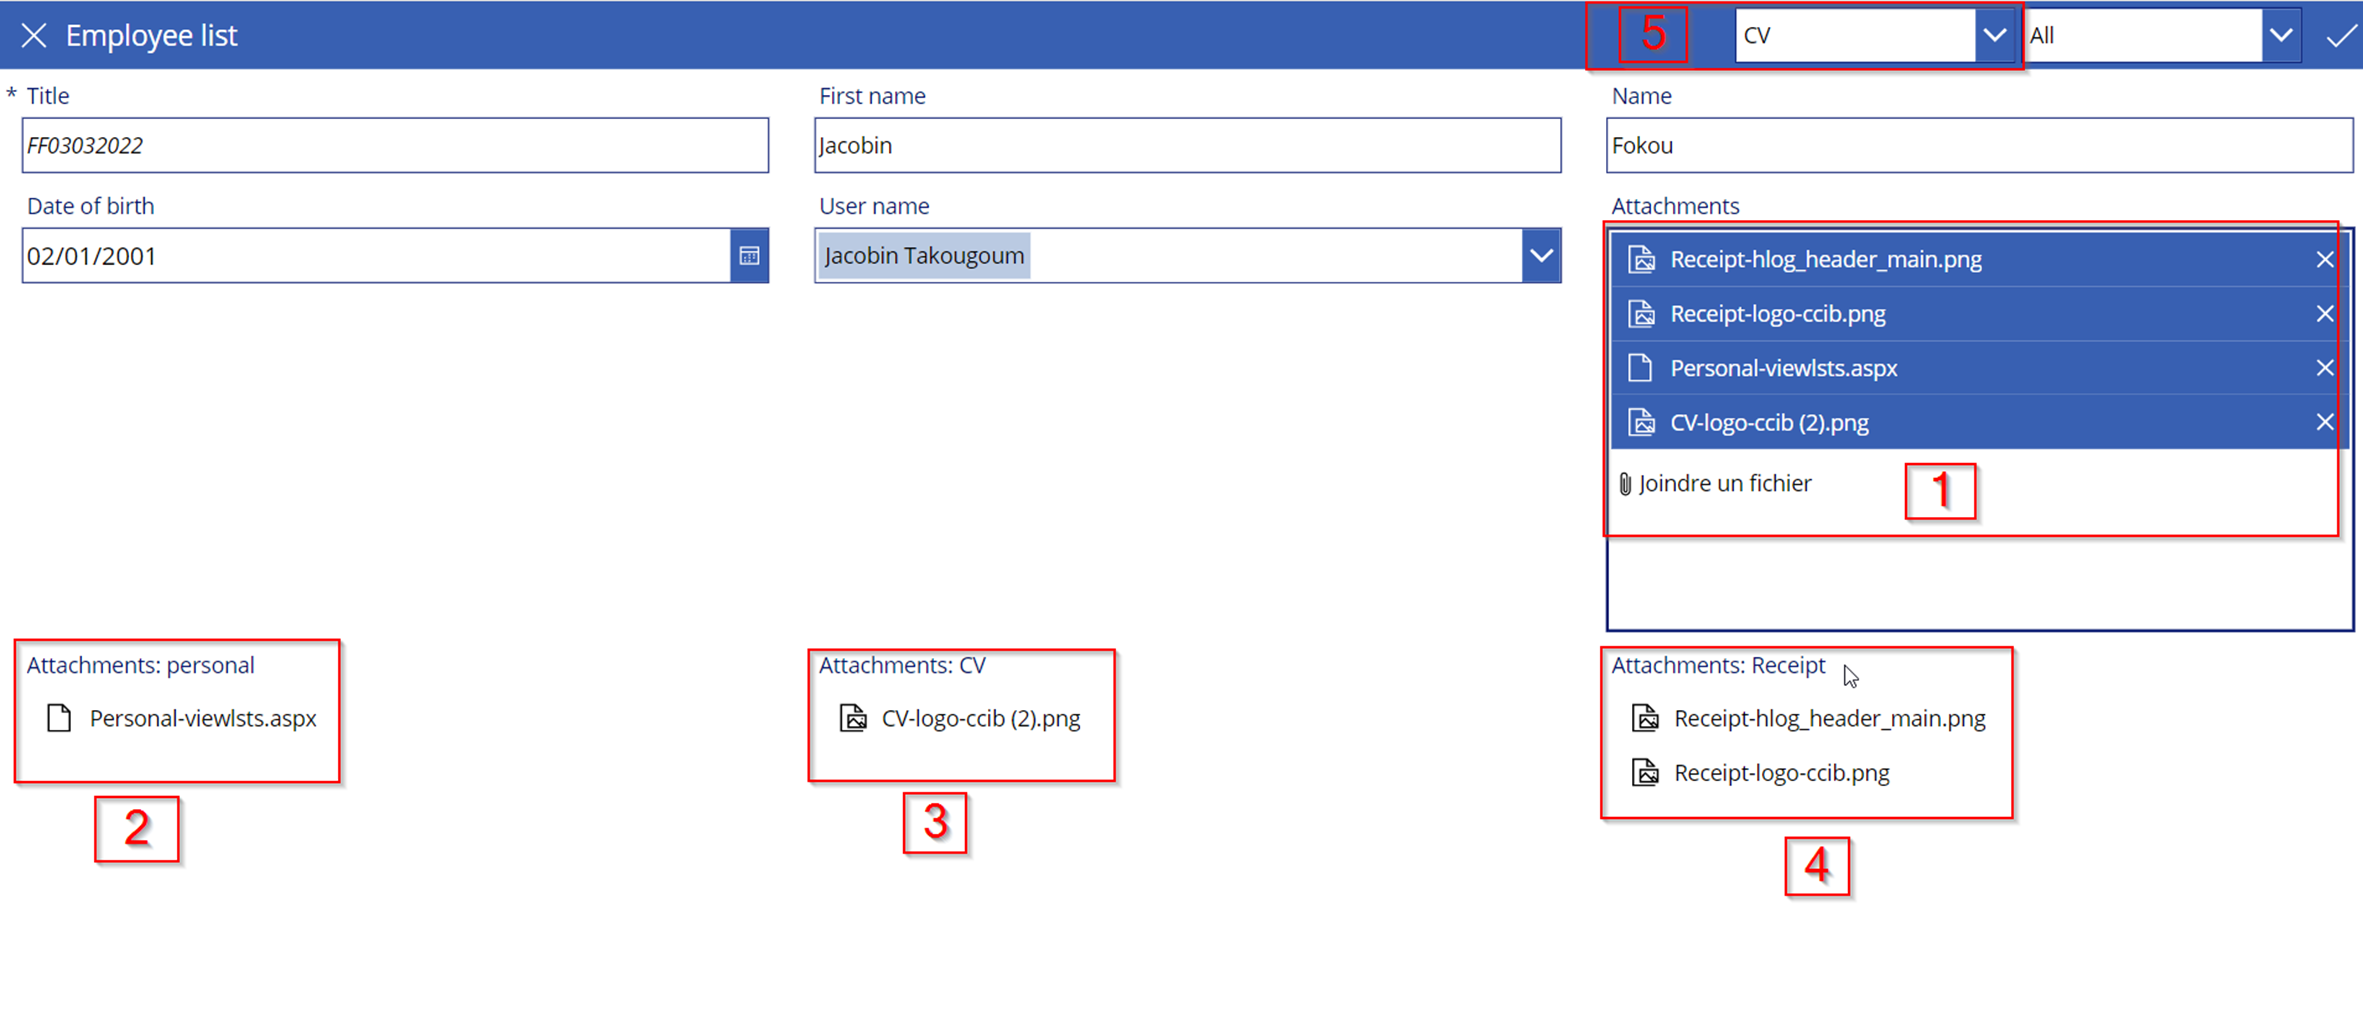
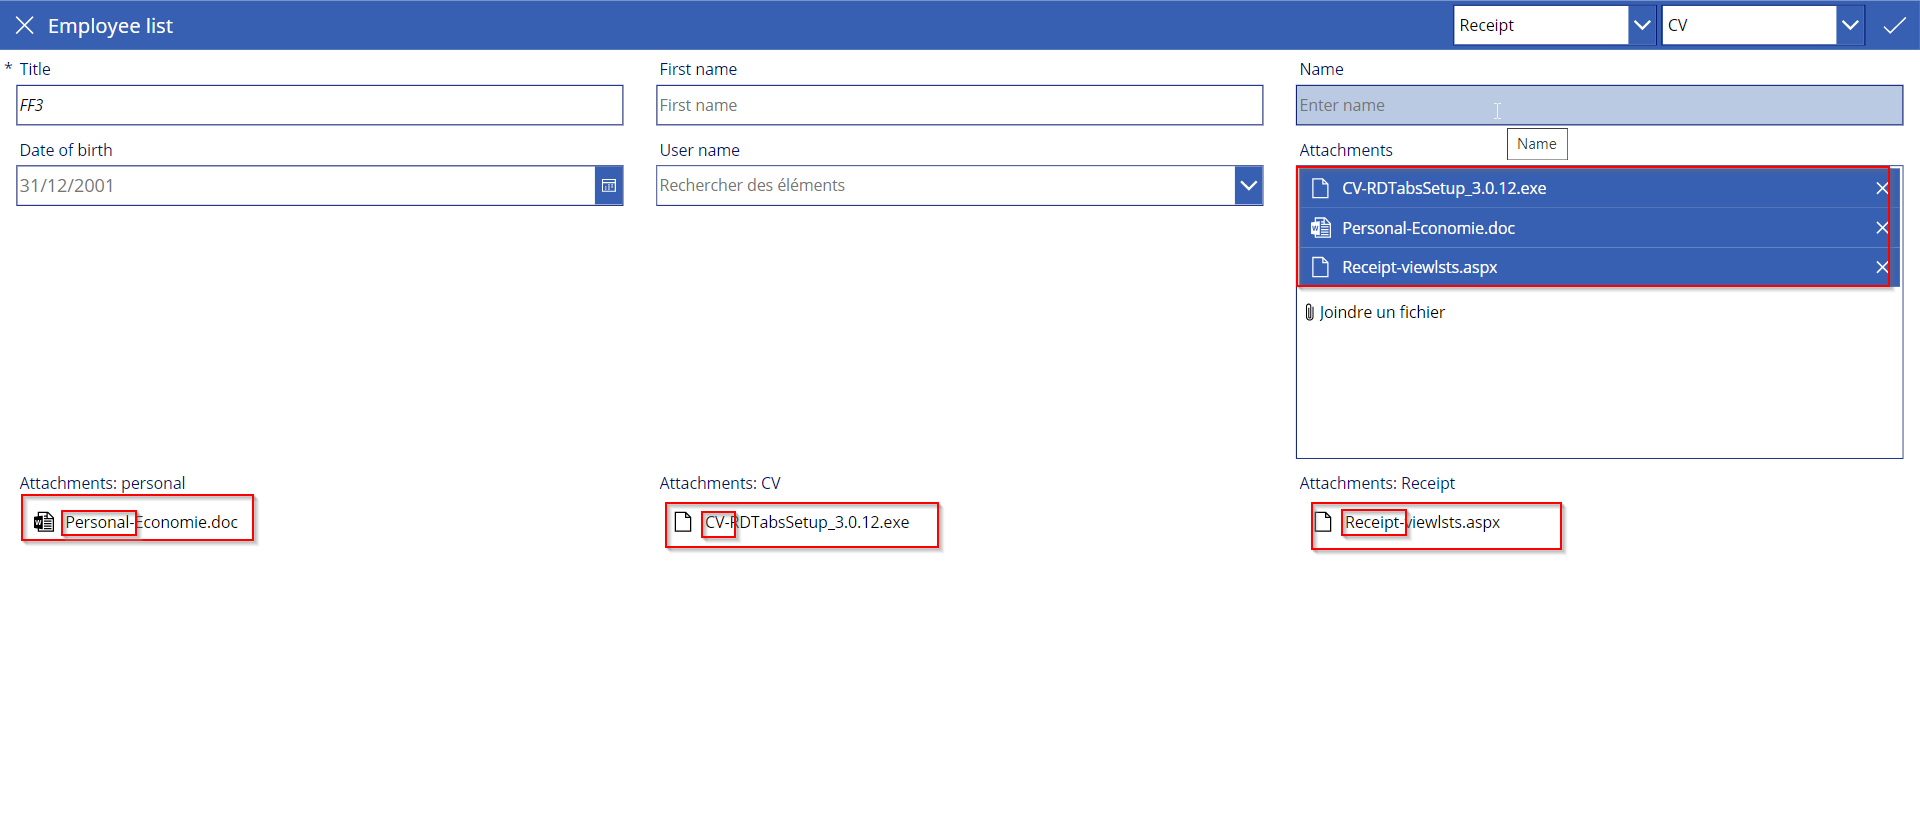
The application we want to make is the following:
1: The main camp that allows us to upload files
2, 3, 4 : The field that allows us to display files of a particular category
5 : Selection field that allows us to select the category of the file to import
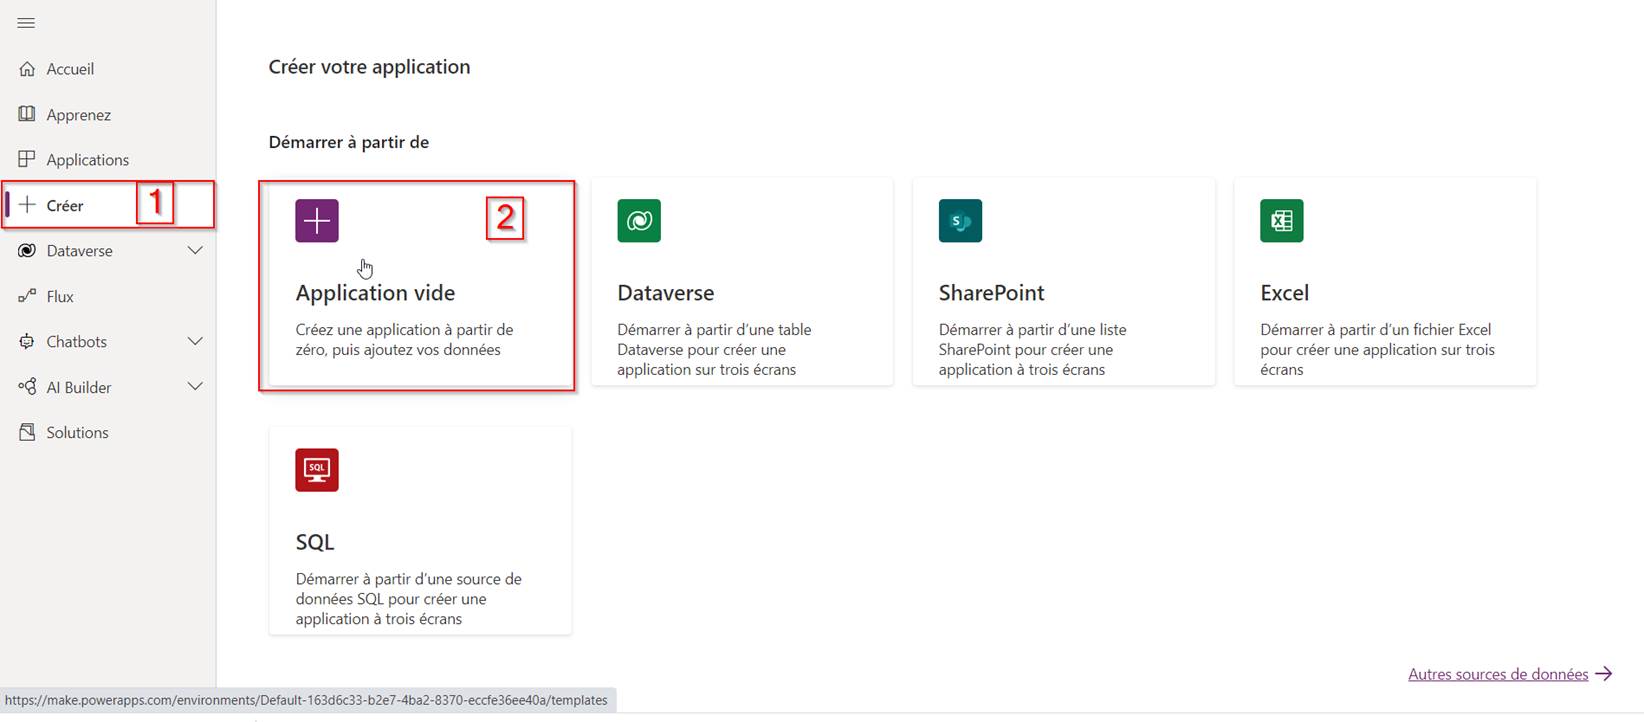
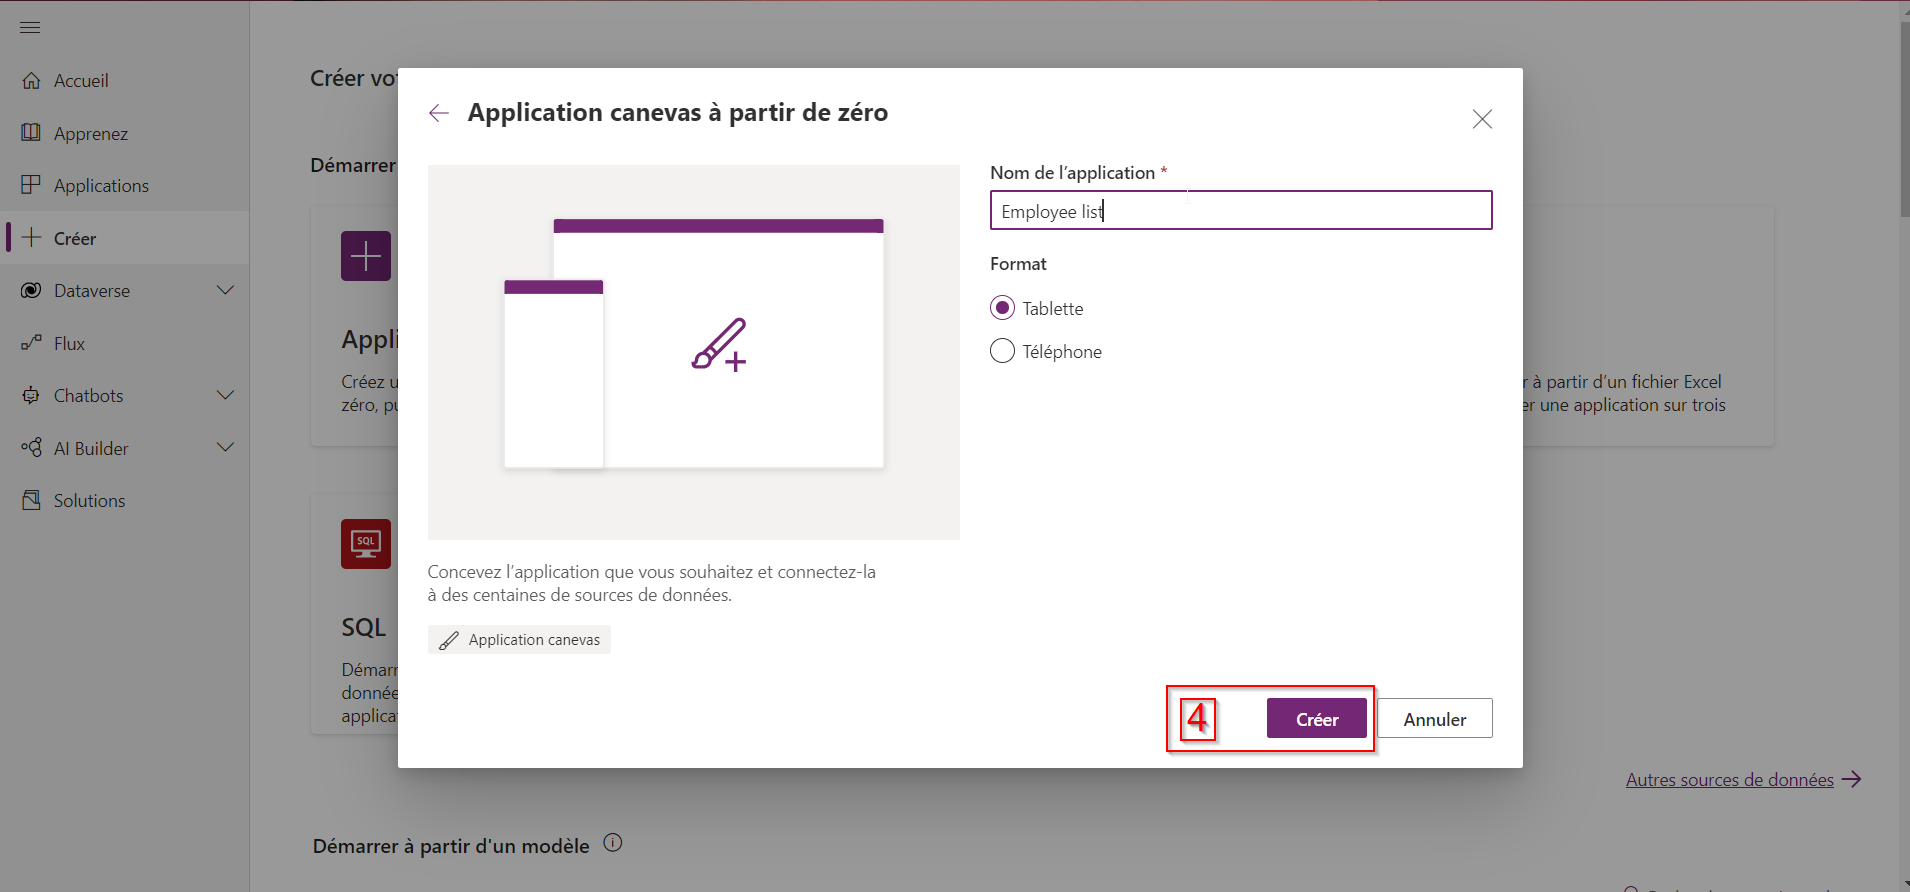
1. Create a PowerApps canvas application

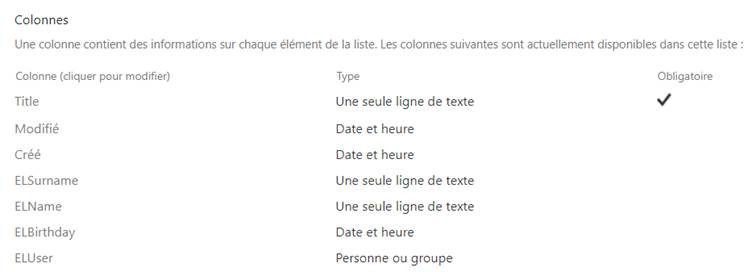
2. Let’s create a SharePoint list to store our data
The structure of our list (EmployeeList) will be as follows
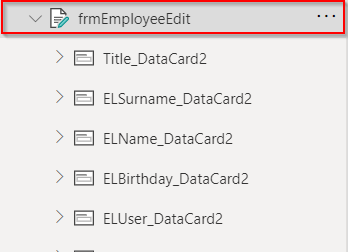
3. Create a form on our PowerApps application based on our SharePoint list
4. Add our SharePoint list to the data sources of our application
![]()
Then add our form and to its data source add our created SharePoint list.
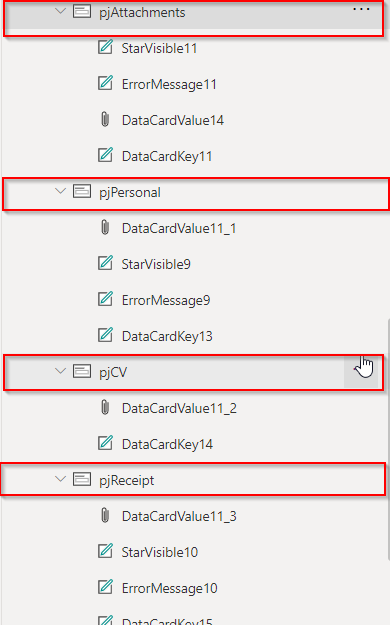
Add four cards containing Attachments fields to our application, one of which is for selection and the other three for display by category.
5. Let’s add to our application the category selection field that we specify in the items property.

6. Next we will define a collection in the OnStart property of the application
This collection must contain our attachments (we will see more in detail 😉 )

By default this collection takes an empty row from our SharePoint list so we are unlikely to have any problems.
On our field that allows us to add attachments, let’s add the following settings
7. On the OnAddFile property Add this code:
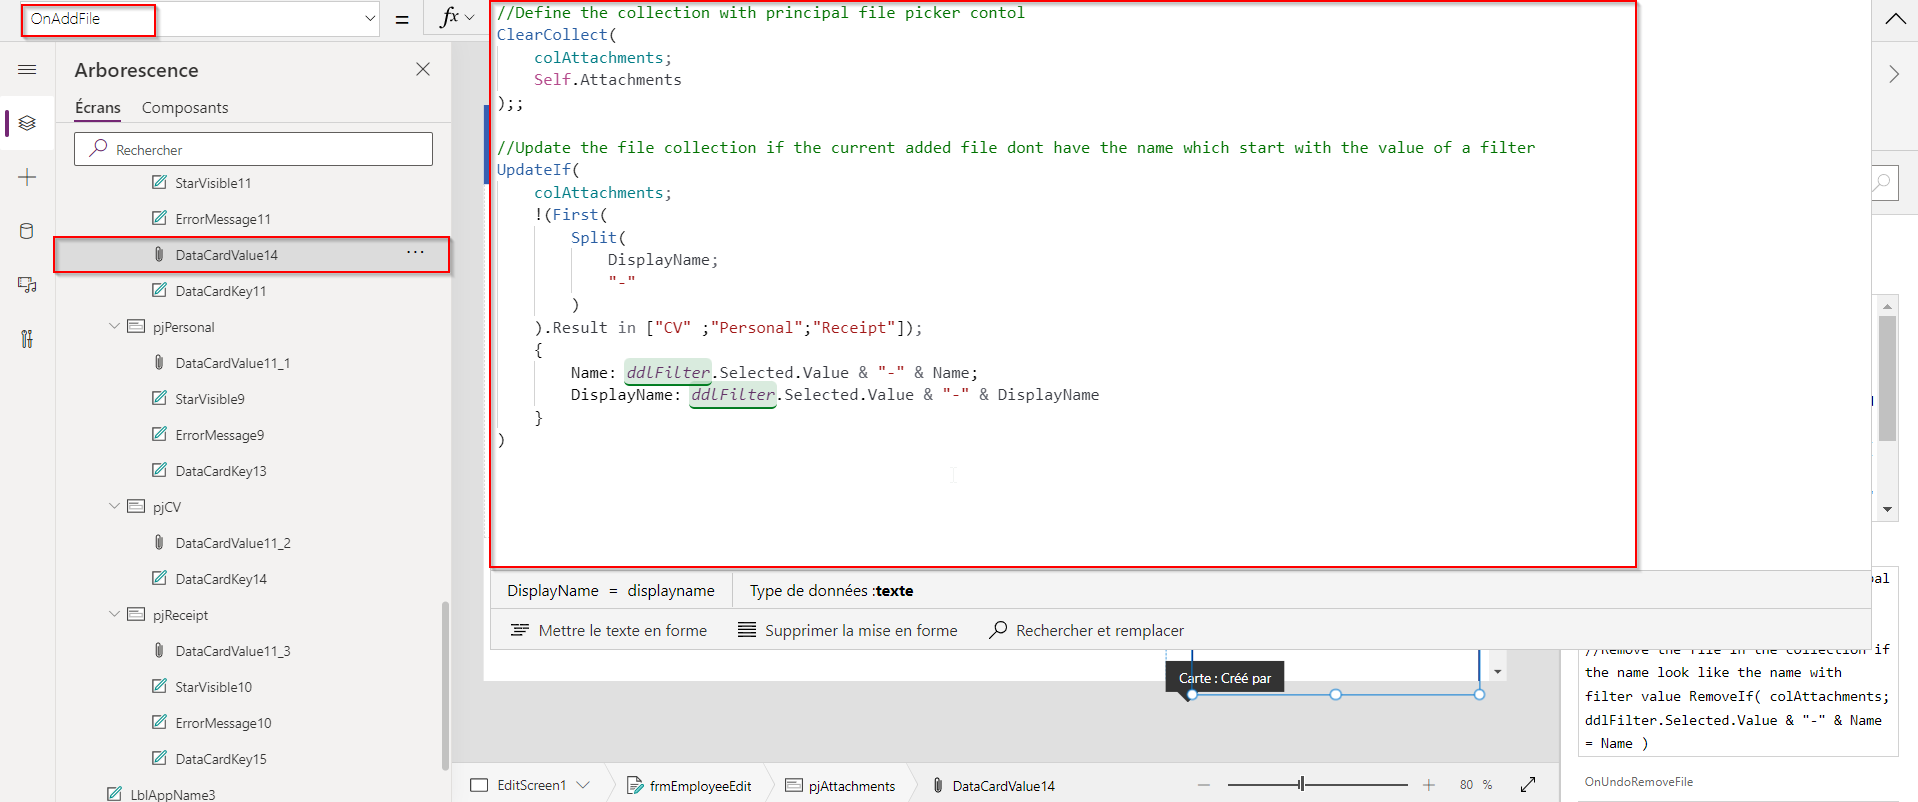
In this code we tell PowerApps to add the file if its display name does not start with one of our filters. If it does, then we add the file to the file collection by prefixing its name and display name with the value of the selected filter.
8. On the OnRemoveFile property, do :
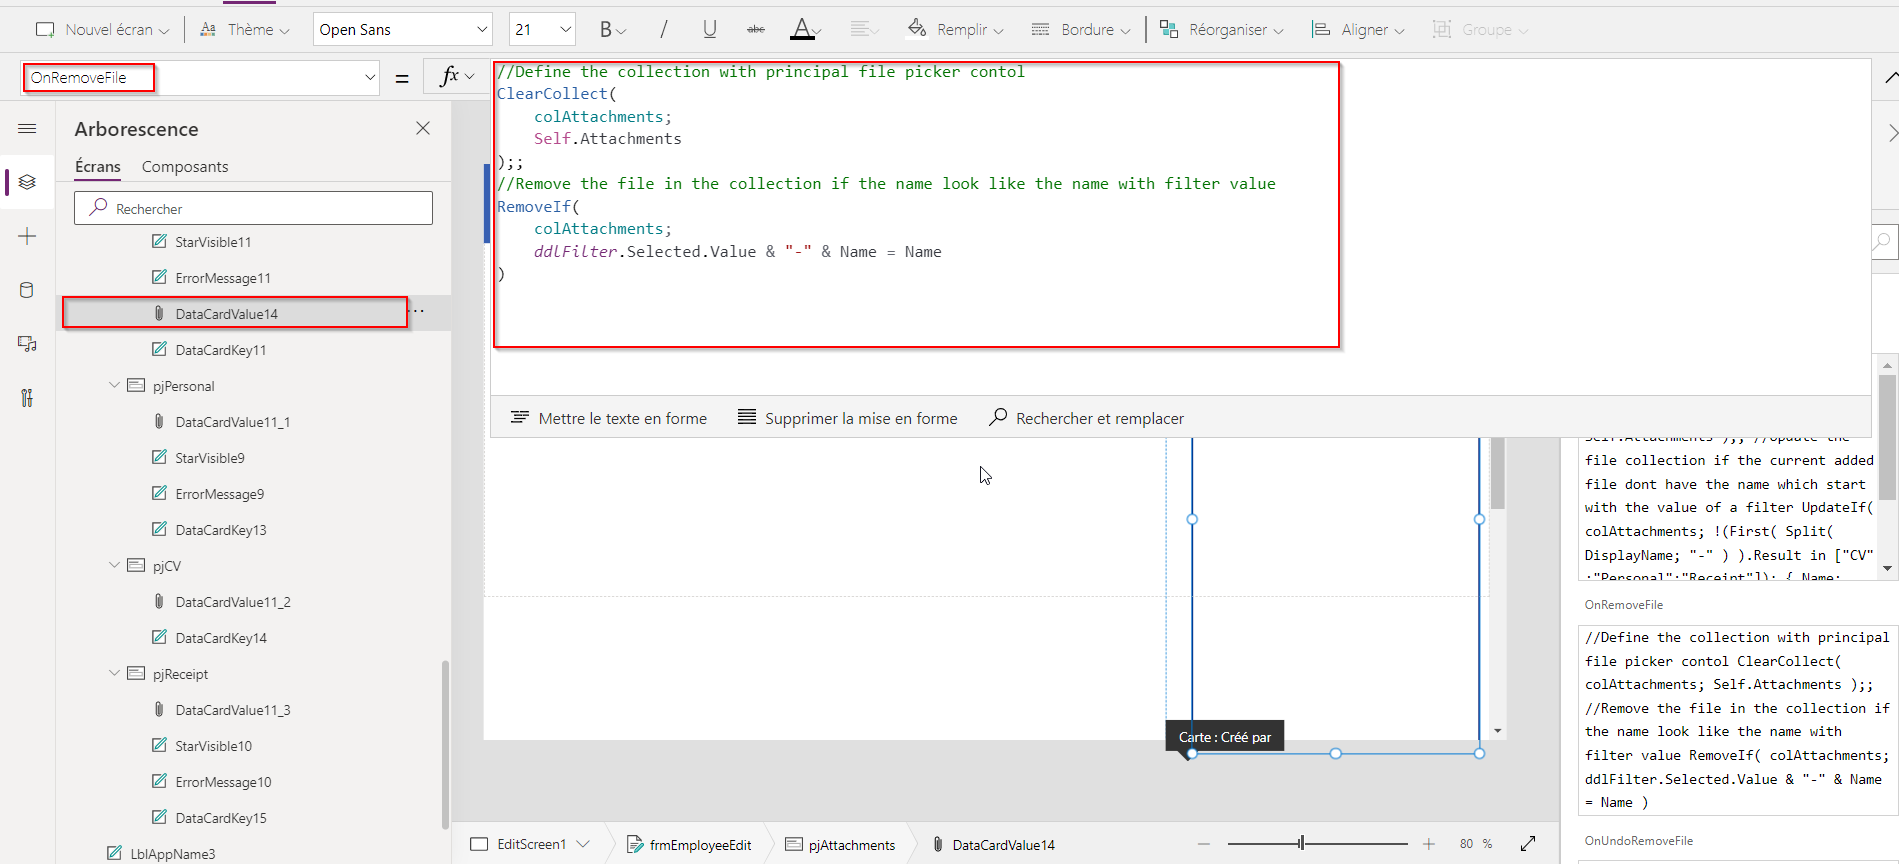
In this code we tell PowerApps to remove the file from our collection if its name matches the prefixed name of the selected filter value.
9. The elements of this field are therefore “the collection of colAttachments files”.
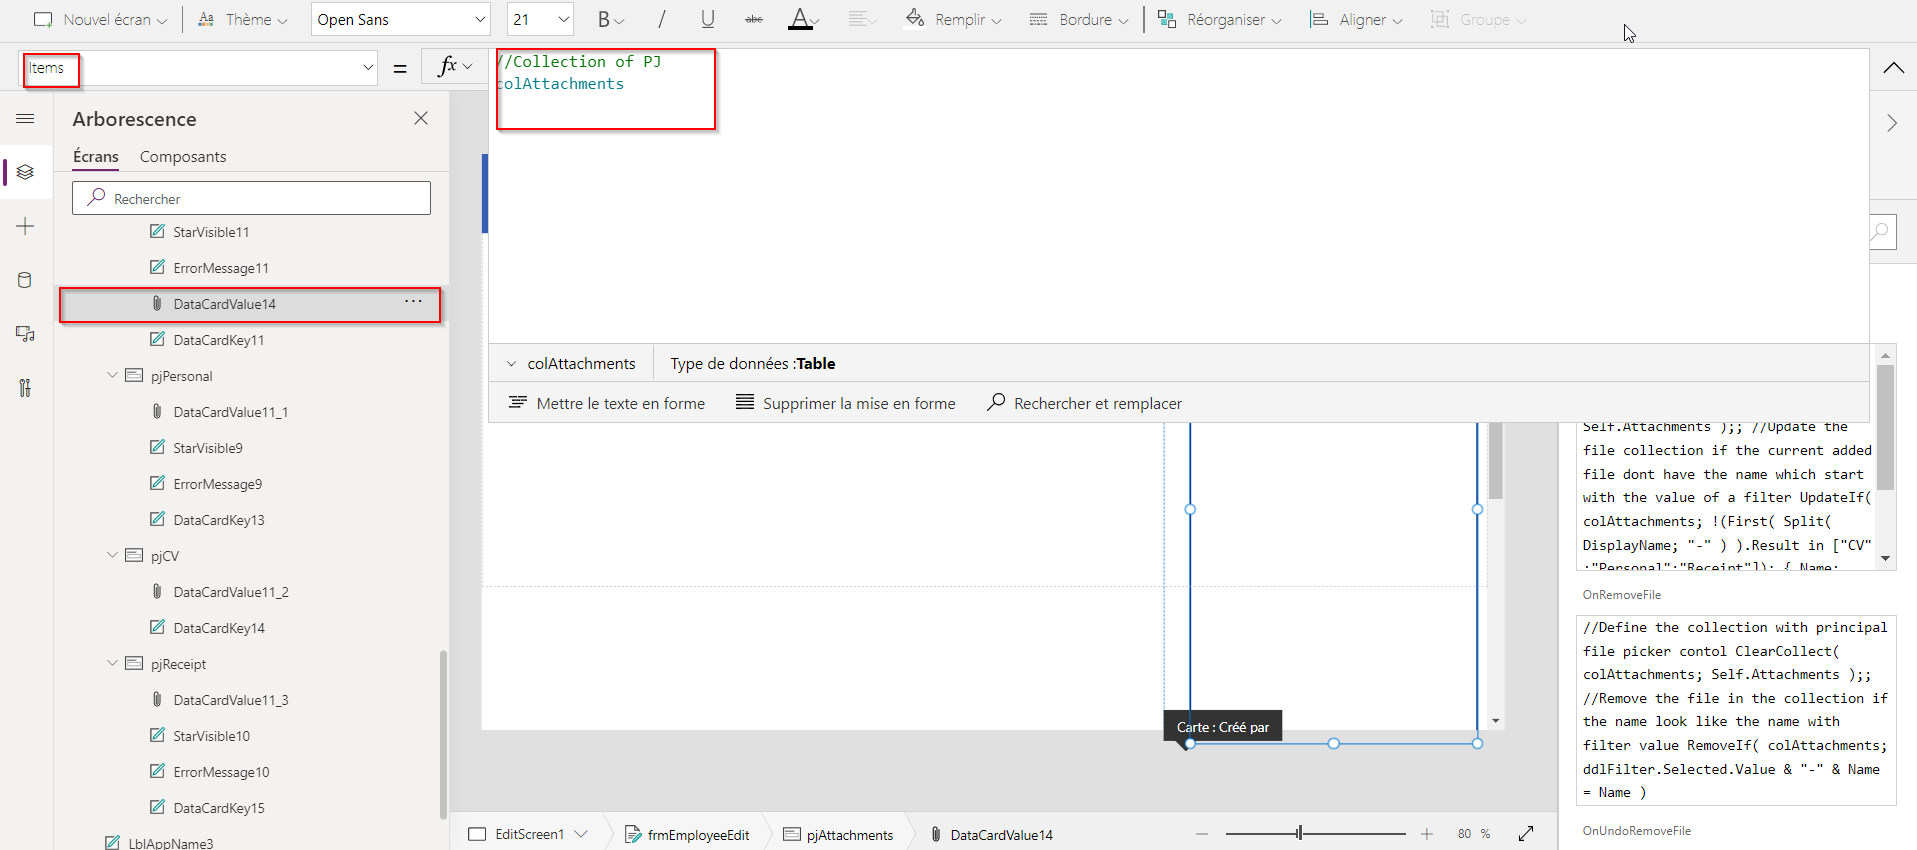
Now that everything is done on this field, so let’s configure which ones should display each file category.
10. The configuration to do is to filter the file collection according to a specific category. Like this:
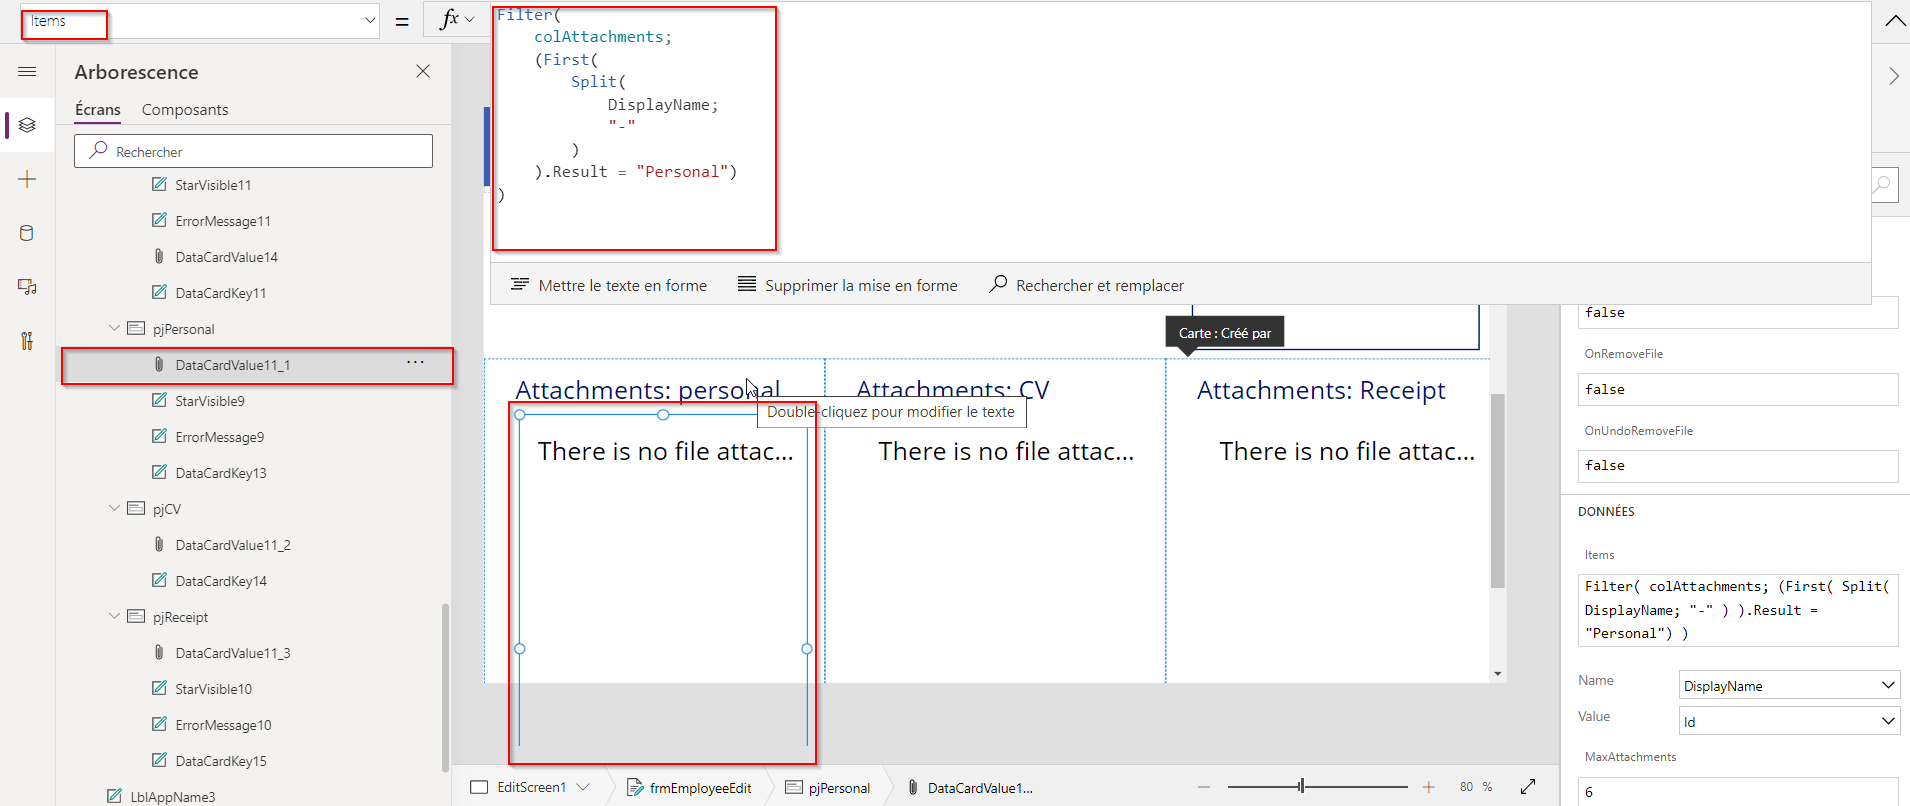
“Personal” is the name of a defined category.
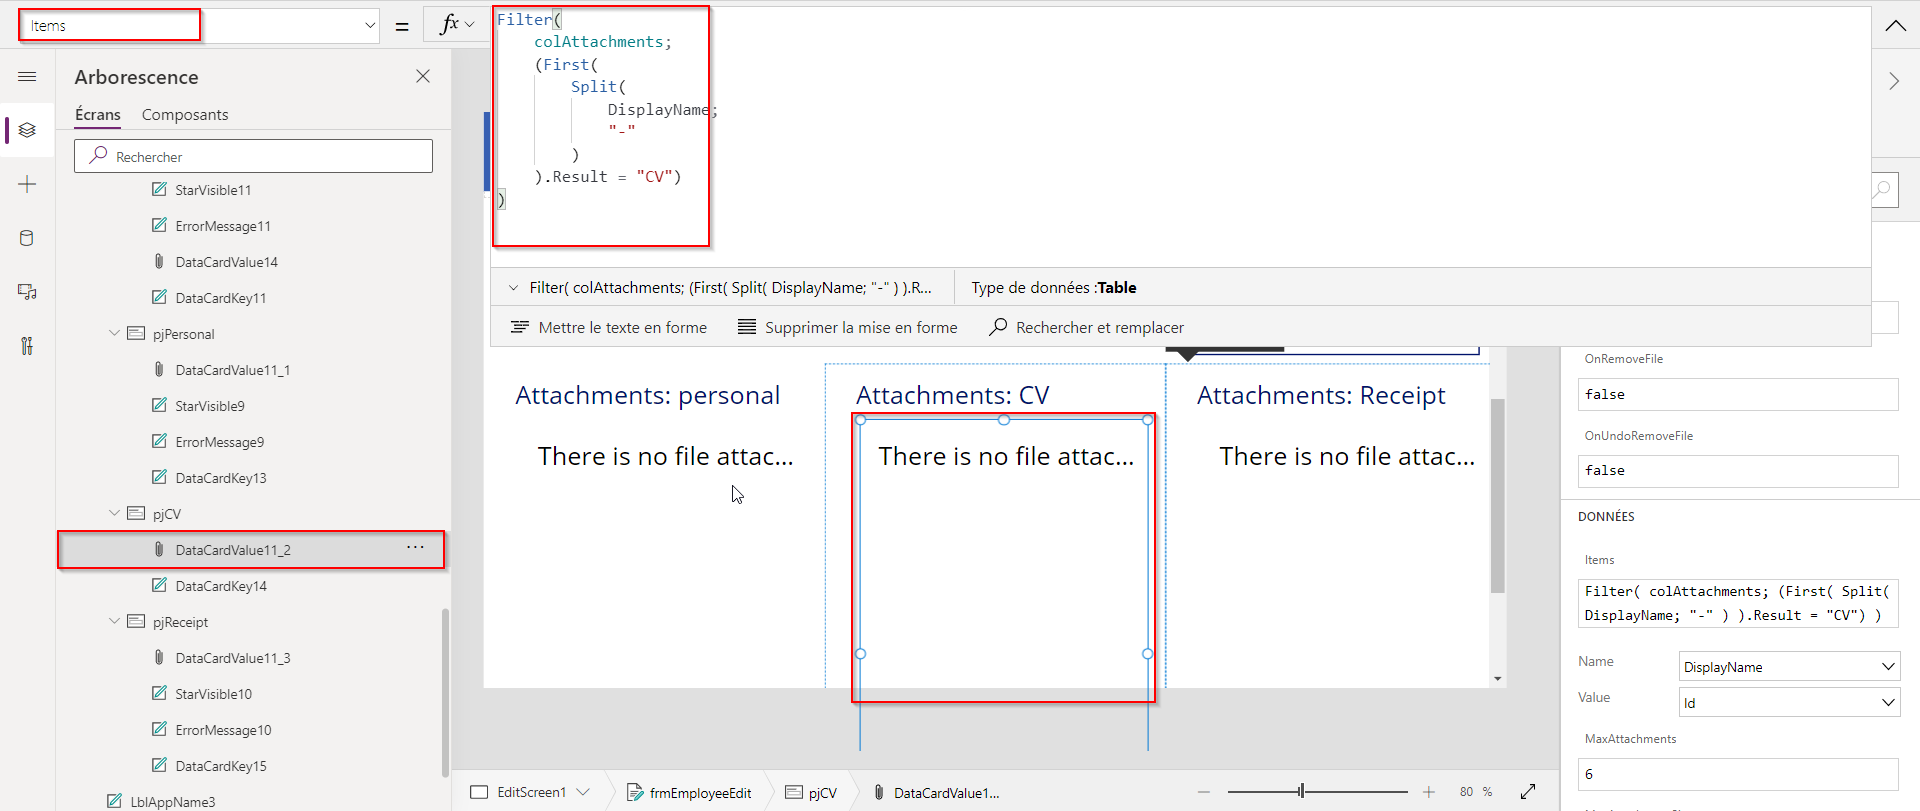
“CV” is the name of a defined category.
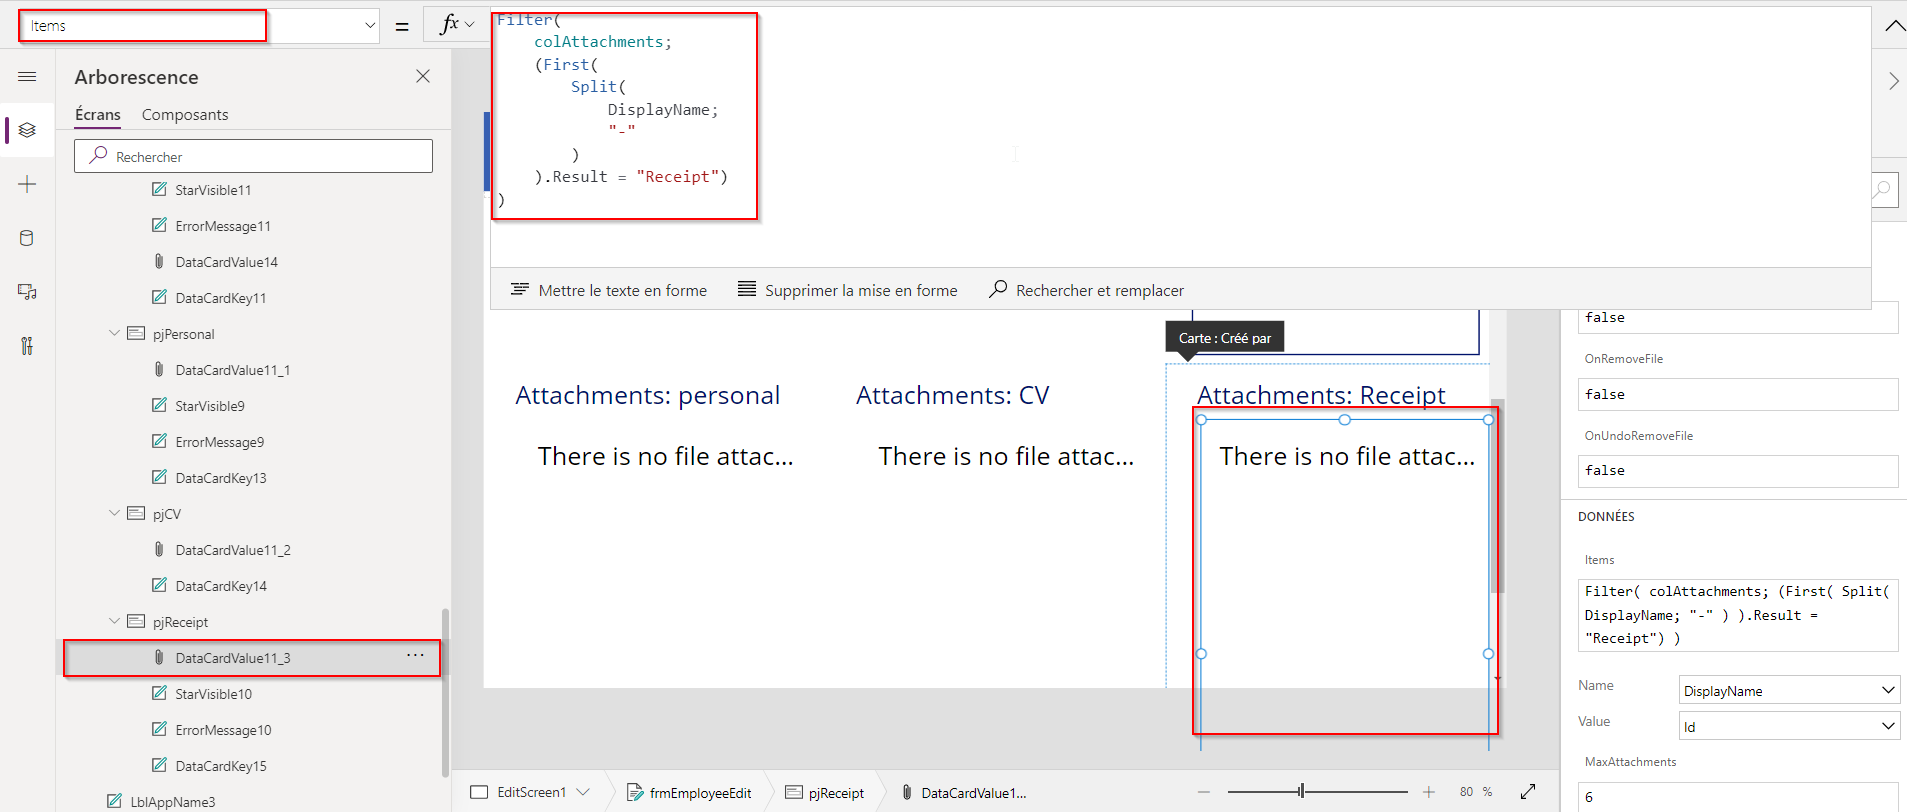
“Receipt” is the name of a defined category.
In addition to the Items property, this field must be made editable to avoid confusion.
The result should be similar to this
Everything is set up, you can just test and enjoy the trick😊
Why use a filter like this?
For what reasons can we use this tip🤔❓
- A SharePoint list has only one column for recording Attachments, however in your business application you need to retrieve files at multiple usage levels which poses the problem that one user can delete the file uploaded by another.
- You want to email some files uploaded from PowerApps but it’s not when you set up the flow that it becomes difficult to implement
- You are just a CURIOUS who wants to learn new tricks😁