
We will see how to replace the content of a content control of a word document from its K2 application. Let us consider that we have two word documents (D1 and D2). Each document have a content control C1 and C2 respectively. Here we will see how to replace the content of C1 by the content of C2 while maintaining the style. Indeed, the integration of a service that would do this is interesting.
I-Downloading and Installing the broker
1.Download
Download the DLL cliquantici. Then unzip the archive.
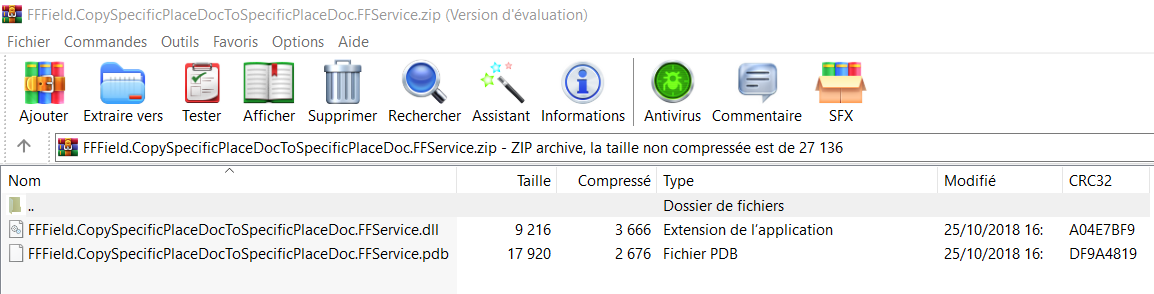
Place the .DLL and .Pub file in the ServiceBroker folder of the K2 nstallation directory (default C:\Program Files (x86)\K2 blackpearl\ServiceBroker).
2.Installation Broker de gestion contrôle de contenu Word
-
- Open the SmartObject Service Tester tool by double-clicking SmartObject Service Tester.exe socated in the K2 bin directory (default: C:\Program Files (x86) \K2 blackpearl\Bin\SmartObject Service Tester.exe).
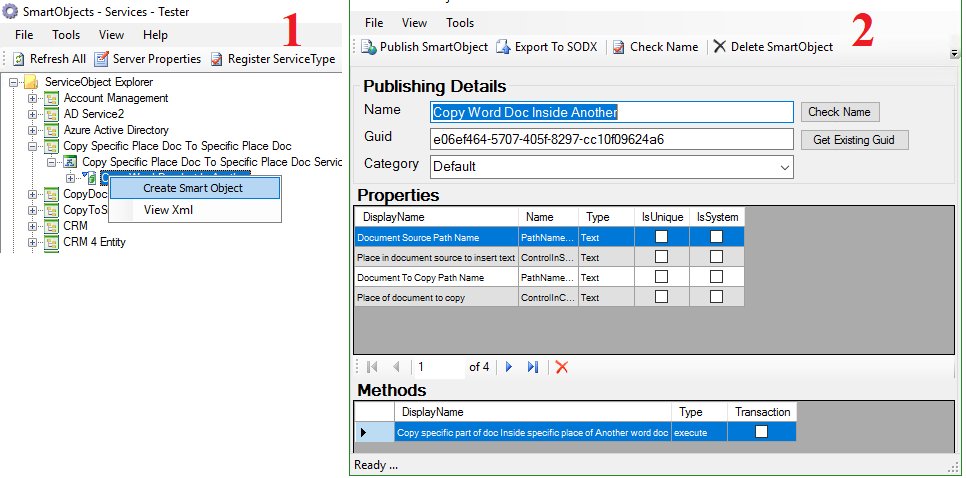
- On the window that opens, click the Register ServiceType. On the window that opens, select the name of the service to install, which is the name of the .dll file, in our case FFField.CopySpecificPlaceDocToSpecificPlaceDoc.FFService.
Once the service has been selected, simply fill in the fields:
-
-
- System Name: you can leave it as is or change it (as long as there are no special characters or spaces).
- Display Name: the name that will appear in the design tools (special characters allowed).
- Description: a description of our service broker, this part is not mandatory, but important to remind us of the role of our service.
- Guid: to leave as is during the original installation.
-
As in the figure below.
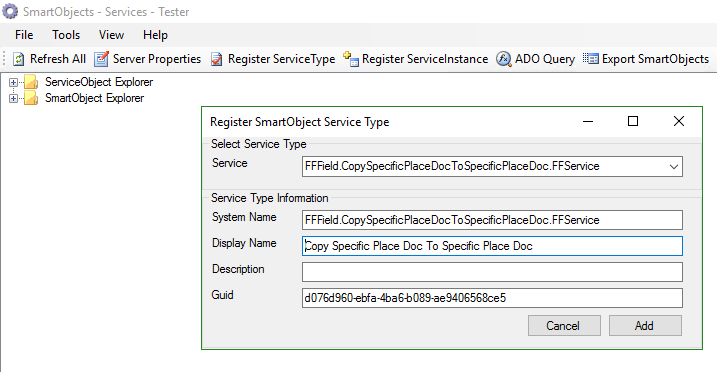
Then click Add. As result, a new service type FFField.CopySpecificPlaceDocToSpecificPlaceDoc.FFService have been created and appears in the ServiceObject Explorer.
Then let’s go toServiceObject Explorer. On this Service Type : right-click> Register ServiceInstance. In the window that opens, specify:
- Service Types : which is the name of the service instance.
- Authentication mode : the broker’s execution account (the account that will therefore interact with the data source). The choice will depend of the manner you want to connect to the data source and the associated permissions. In our case we will choose: Impersonate.
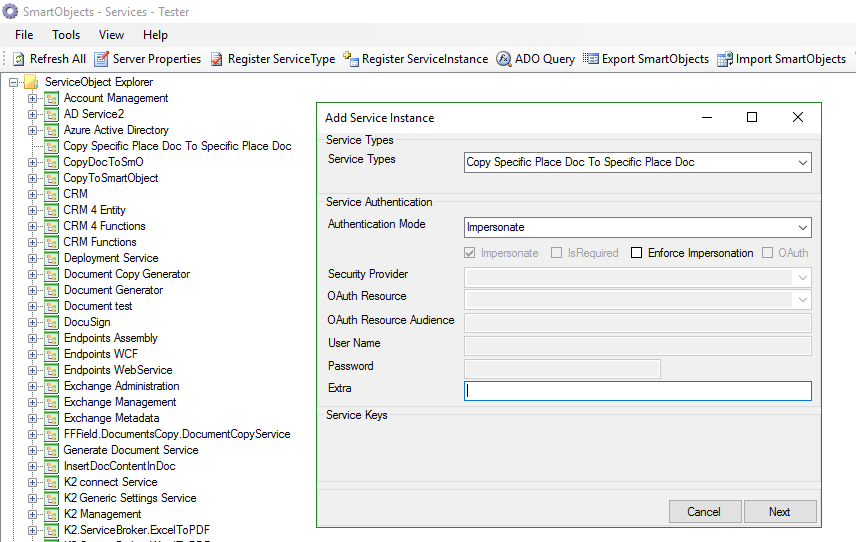
- Then click on Next.
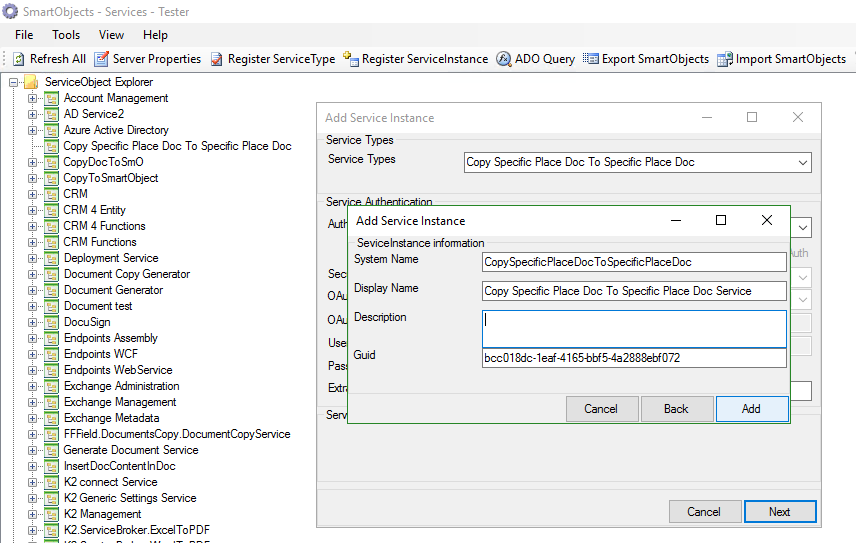
- Fill in the System Name and Display Name in the pop-up that appears (same constraints as before, it is this time the name of the instance of the broker).
- Then press Add.
II- Creating of the SmartObject
Note : When updating a service broker, the DLL file to replace will be blocked by the operating system (and therefore not replaceable). It is then necessary to restart the service K2 blackpearl to do the manipulation.
II- Execution of the broker
The smartObject thus created will be present in the Default subfolder of the SmartObject Explorer folder as shown in the 1 image below.
Follow the steps below to run the broker
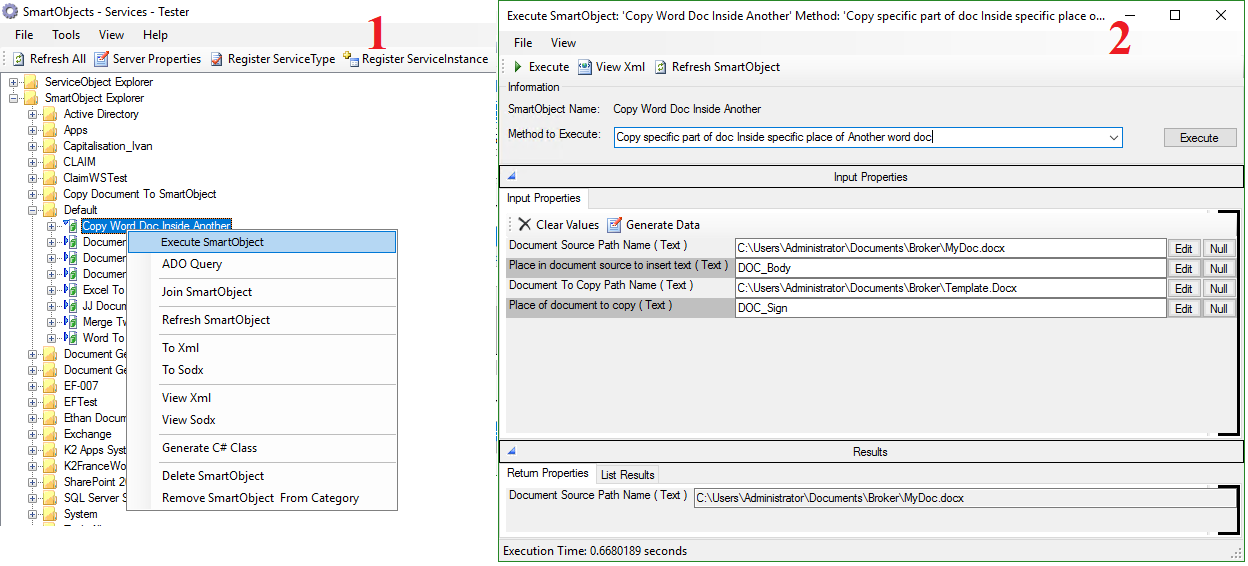
Let’s consider an example on the image 2 above. The result, the content of content control DOC_Body, inside word document Template.docx will be replace by the content of content control DOC_Sign, inside word document MyDoc.docx.